Want an easy way to send files to Dropbox? How about just sending an email to Dropbox with the file attached?
With Email by Zapier—Zapier's built-in email tool—and a Zap, Zapier's automated workflows, you can easily save only the attachments you want so you can quickly find them later. Don't get bogged down in your inbox trying to search for that one PDF with the filename you can't remember. Instead, simply forward an email to a custom email address to automatically tuck away your attachments in Dropbox. Here's how.
New to Zapier? It's workflow automation software that lets you focus on what matters. Combine user interfaces, data tables, and logic with thousands of apps to build and automate anything you can imagine. Sign up for free.
Automatically save email attachments in Dropbox
Zapier lets you create automated workflows called Zaps, which send your information from one app to another. You can create your own Zap from scratch without any coding knowledge, but we also offer quick templates to get you started.
If you'd like to start with a template, click on it below, and you'll be taken to the Zap editor. You'll need to create a Zapier account if you don't already have one. Then, follow the directions below to set up your Zap.
Set up your Email by Zapier trigger
First, set up your trigger—the event that starts your Zap. If you're using the Zap template, this will already be selected for you. Otherwise, search for and select Email by Zapier as the trigger app and New Inbound Email as the trigger event. Click Continue.

Zapier will then make a new email address where you can email your files. Customize the email address by adding in whatever name or characters you'd like. We've used dropbox here so it's easy to remember, but you can change that if you'd like. Zapier will then add a custom, random ending like .6iop5@zapiermail.com to the end of the address.

Click Copy and save the email address to your email address book. Then send a new email to that address from your main email account with an attached file you'd like to save to Dropbox.
Back in Zapier, click Continue, then click Test trigger to test your trigger step.
Zapier should find the email you just forwarded to your Email by Zapier account. Click Continue with selected record.

Set up your Dropbox action
Next, we'll customize the action step, the event a Zap performs after it's triggered. Select Dropbox for your action app and Upload File as your action event. These will be selected for you if you're using the Zap template. Then, connect your Dropbox account, if you haven't already, and click Continue.

Now it's time to customize your action. Select the Space where you'd like to store your attachments. Then choose the right folder.
The File field is where you'll add your attachment from your email. This will be selected for you if you're using the Zap template. If not, click in the File field and select Attachment from the Insert Data dropdown.

Note: Most email apps will only let you send files up to 25MB, and Zapier can only add files up to 100MB to Dropbox.
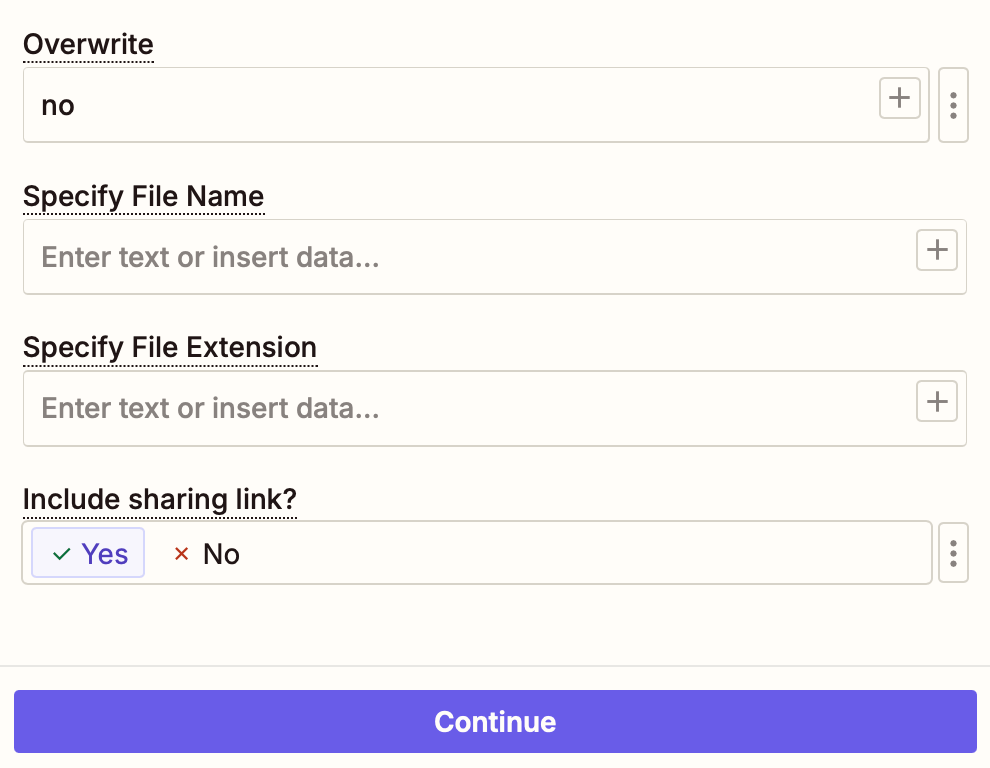
There are also some optional fields you can personalize. In the Overwrite field, you can select Yes to overwrite files with the same name and extension instead of creating a duplicate.
If you want to use your Zap for a specific task, like filing reports every week, you can use the Specify File Name field to automatically change the file name of the attachment. Let's say you've uploaded an attachment called "report.pdf," you could rename it to "friday_report.pdf" using this field. To change the file extension (for example from .PNG to .JPG), you can use the Specify File Extension field.
Lastly, the option to include a sharing link is enabled by default. If you want to keep files completely private, click on No.

Once you're done customizing your action step, click Continue.
Now it's time to test your Zap. Click Test step and Zapier will add the email attachment you selected in your trigger step to your Dropbox account. Here's what ours looked like:

If everything looks right, you're ready to use your Zap. Now every time you get an attachment you want to save in your Dropbox folder, just forward it to your custom Zapier email address for instant filing.
Looking for more ways to connect your email to Dropbox? Check out these Zaps:
More details
Related reading:
This article was originally published in September 2018, written by Matt Guay. It was most recently updated in January 2025 by Khamosh Pathak.


