Throughout my time exploring Discord's business uses for Zapier, one thing has become clear: the most useful features for business require you to dig a little. While Discord is great out of the box for most users, you need to use some of the less obvious features to make it work for your community-building strategy.
Table of contents:
1. Community servers
When you switch your server to a Community server, you'll unlock a host of features, including a lot of the ones I'll talk about in a bit.
You just have to go a little deep into your settings to find the toggle. For a full rundown, read this guide to building a Community Server, but here's the quick how-to.
Click the dropdown arrow next to your server name in the top-left corner, then choose Server Settings.
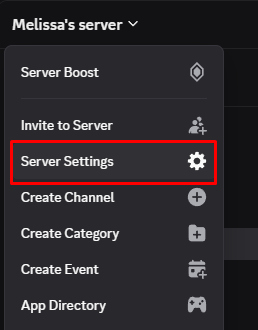
Click Enable Community from the left-side menu.

Click the Get Started button to set up your Community server. Setup involves adding some secure settings to your server and creating new channels for rules and announcements.
After you switch to a Community server, you'll have access to features like:
The ability to apply for Discord's Server Discovery page, where people can find your server directly
Moderation tools that measure community activity and help you protect your community from bad-faith actions
Organizational tools for rules and onboarding to build the community as you want it
2. Community onboarding
Community servers include onboarding features that help you design the perfect welcome experience for your community members.
Onboarding lets new members choose the channels they want to join, which is useful for servers with a lot of channels. Go to Onboarding in your server settings, and click Check it out to get started.
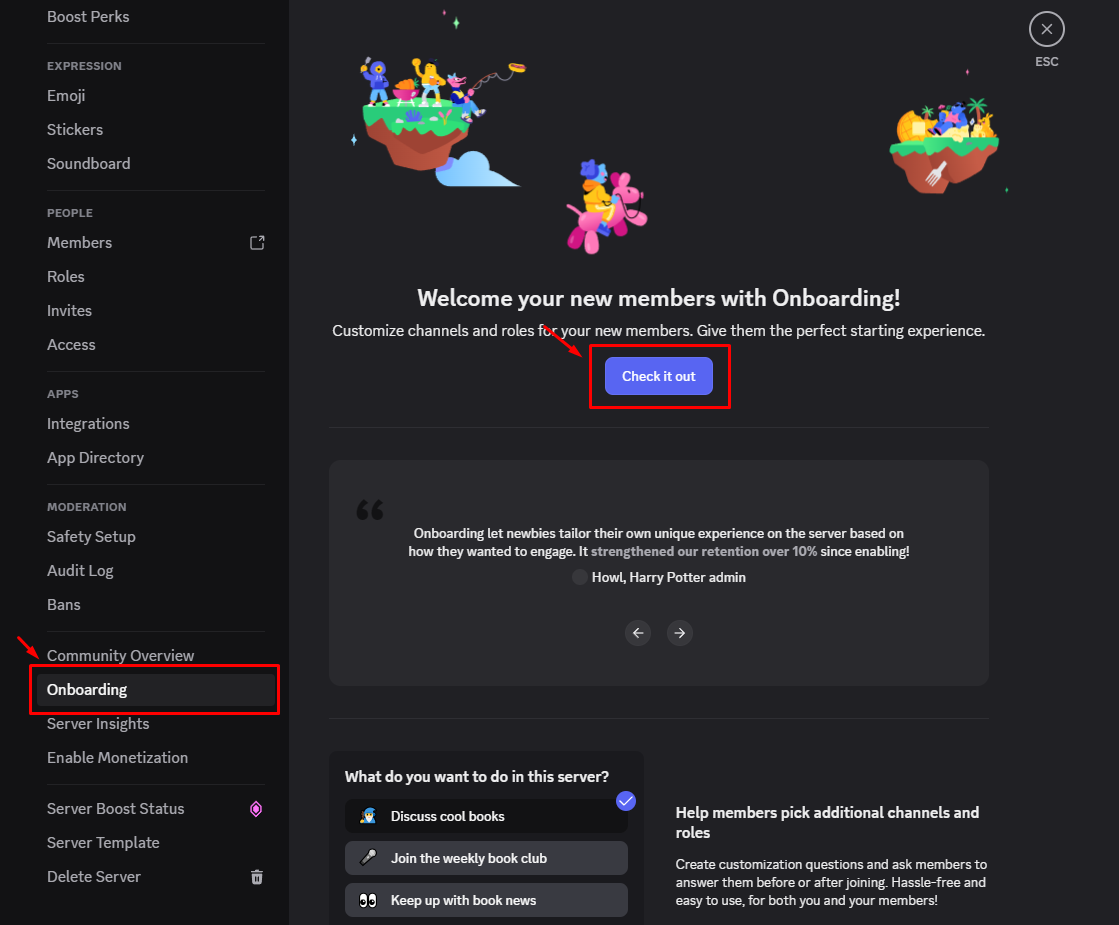
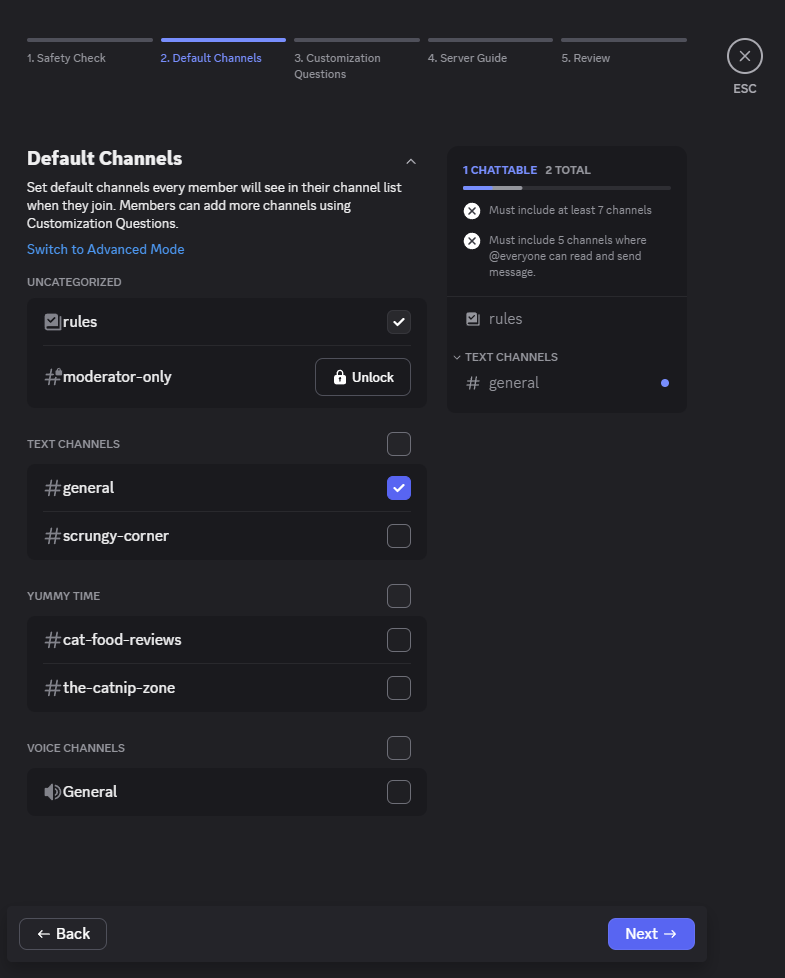
After providing a safety check where you can see what your AutoMod does with new members, you can choose what default channels a new member will see in their list when they join. Check the boxes next to the channels you think all members should have initial access to.
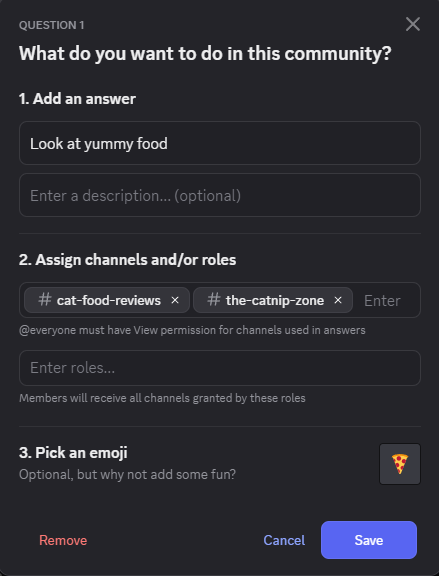
Then, you can create questions that will determine what channels and roles a member might want to have. You can associate multiple channels with different roles and change those associations later on.
Once you're done with your customization questions, you can create a server guide with a welcome message, recommended things to do, and links to resource pages you can make out of channels.
You might also want to enable Discord's built-in rules screening option. Under the People tab in your Server Settings, click Access, then turn on the Server Rules toggle.
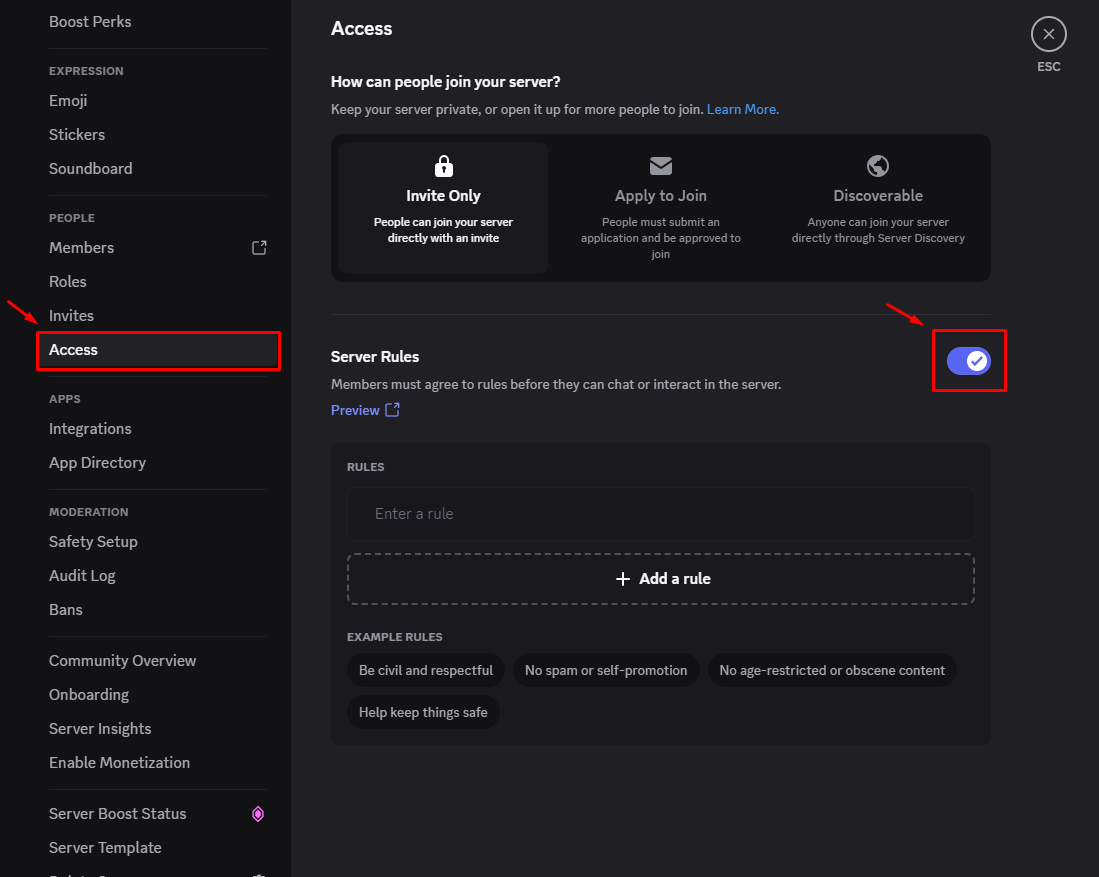
Here, you can add a list of the fundamental rules someone needs to follow to be part of your community. This feature doesn't allow for pictures or links in your rules, but you can keep a more detailed list in your rules channel.
3. Server templates
Not sure what channels to include in your server? The Server Templates option in your Server Settings lets you upload a template with preset channels and categories to change your server to match.
You can find plenty of templates online—here's a good place to start. Many of them are gaming-centric, but you can edit your channels however you want once you apply a template. Here's a peek at one of the community templates I found.
4. Server monetization
Discord's monetization features give you two ways to make money with your community and creations:
Server Subscriptions: Gate some or all of your server channels behind a subscription, and offer exclusive emoji. With this option, you can monetize your community or any content you decide to share in your gated channels.
Server Shops: This feature lets you set up one-time purchases for server roles, emoji, or downloadable files. It accepts a wide range of file formats, so you can make money off of just about any digital product you can think of.
Here's how to get started:
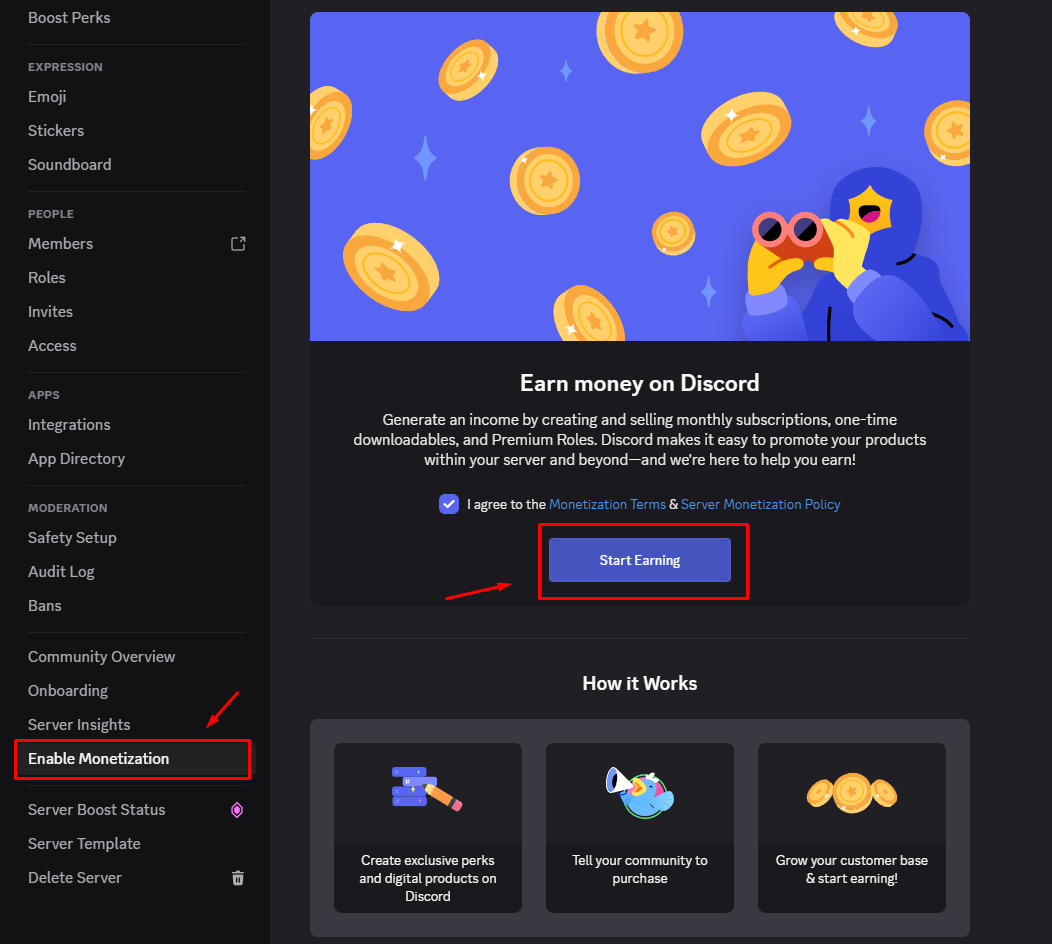
Go to your Community server's Server Settings.
Click Enable Monetization.
Click Start Earning.
You'll need to make sure your server meets Discord's monetization requirements and provide payment account details.
5. Discord bots
The Discord community has tons of original bots for you to automate your server with, or you can also make your own with Zapier.
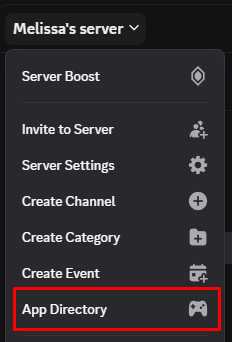
You'll find Discord-specific bots within Discord's App Directory and on independent sites, like top.gg, discord.bots.gg, or discordbotlist.com. If you want to stay within Discord, click the dropdown arrow by your server name and choose App Directory.
The Moderation and Tools tab includes some of the most popular bots.
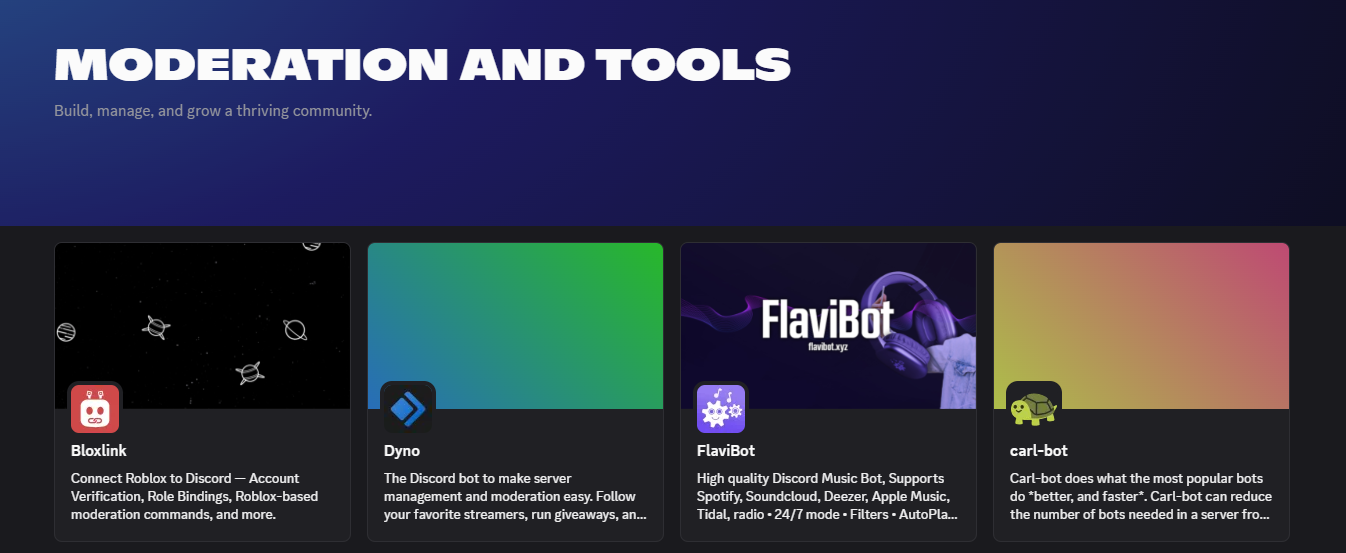
Most of the apps in the directory and third-party sites are for fun, which can make it tricky to find a bot for business purposes—but Zapier can fill this gap for you by connecting Discord to all your favorite business apps. Learn how to build a customized Discord bot, or try some of these Discord automations to make Discord work better with the rest of your tech stack.
More details
Zapier is the most connected AI orchestration platform—integrating with thousands of apps from partners like Google, Salesforce, and Microsoft. Use interfaces, data tables, and logic to build secure, automated, AI-powered systems for your business-critical workflows across your organization's technology stack. Learn more.
6. Forum channels
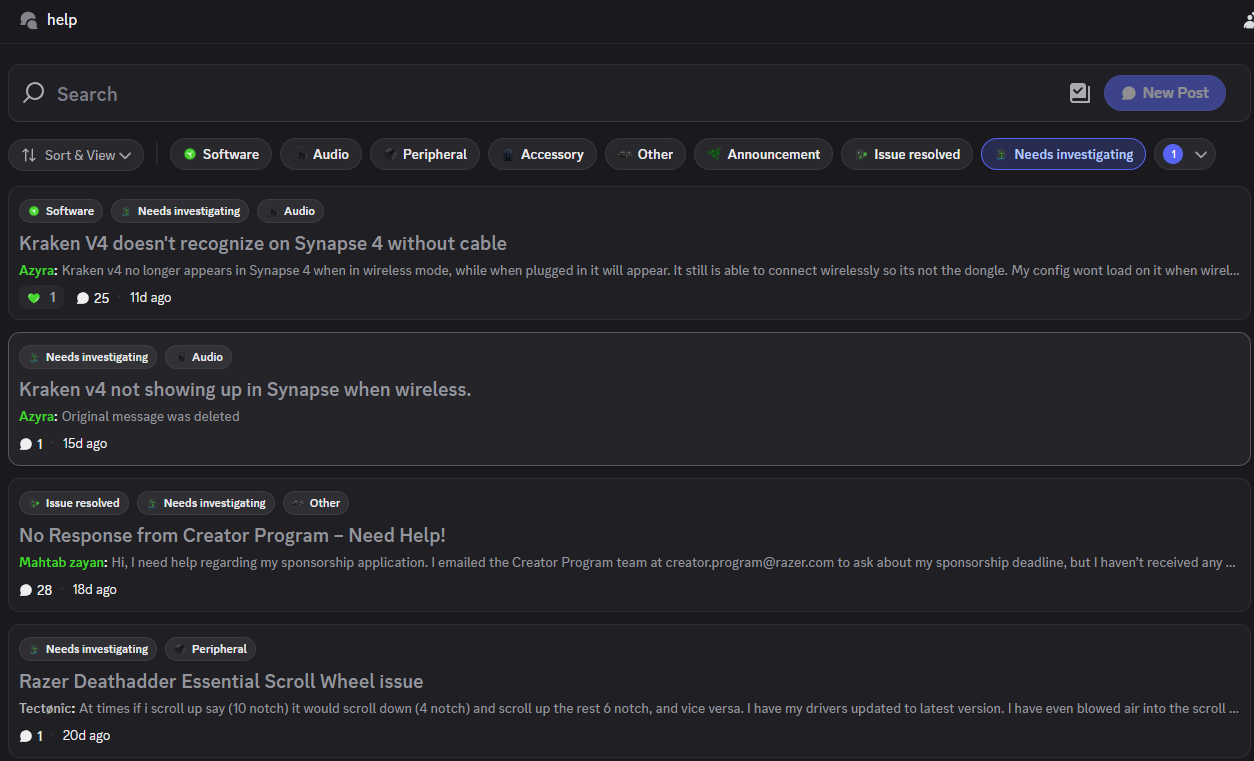
Servers tend to mostly use voice and text channels, but forum channels also exist for topics that need distinct conversations and organized archiving, such as support requests or recommendations. For example, the PC gaming equipment brand Razer uses this channel type for people who need help from other fans.
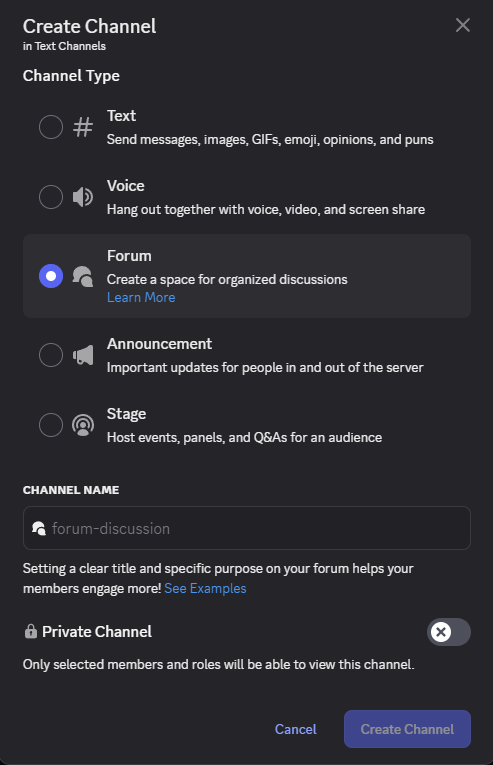
Create a forum channel the same way you would any other channel: click the + next to a category in your channel list or select Create Channel after clicking the dropdown arrow next to your channel name. Then, select Forum in the window that pops up, and give your channel a name.
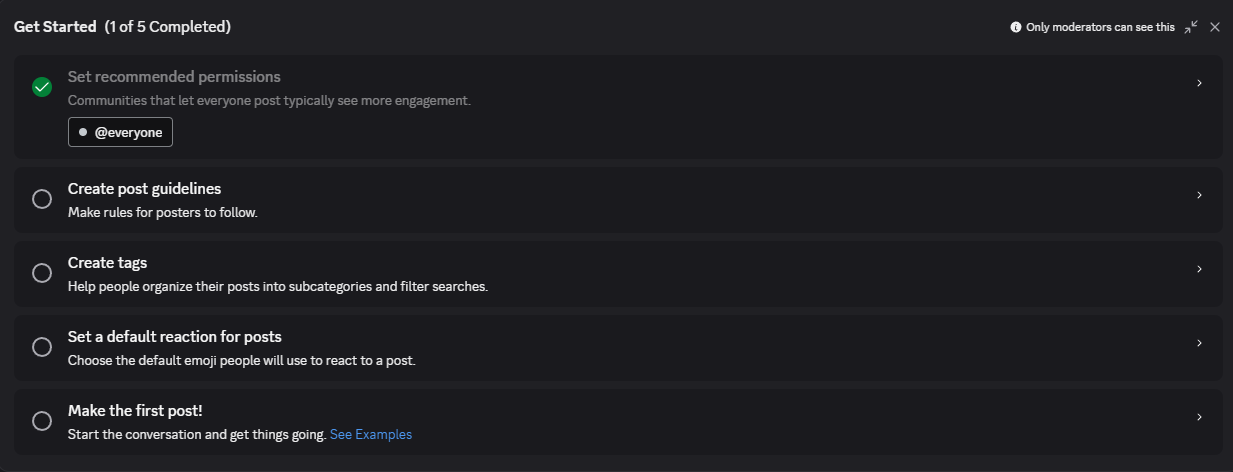
Now you can set up your new forum channel. Navigate to the channel itself, and Discord will guide you through setup in five steps.
7. Threads
Some one-off conversations need a focused place to stay on track but might not fit in your forum channel. That's where you can use threads, temporary threaded conversations that people can join to stay in the loop.
There are two ways to start a thread in any type of server:
Click the + icon to the left of the text box for drafting message, then choose Create Thread.
Hover your mouse over the message you want to start a thread with, then click the dots icon in the set of options that appear in the upper-right corner of the message. From there, click Create Thread.
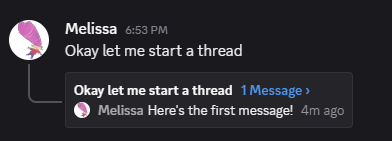
This is what your thread should look like from the outside and inside:

After you make a thread, you'll find a link to it nested under the channel where you posted it in the channel list.
To determine how long the thread stays there, click the three dots at the top of the thread, and choose Edit Thread. Then set the time frame in the Hide After Inactivity option. You can also click Close Thread in that same menu to close the thread early.
Outside of the thread, the rest of the conversation in the channel will keep moving.
8. Stage channels
Stage channels are a special type of voice channel that allow a speaker to talk while all other participants listen. This channel type is ideal for events like AMAs and webinars, and it's exclusive to Community servers.
To get started, choose the Stage channel type when you go to create a channel. In its waiting mode, you can start a stage event right away or schedule a stage event for later. If you start immediately, you can choose a topic and begin talking. Scheduling a stage event takes you to the event creation interface, which I'll get into in a bit.
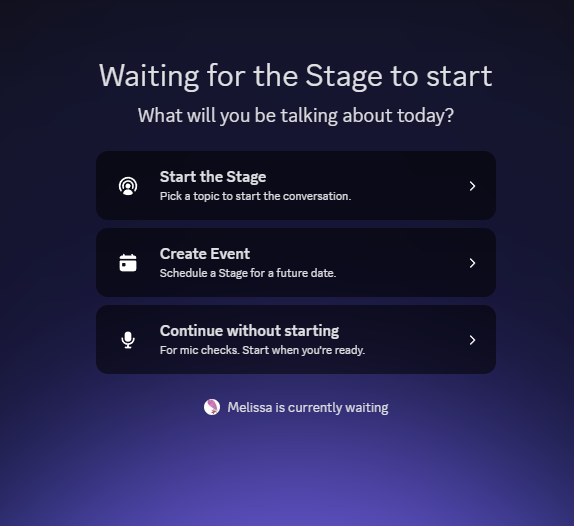
Once the stage begins, stage moderators can speak and elect other speakers during the call, whether or not they're moderators. You can also temporarily make someone a speaker for audience questions.
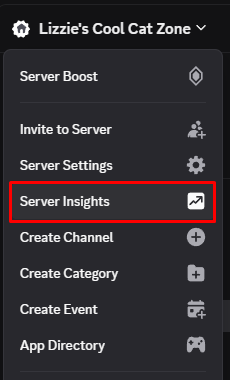
9. Server insights
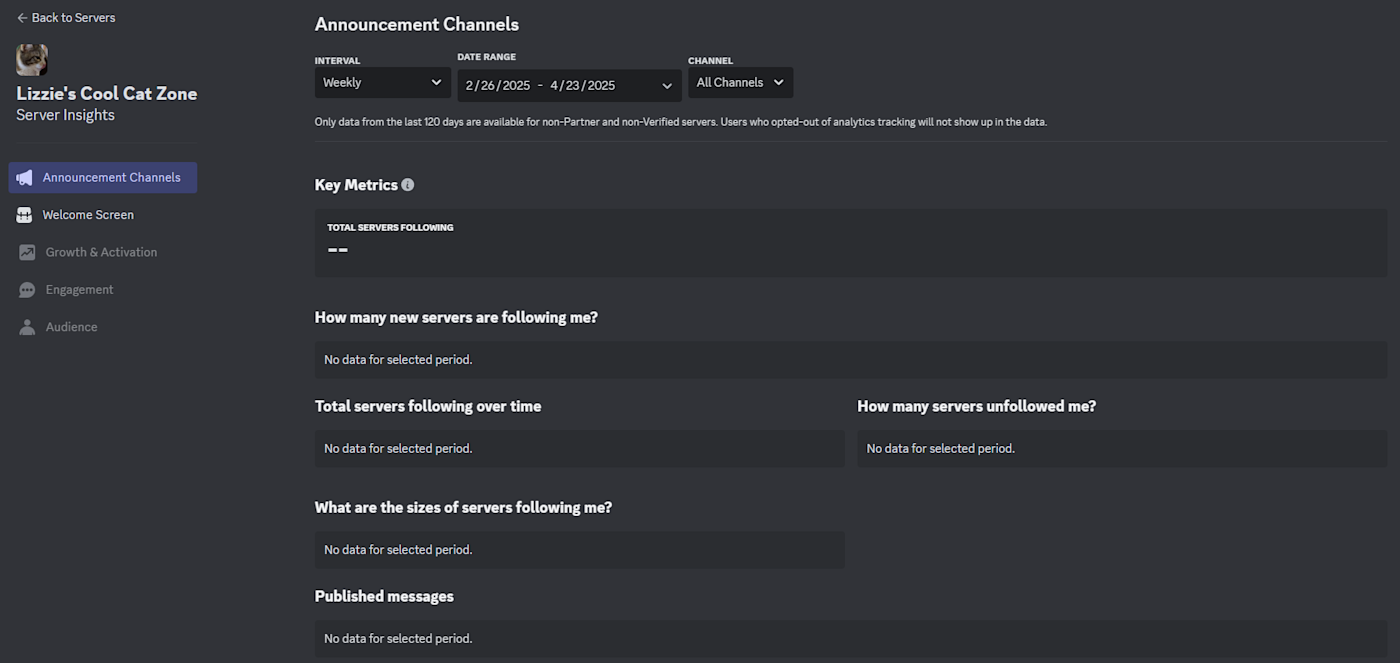
Community Servers also come with the option to turn on Server Insights: analytics on your community's activity to help you improve engagement. After making your server a Community server, click the dropdown arrow next to your server name, and choose Server Insights.
Click Go to Server Insights, and you'll be taken to an external website with your analytics. You need to have more than 500 server members to see metrics related to member activity, but for any server, you can see metrics related to your announcement channels and welcome screen.
10. Reaction roles
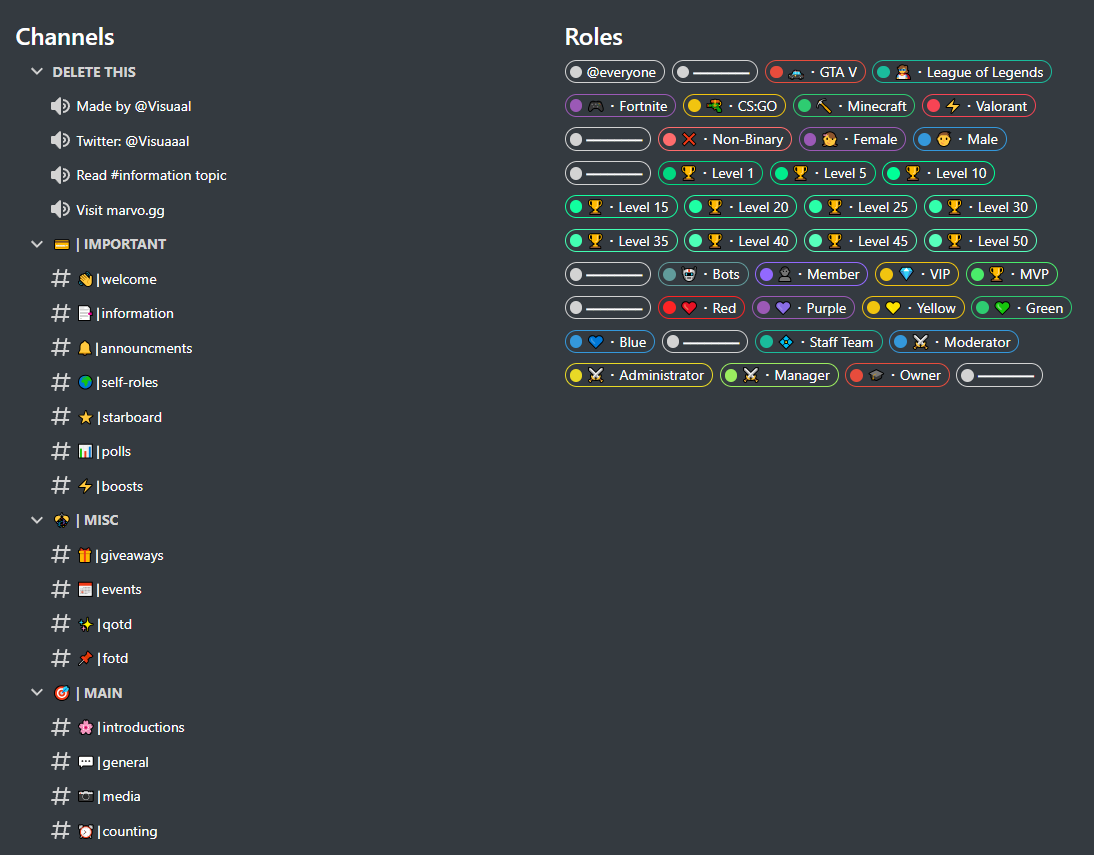
Roles are an big part of running a community on Discord: they let you control member privileges and permissions and "verify" newcomers to your server, and they allow members to self-identify with specific interests.
Admins and moderators can assign roles manually through Discord's server settings, or you can use a bot to enable reaction roles—that way, you can automatically assign roles when members react to a message with a specific emoji.
You can build your own reaction role bot—and customize it however you want—using Zapier. Learn more about how to automate roles with Discord, or get started with this template.
11. Events
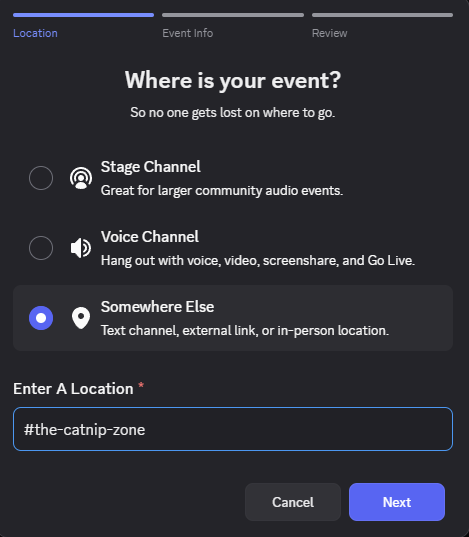
When you host events, it'll present a persistent reminder in your Discord server. Click the arrow next to your server name, then click Create Event.

Choose a stage channel, a voice channel, or somewhere else for the event to take place. The event doesn't even have to happen on your server, so you can use this feature to organize any event for your organization.
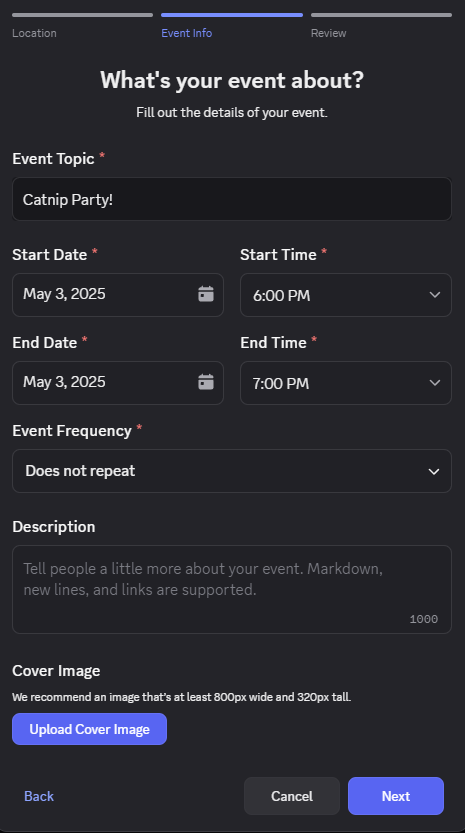
Then add some details to your event, such as the event topic, a time, a description, a frequency, and an image.
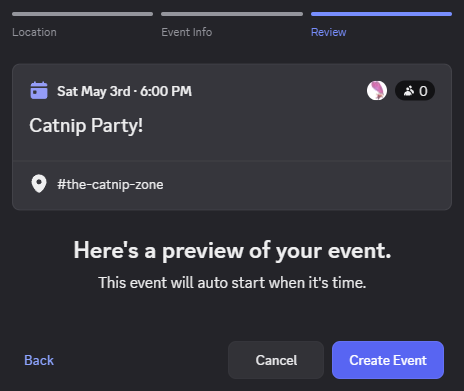
With all of that settled, you can preview what your event will look like before you officially create it.
After you create your event, it'll add to the number of events noted at the top of your channel list. Members can click that # Event(s) option to look at all of your server events and get more details on each.
More ways to make Discord work for you
Building a community on Discord is simple at its core, but the real magic happens once you start poking around the settings. Give some of these Discord features a try, and stick with the ones that keep your community engaged.
Related reading: