Running successful marketing and advertising campaigns requires more than just launching ads and hoping for the best—it takes consistent performance tracking, budget optimization, and strategic adjustments. But manually aggregating campaign data and generating reports can slow your team down and pull focus from creative work and audience targeting.
With Zapier Tables and Agents, you can automate the entire process. Automatically store LinkedIn and Facebook campaign data in a Zapier Table, then set up an AI agent to analyze performance, extract key insights, and send a weekly report via Gmail with optimization tips—no manual work required. Watch the demo below to see how it works, or keep reading for step-by-step instructions.
Note: This demo uses an older version of Zapier Agents. We've since updated the experience, so the visuals and UX may look a little different. For more information, check out our step-by-step feature guide.
To build your AI marketing team, you need:
A Zapier Tables paid plan to leverage formulas and advanced reporting.
A Zapier Workflows paid plan for premium apps and multi-step Zaps.
A Zapier Agents free plan to set up weekly reporting and recommendations.
Skip ahead
Building with ChatGPT, Claude, Cursor, or other AI platforms? Try Zapier MCP! It's the fastest way to connect your AI to nearly 8,000 apps and 30,000+ actions without complex integrations.
Step 1: Set up your reporting table
Let's start off with creating a reporting table from one of our pre-made templates. Click Try it on the template below, then click Use template in the new window.
Consolidate LinkedIn and Facebook Ads and run weekly reports using an AI Agent.
This will create your table within Zapier Tables. Your table will include several premade fields, which you can now customize.

Those fields will be directly related to your campaign information like individual campaign names, ad platforms, and other hard data such as impressions, clicks, number of leads, ad spend, and so on.
Set up your table's connected Zaps
This template will already include a couple of Zaps—our word for automated workflows. These Zaps will make sure that all your Facebook and LinkedIn ads data flows automatically into your table on a set schedule (so you don't have to upload this information manually).
The way it works is simple: The Zap triggers once a week and creates a report in LinkedIn Ads and Facebook. It will then send each new report to your Zapier Table.
You can view all the Zaps that are connected to your table by clicking the Linked Assets icon in the left-hand panel of your screen.

If you click on a Zap (it'll be in draft mode), it will open in the Zap editor where you can finish setting it up. Just follow the instructions to connect your accounts and test each step in your Zap. Remember to switch on your Zap once it's ready.

Make sure to follow the same instructions for your second Zap. Once you've switched on all your connected Zaps, your ad data will be pulled in for a comprehensive view of performance over time.
Note: If you already have existing campaign records that you'd like to add to your empty table, you can import existing records from a file or transfer existing data through a Zap.
Edit your table's fields
Once you're finished with your table's Zaps, head back to your table.
To edit existing fields in your table, click any field and select Edit field from the list of options.

In the right-hand panel, you can give that field a new name, define the field type, adjust the alignment, and add an icon to personalize your table. Just remember to click Save once you're done.

Tip: You can also rearrange the order of your fields by clicking on the field name and dragging-and-dropping it into a new place.
Add unique fields to your table
With Zapier Tables, you can add unique fields to your table to help you generate information or calculate data from your table's records. For example, you can add:
Formulas that perform calculations, add up values, and extract key insights from existing records in your table.
AI fields that let you automatically populate records, reference record data, and generate different responses.
Linked records that let you create a relationship between two different tables by using the content of one table to fill or update the records of another table.
In this case, let's start by adding a formula field to your table. We want to add a formula field to calculate the cost per click (CPC) of your ads, as LinkedIn won't automatically provide this information in the report it sends to your table.
To set up a formula field, click the + Add field icon in the top-right corner of your table and select Formula from the dropdown menu.

Give your field a descriptive name (like cost per click), then click into the Formula field. Click the Insert Fields tab to search for and select the fields you want to calculate from your table. In this instance, all you need to do is pull in the Ad spend field and the Clicks field from your table and divide it with a forward slash (/), like so:

It will then generate a preview of your cost per click data. Click Create to add this field to your table. From now on, it will generate the cost per click for every new record.
Step 2: Build your agent
Now for the fun part: setting up your AI agent to interact with your table.
To set up your agent from scratch, follow these steps:
Head over to agents.zapier.com and sign up.
If you haven't created an agent before, click Create agent. If you already have agents, hover over the + icon on the left sidebar and click + New agent.
Next, click Skip this step to open your agent's configuration page, as we'll fill out the instructions properly in a later step.

In the left-hand panel you can set up or change the agent's trigger, personalize the instructions, and configure any apps that perform actions. In the right-hand panel you can test your agent's performance once you've set it up.

Set up your agent
Now let's set up your agent. Your agent will include the following:
Trigger: An event that prompts your agent to take action. You can trigger events on a schedule or when something happens in another app.
Instructions: What you want the agent to do.
Tools: Apps, functions (like web search), and data sources the agent will use to perform tasks.
To set up your agent, follow these steps:
First up, let's set the trigger for your agent. Click the Add trigger step and select Schedule by Zapier from the list of options. Then define your preferred frequency, like daily, weekly, or monthly. As an example, this agent is set to trigger every Monday at 10 a.m., but you can adjust as you see fit.

Next, let's add the first part of your instructions. In the Instructions field, type out exactly what it is you want your agent to do with the data from your table. For example, you might type out:
Analyze the newest Facebook and LinkedIn Ads results against the entire performance of ads to compare focusing on Cost per click and Cost per conversion.

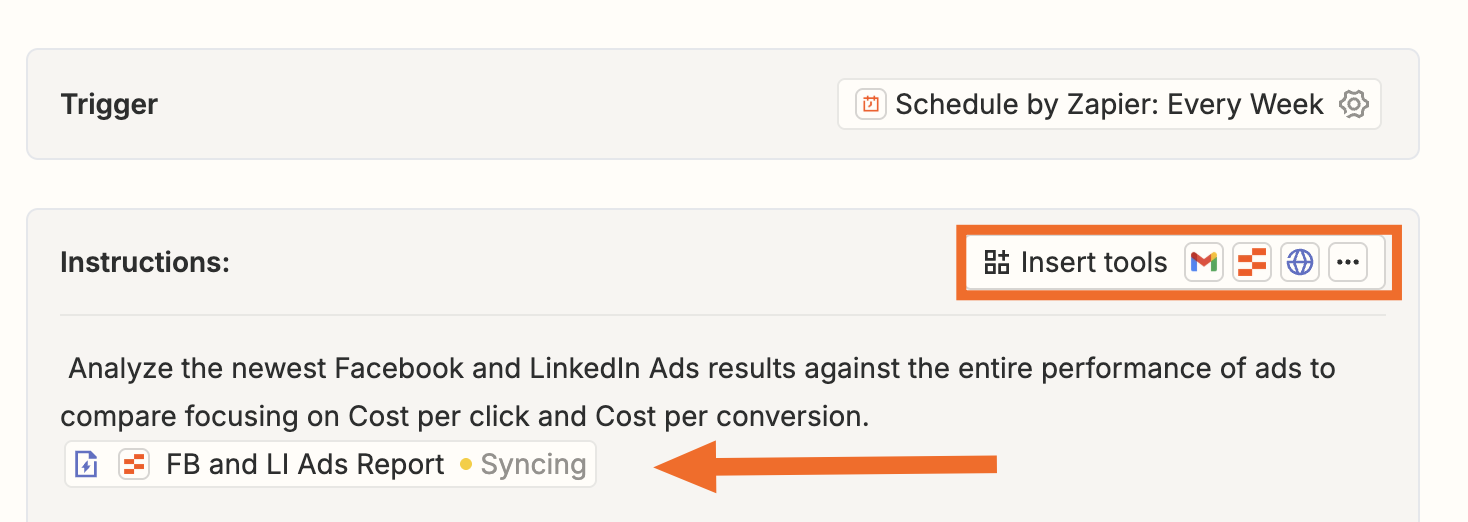
Next, let's connect your agent to the table we created earlier so your agent can pull insights from the data. In the Instructions field beneath your text, click the Insert tools tab at the top of the Instructions panel.

Next, click the + Add tool icon, then select Zapier Tables from the list of options. Click Data integration and then you can search for and select the right table from the list of generated options. Click Add data source and wait for it to sync. It will appear in your Instructions field, like so:
Next up, tell your agent what you want it to do next. In the Instructions field, add additional guidelines, like:
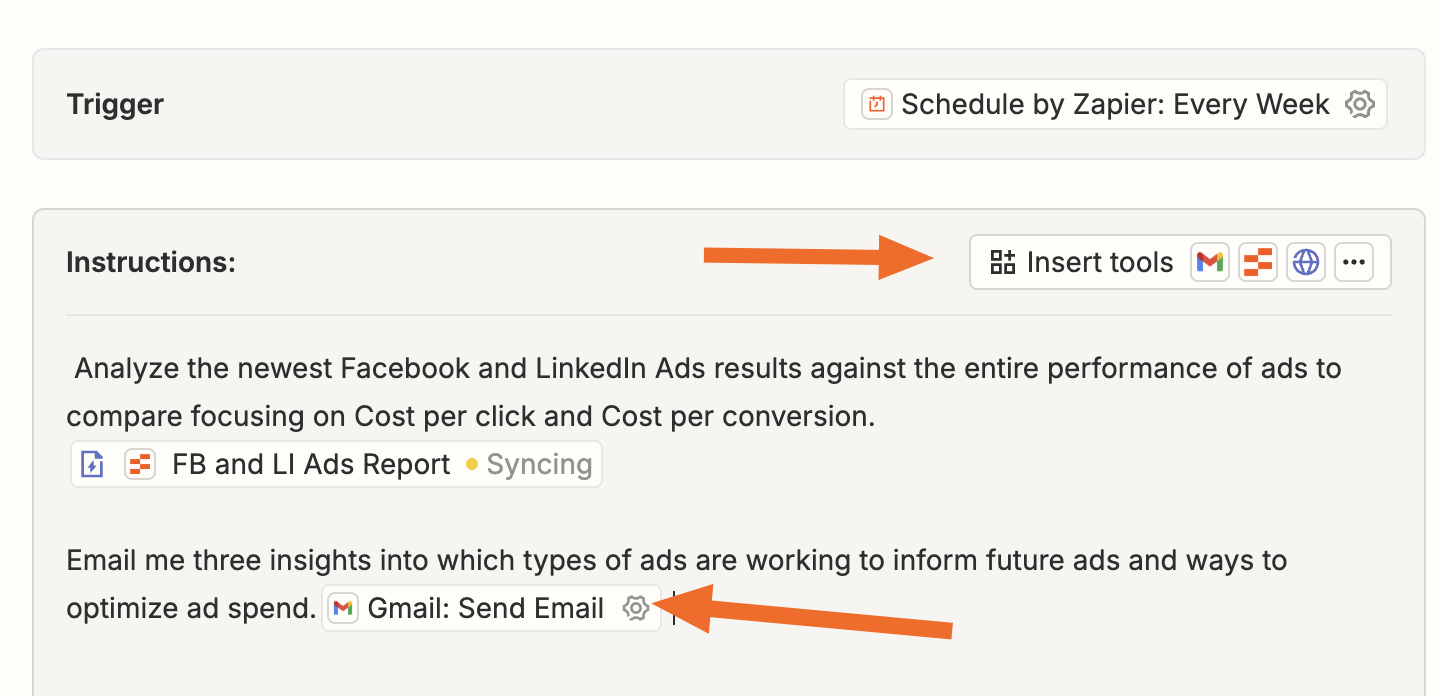
Email me three insights into which types of ads are working to inform future ads and ways to optimize ad spend.

Finally, it's time to add an action—what you want the agent to do with those insights. In our example, we'll be sending them as an email.
To add an action, click the Insert tools tab, then click +Add tool. You can then search for and select Gmail if that's what you use to send emails. Follow the instructions to finish connecting your Gmail account and setting up the relevant fields (like who receives the email with those insights).
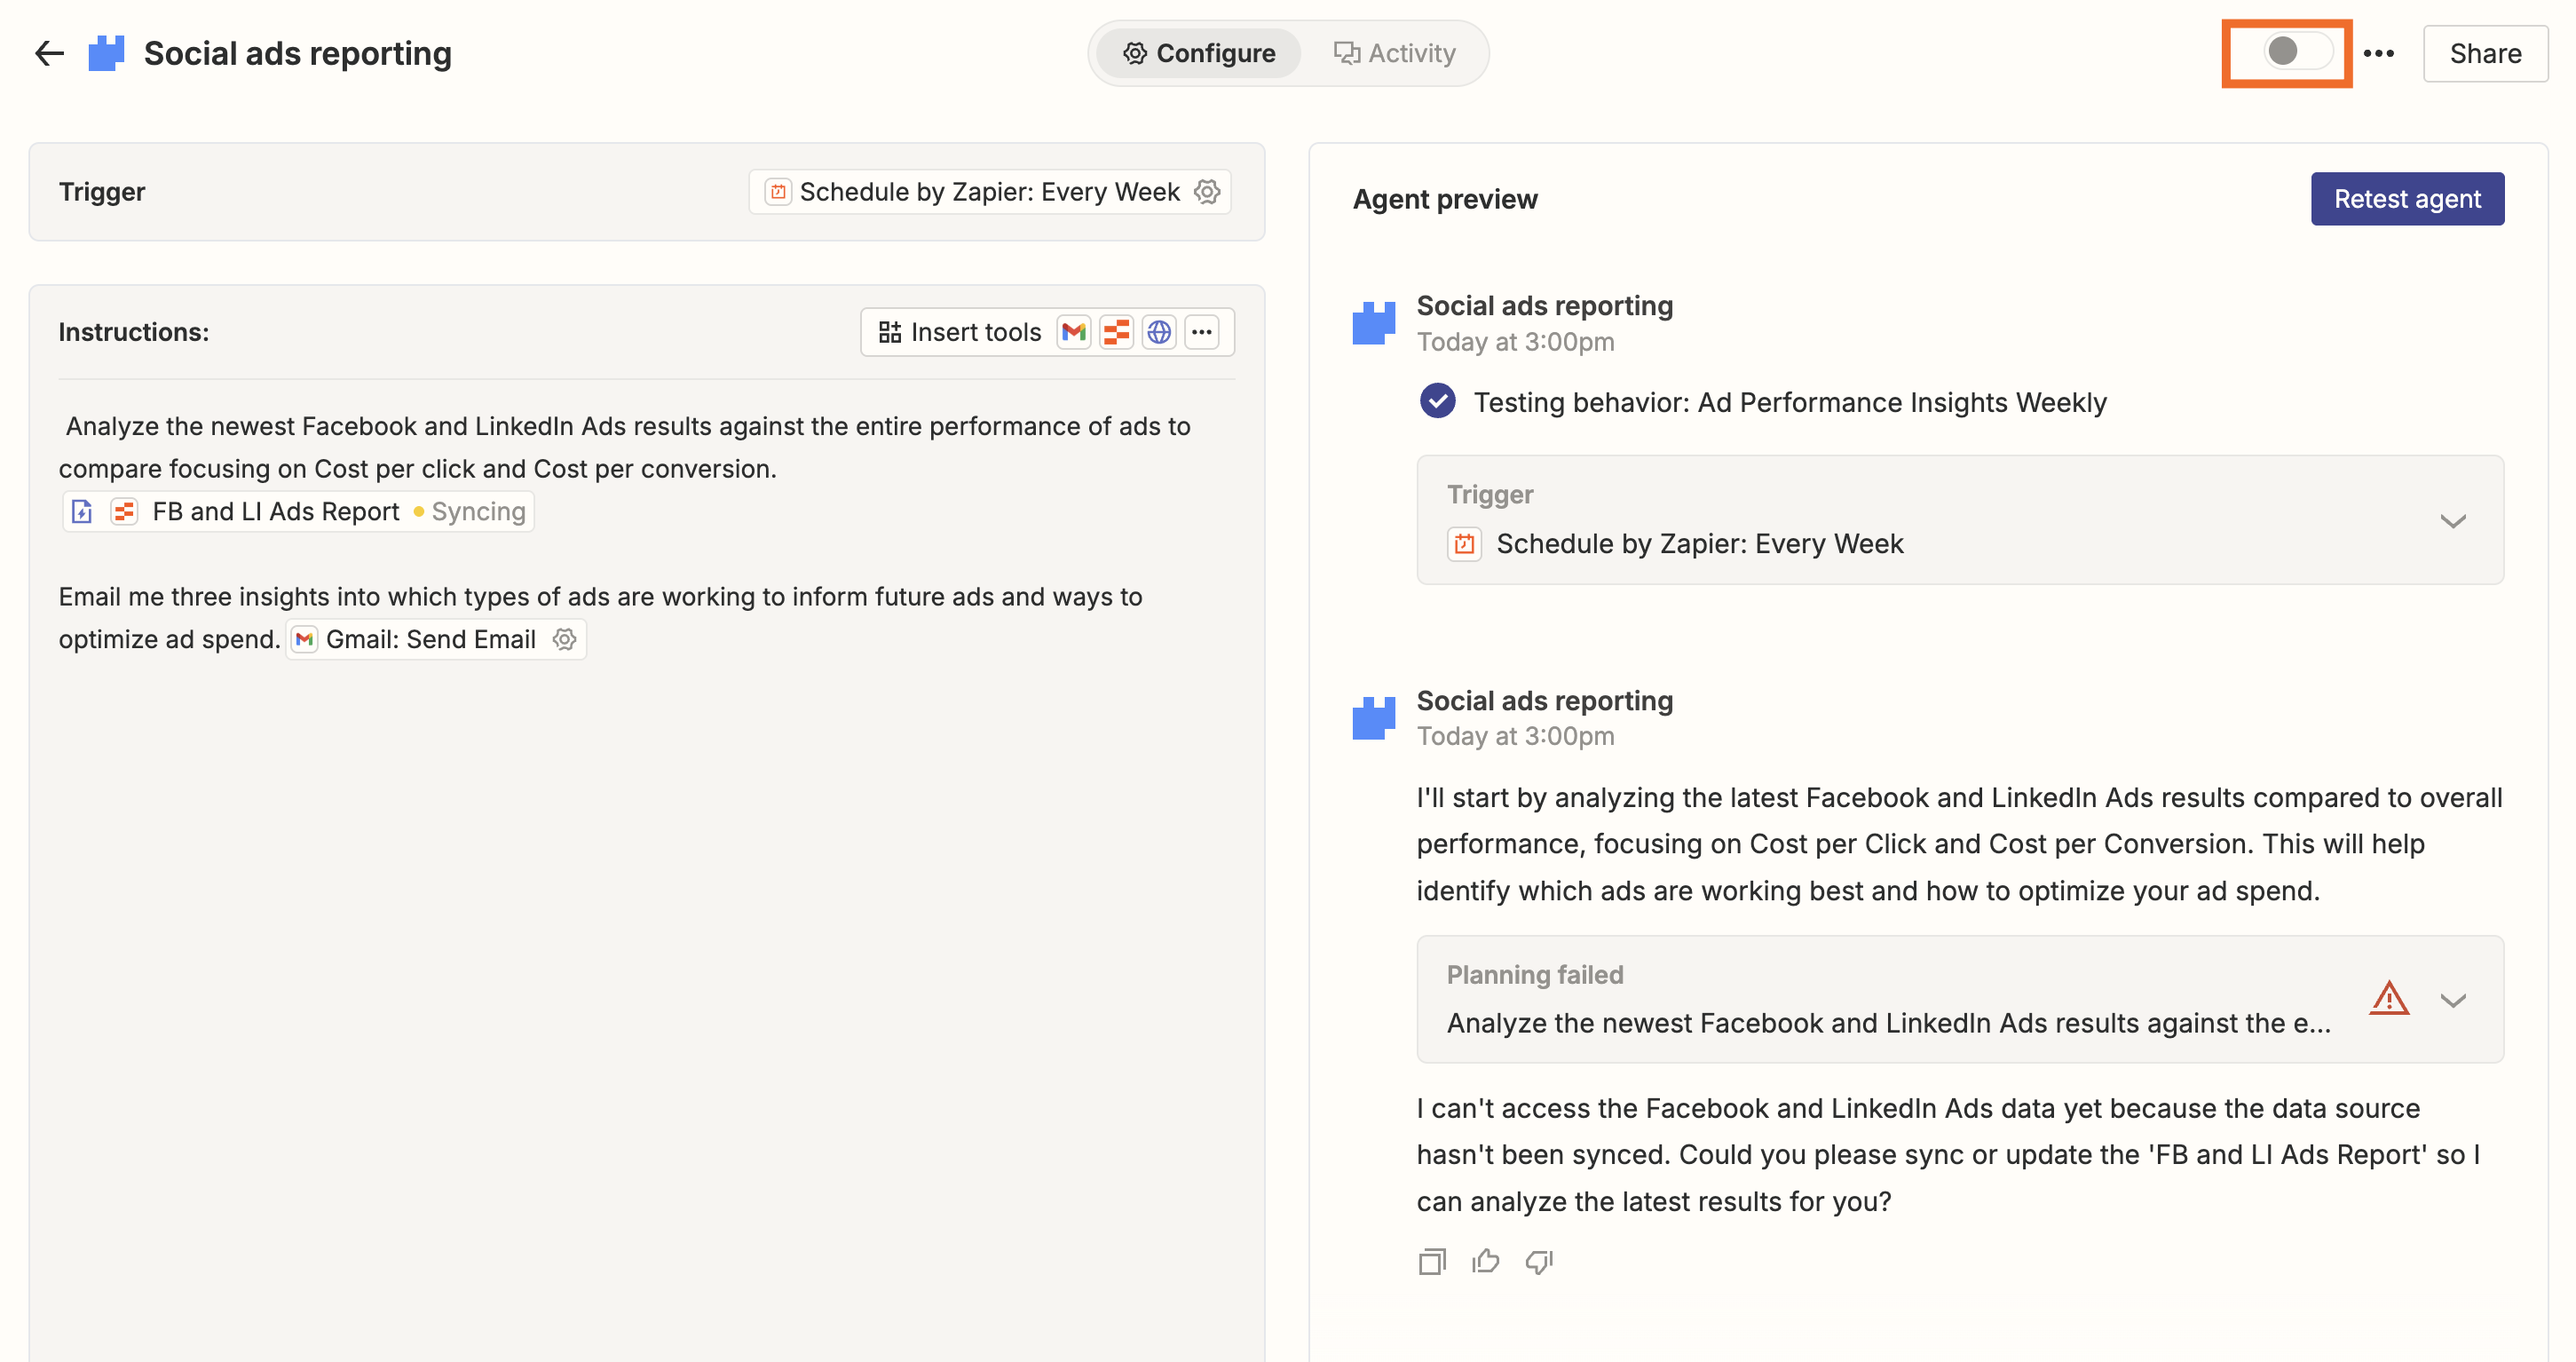
Once you've saved your action, select Test agent. If everything looks good, remember to switch it on with the toggle in the top-right corner of your screen.
Power your ad results with Zapier Agents and Tables
Marketing teams shouldn't have to spend hours compiling reports and sifting through ad data when AI can do it for them. By combining Zapier Tables and Agents, you can automate data collection, generate actionable insights, and ensure your team focuses on high-impact strategy instead of manual tasks.
Ready to try it out yourself? Try Zapier Agents and start powering your business today.
Related reading:
This article was originally published in February 2025, and was most recently updated in May 2025.
