
I once ran a survey for my high school library about the types of books students preferred to read. I scribbled the questions on paper, passed them around during lunch, and then spent hours manually collecting and entering the responses into a spreadsheet.
It… wasn't a great use of my time. But it beat writing a 2,000-word, in-depth character analysis of Beowulf.
If I had to repeat the process today, I'd skip the pens and spreadsheets and use an Airtable form instead.
Airtable forms let you build surveys and automatically funnel data from the submissions into your Airtable base—no manual entry required. Here's a step-by-step guide on how to create a form in Airtable.
Table of contents:
For a refresher on the basics of Airtable, check out this beginner's guide on how to use Airtable.
How to create a form in Airtable
You can create a form in Airtable in a few ways:
Form view (the classic method inside a base)
Interfaces (a newer option that's more customizable)
Both methods use the data fields in a given table to create your form. But only independent fields—for example, single-line text or dropdowns—can be included. Fields that are dependent on others—for example, a formula field—can't.
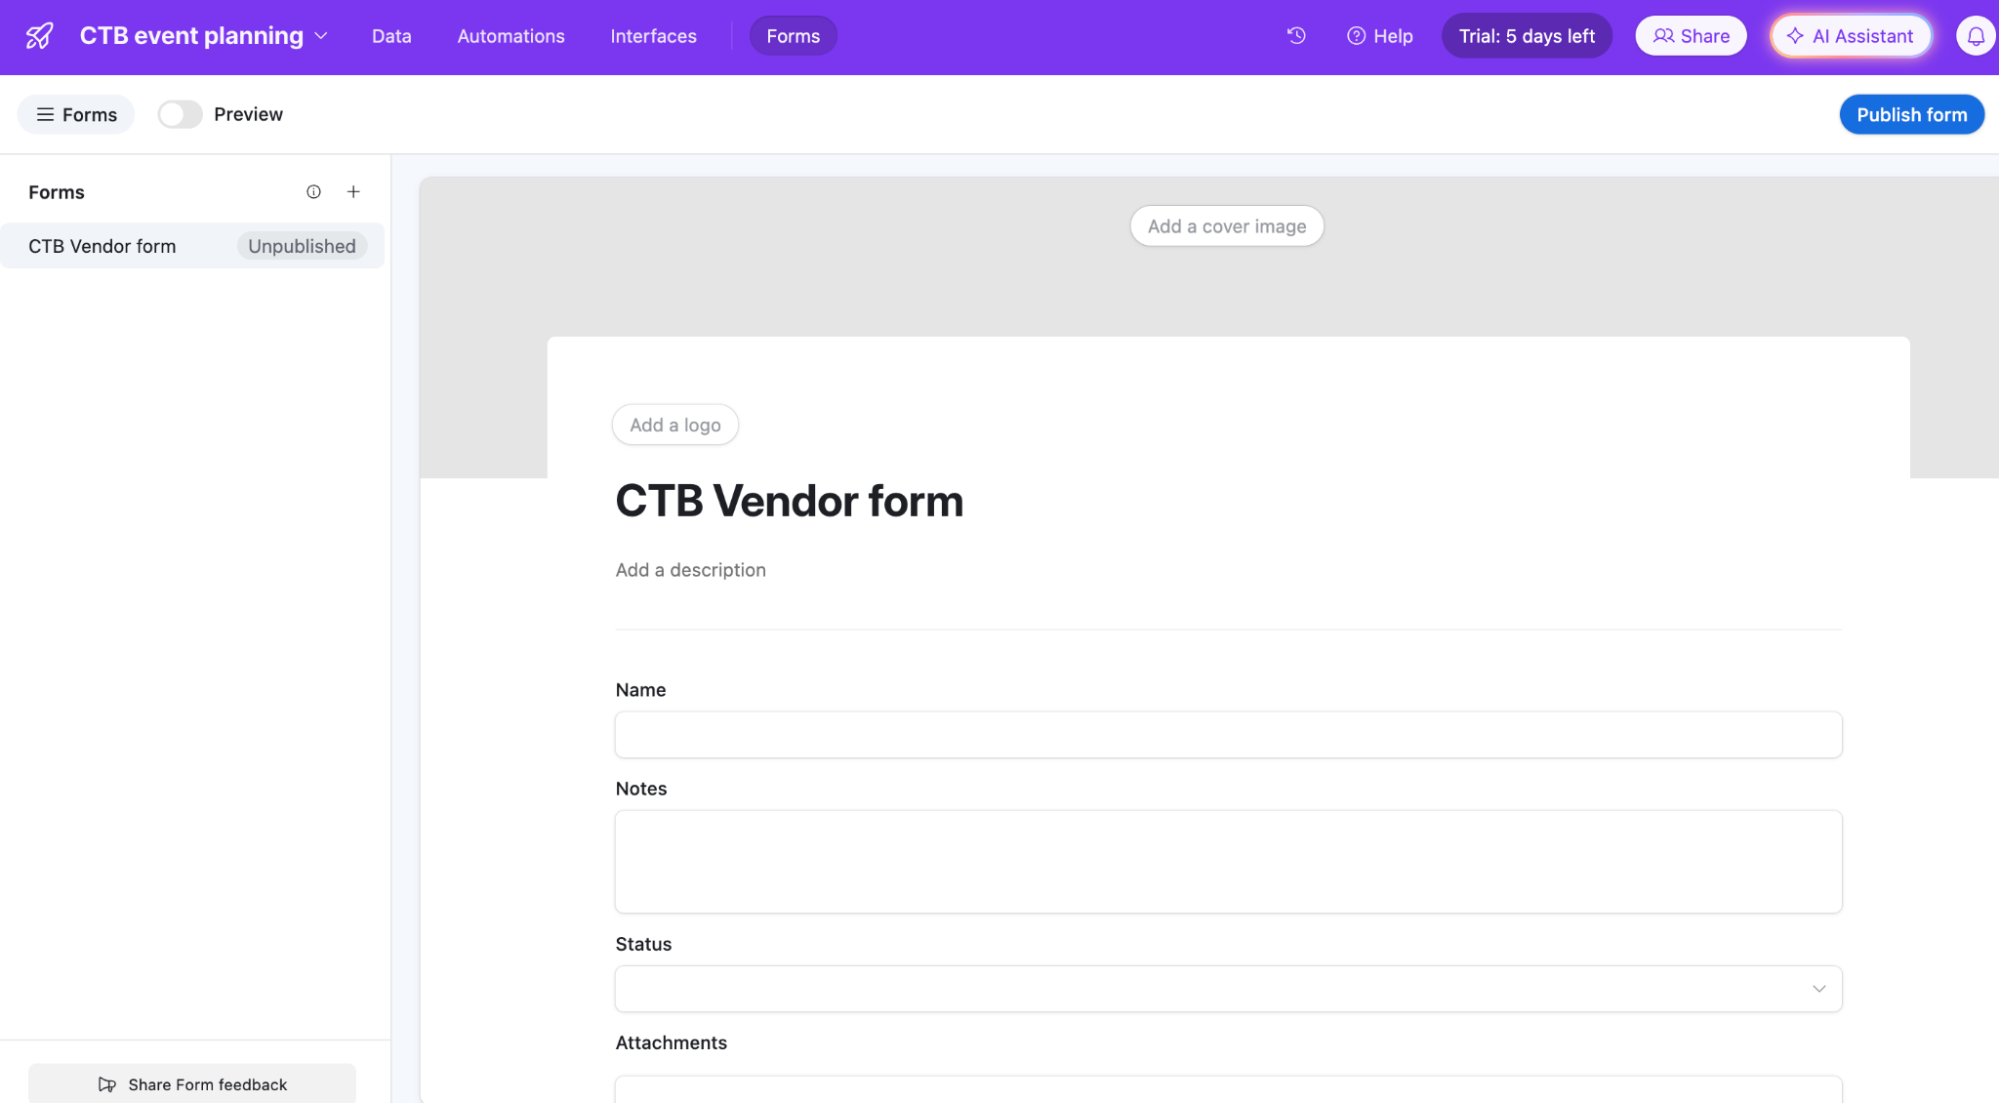
How to create a form in Airtable using a form view
Form view is Airtable's original method for creating forms. It lets you automatically generate a form from an existing table. Here's how to use it.
Open an existing Airtable base—it should contain all the fields you want to include in your Airtable form. (If it doesn't, you can add them as you build your form.)
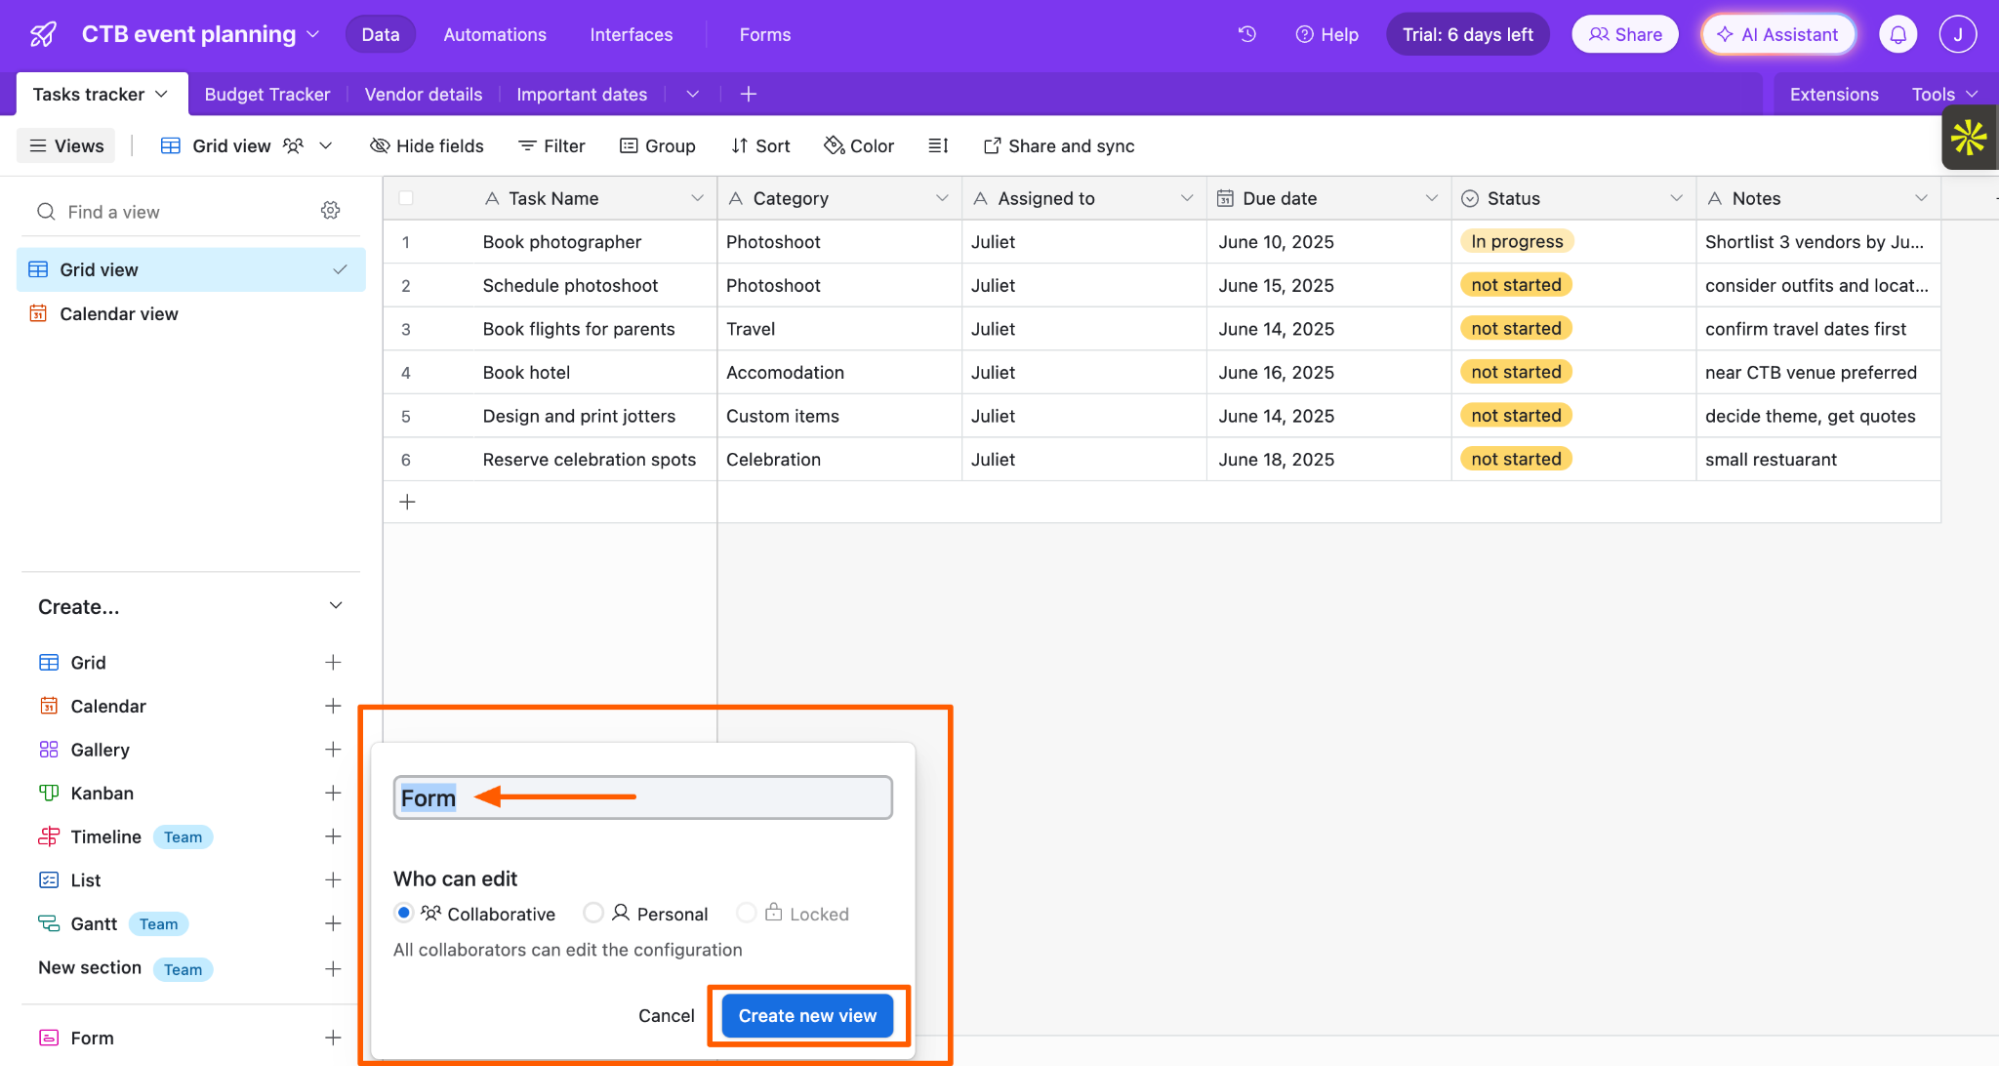
In the Views side panel, under Create, click Form, and then select Create a form view.
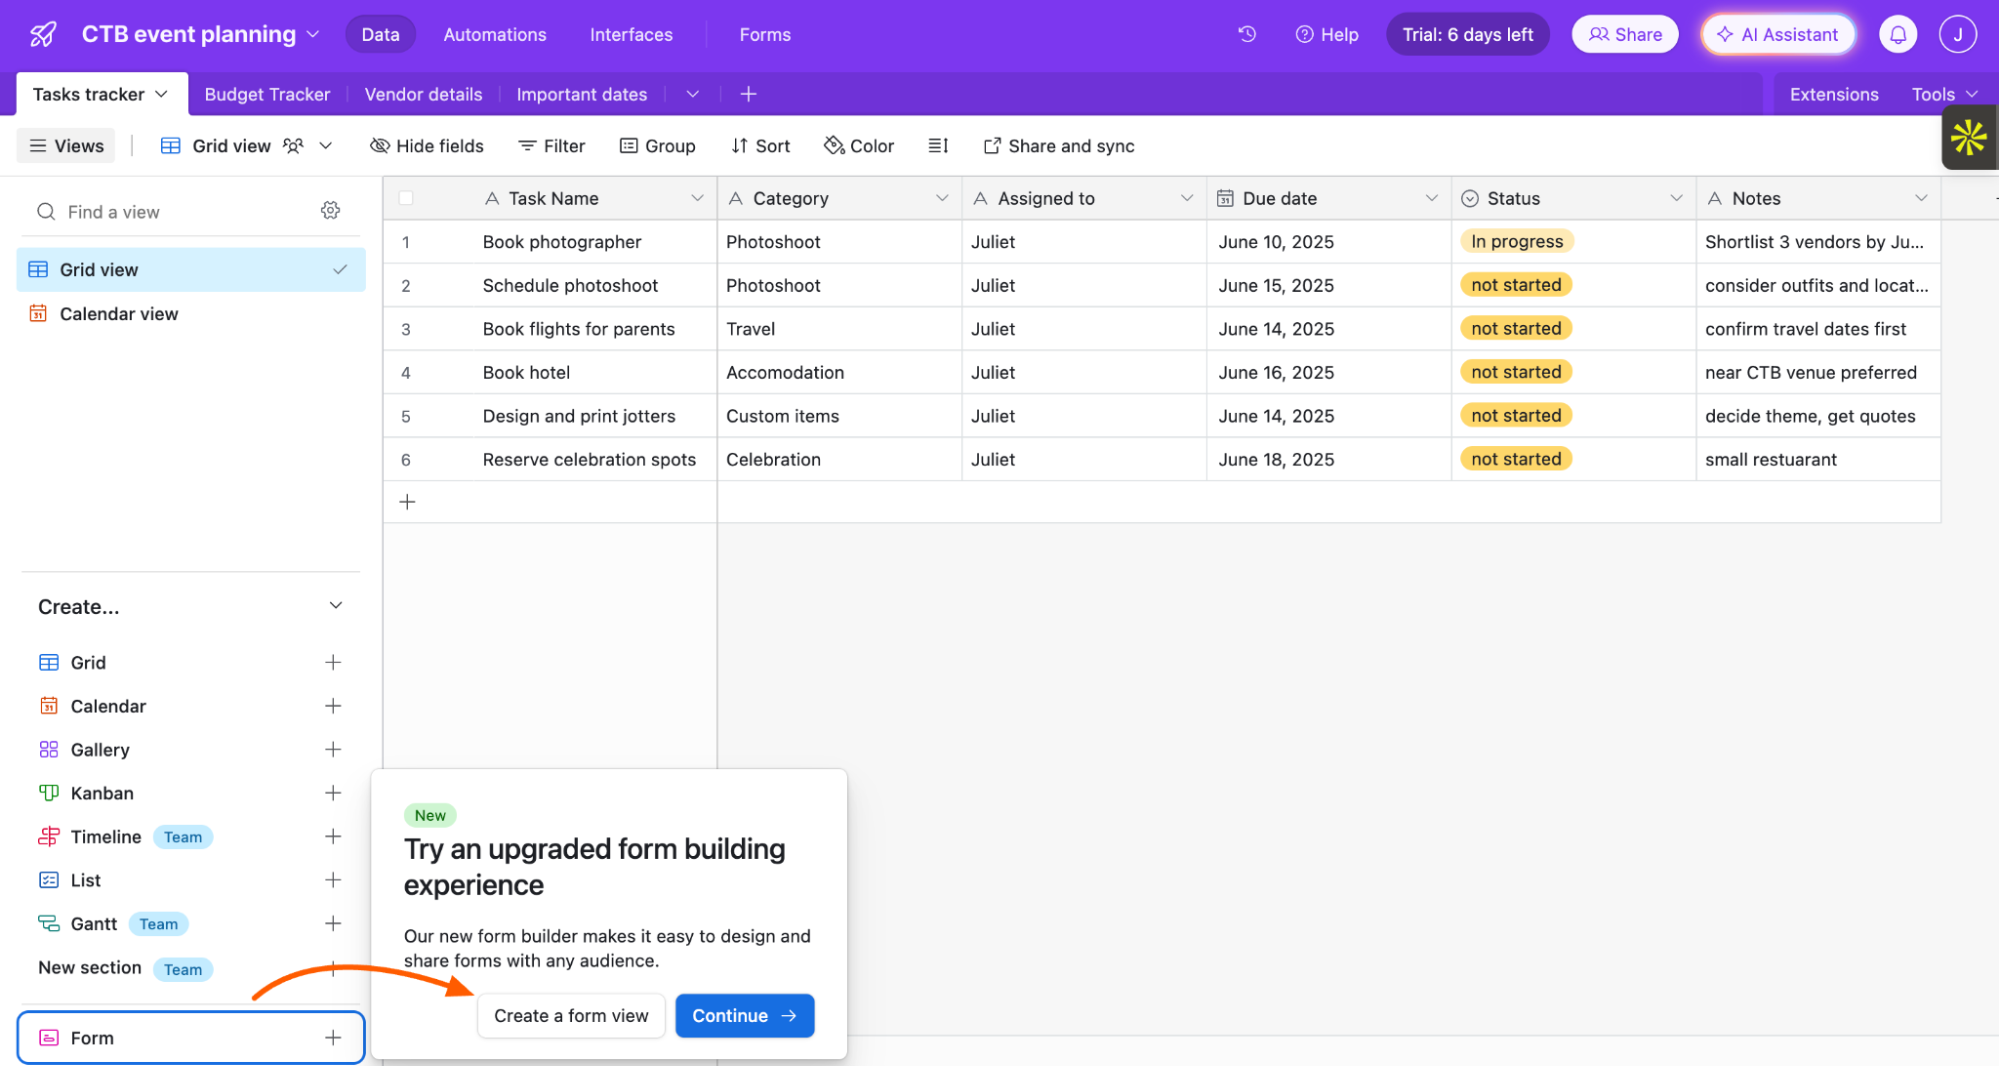
Enter a name for your Airtable form.
Optionally, if you're on a paid plan, you can adjust the form-editing permissions to Collaborative, Personal, or Locked. For users on a free plan, your form is collaborative by default.
Click Create new view.
Customize your form. There are endless ways to do this, but here are some key fields you'll probably want to modify:
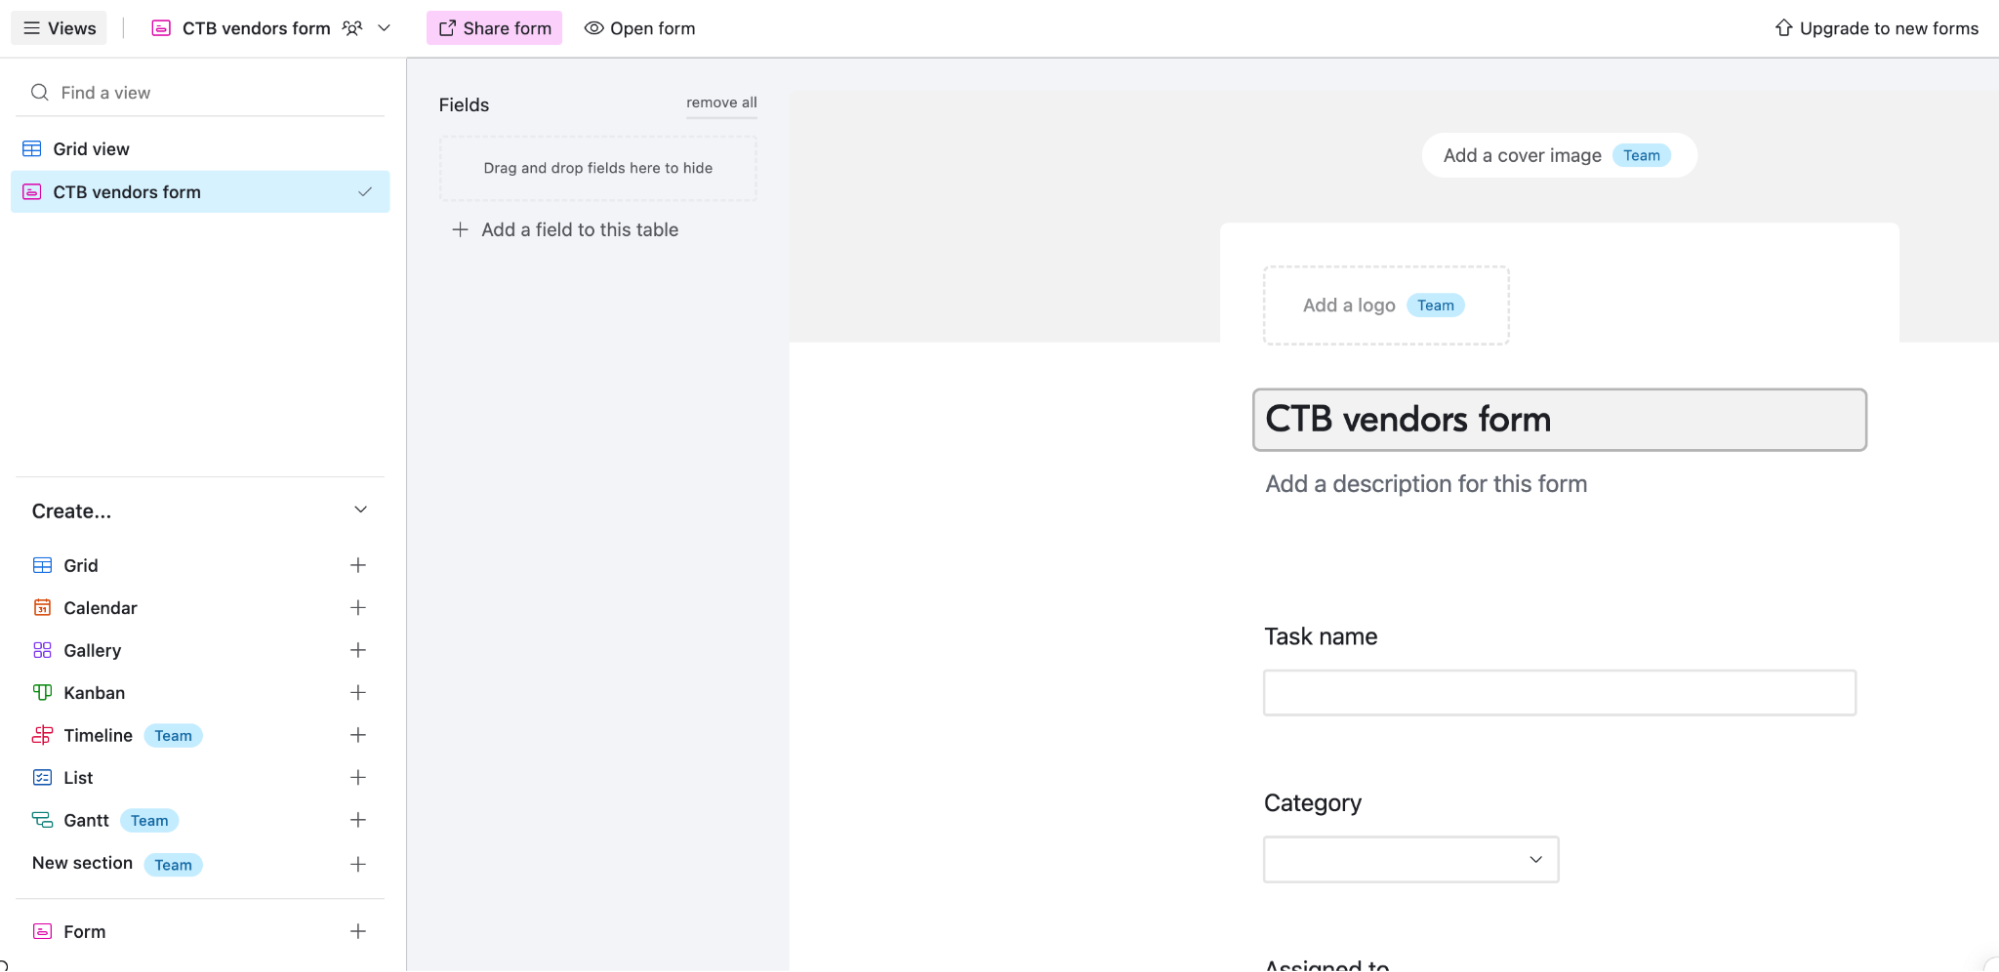
Branding: Click Add a cover image or Add a logo to keep your form's appearance on-brand.
Edit form fields: Airtable automatically adds every independent field from your table to the form. Click any field to modify or remove it.
Add form fields: Click Add a field to this table (next to the form) to add new form fields. These new fields will also appear in your original table.
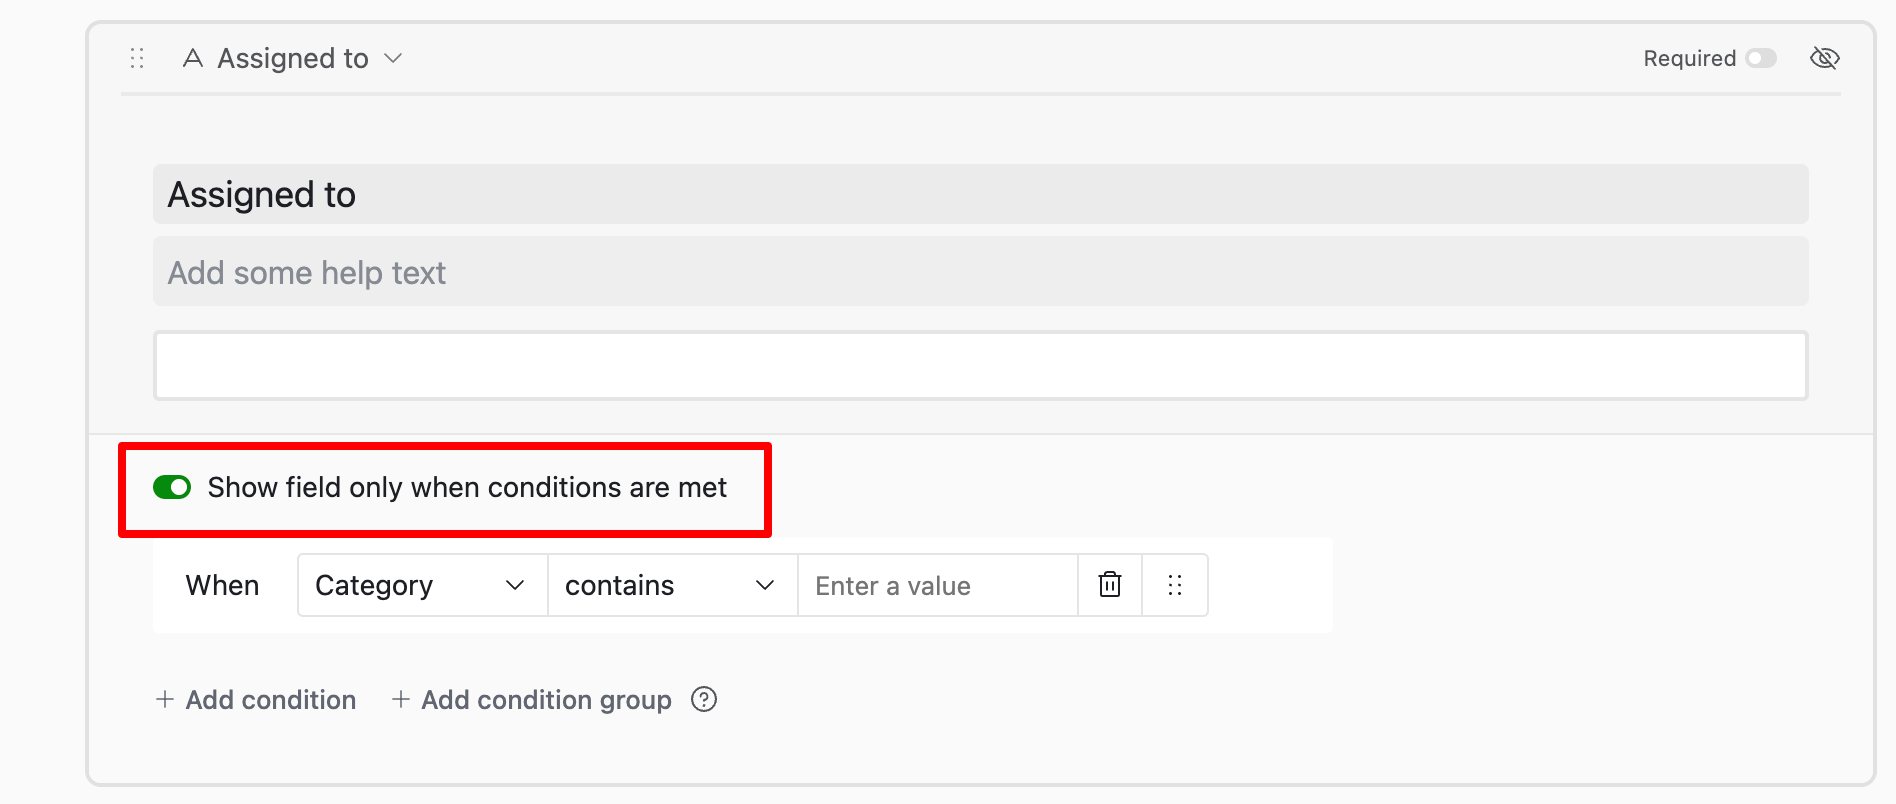
Mark fields as required: If there are certain fields you want to make mandatory for respondents to fill in, click that form field, and then click the Required toggle.

Set conditional form field visibility: You can also add conditional logic to hide or show fields based on user responses to previous fields. Click the field you want to add conditional logic to, and then click the toggle for Show fields only when conditions are met. Then, set up your condition.
Rearrange form fields: The easiest way to rearrange fields is by dragging and dropping them to different positions within your form.
Beneath your form, you can customize what happens after users submit it. Here are the main details you'll want to edit:
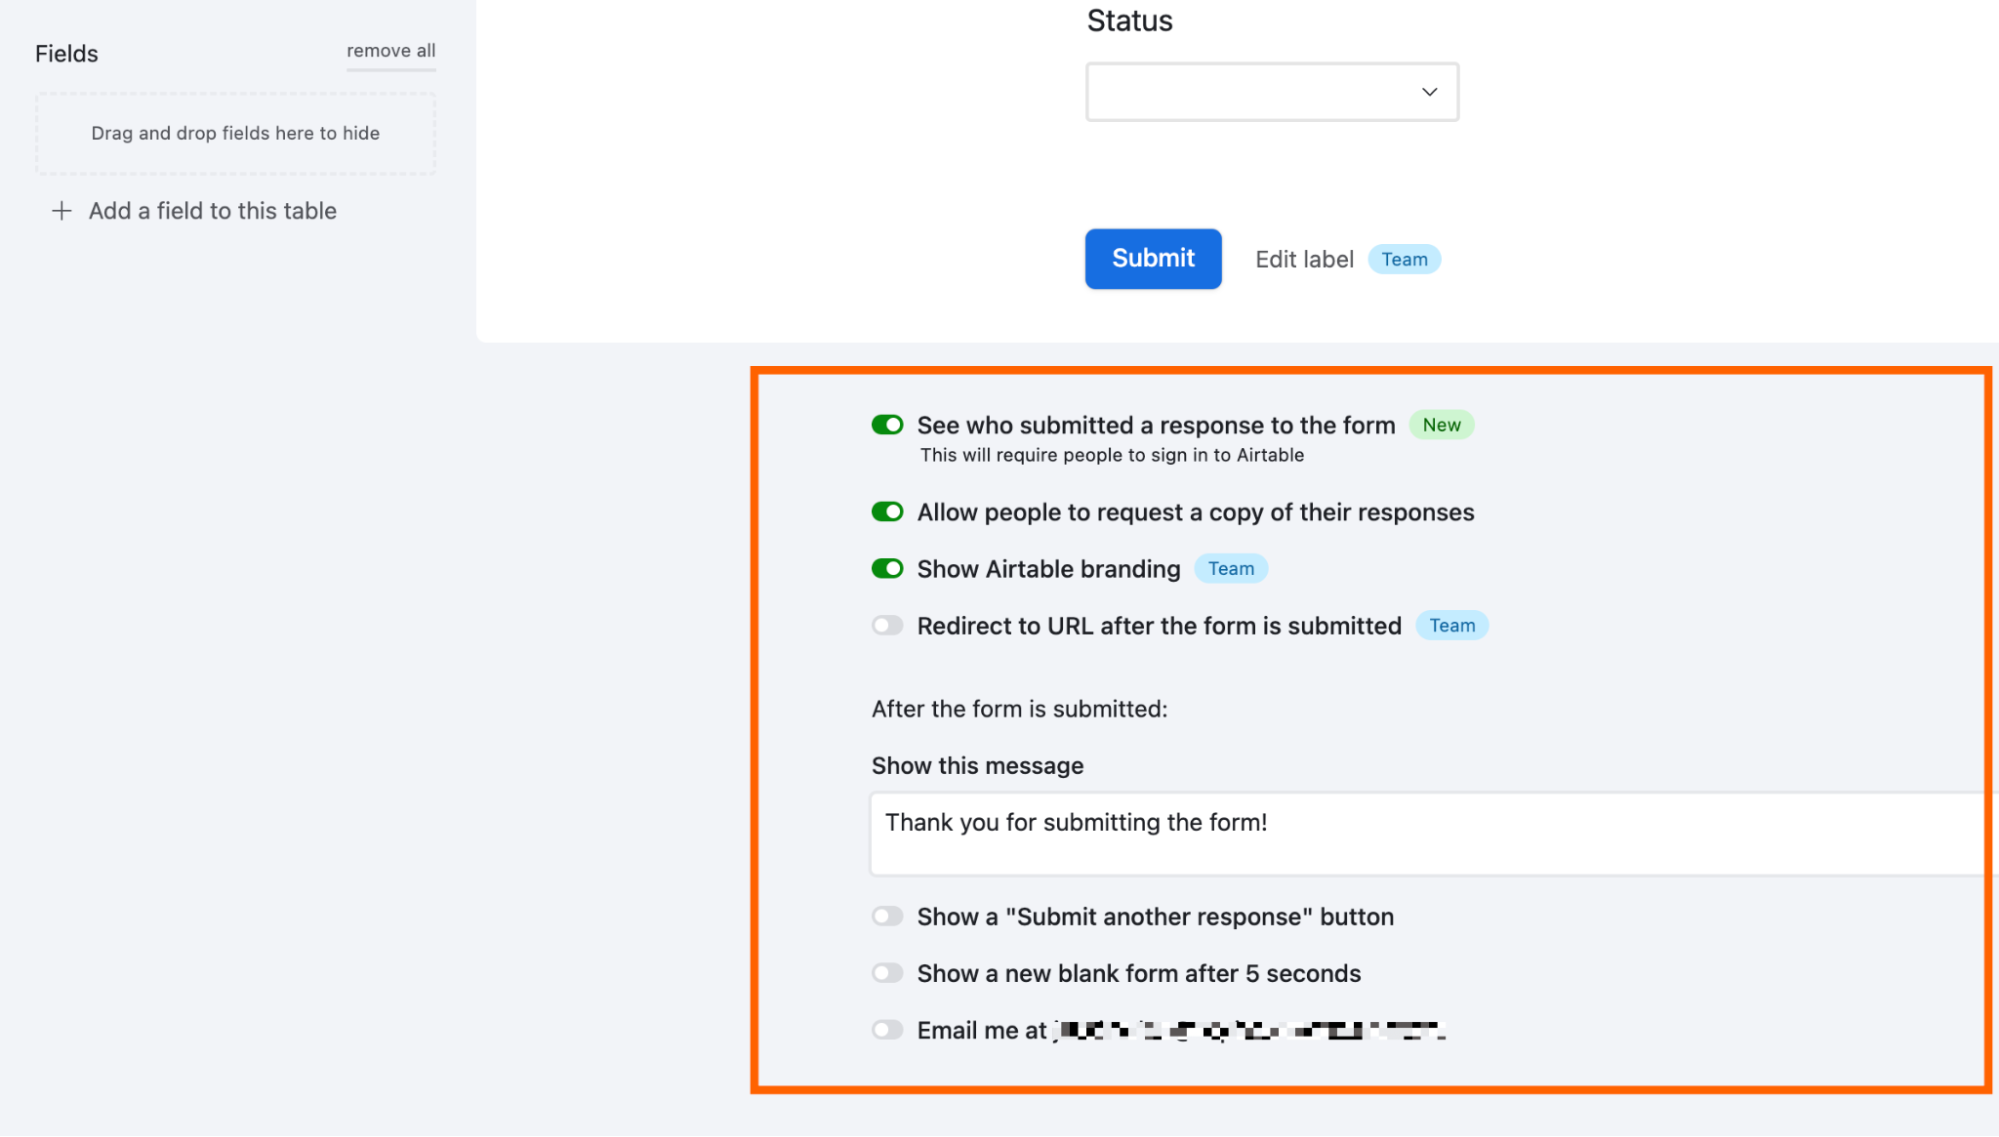
Collect respondent information. By default, Airtable form responses are anonymous. But you can change this. Toggle on See who submitted a response to the form to track who responded—Airtable will also automatically enable Allow people to request a copy of their responses (but you can disable this). Once enabled, respondents will be prompted to sign in to Airtable to submit their responses.
Set a post-form submission message. Click the textbox under Show this message, and enter your message. You can use this to write a brief thank-you message or let respondents know what to expect next.
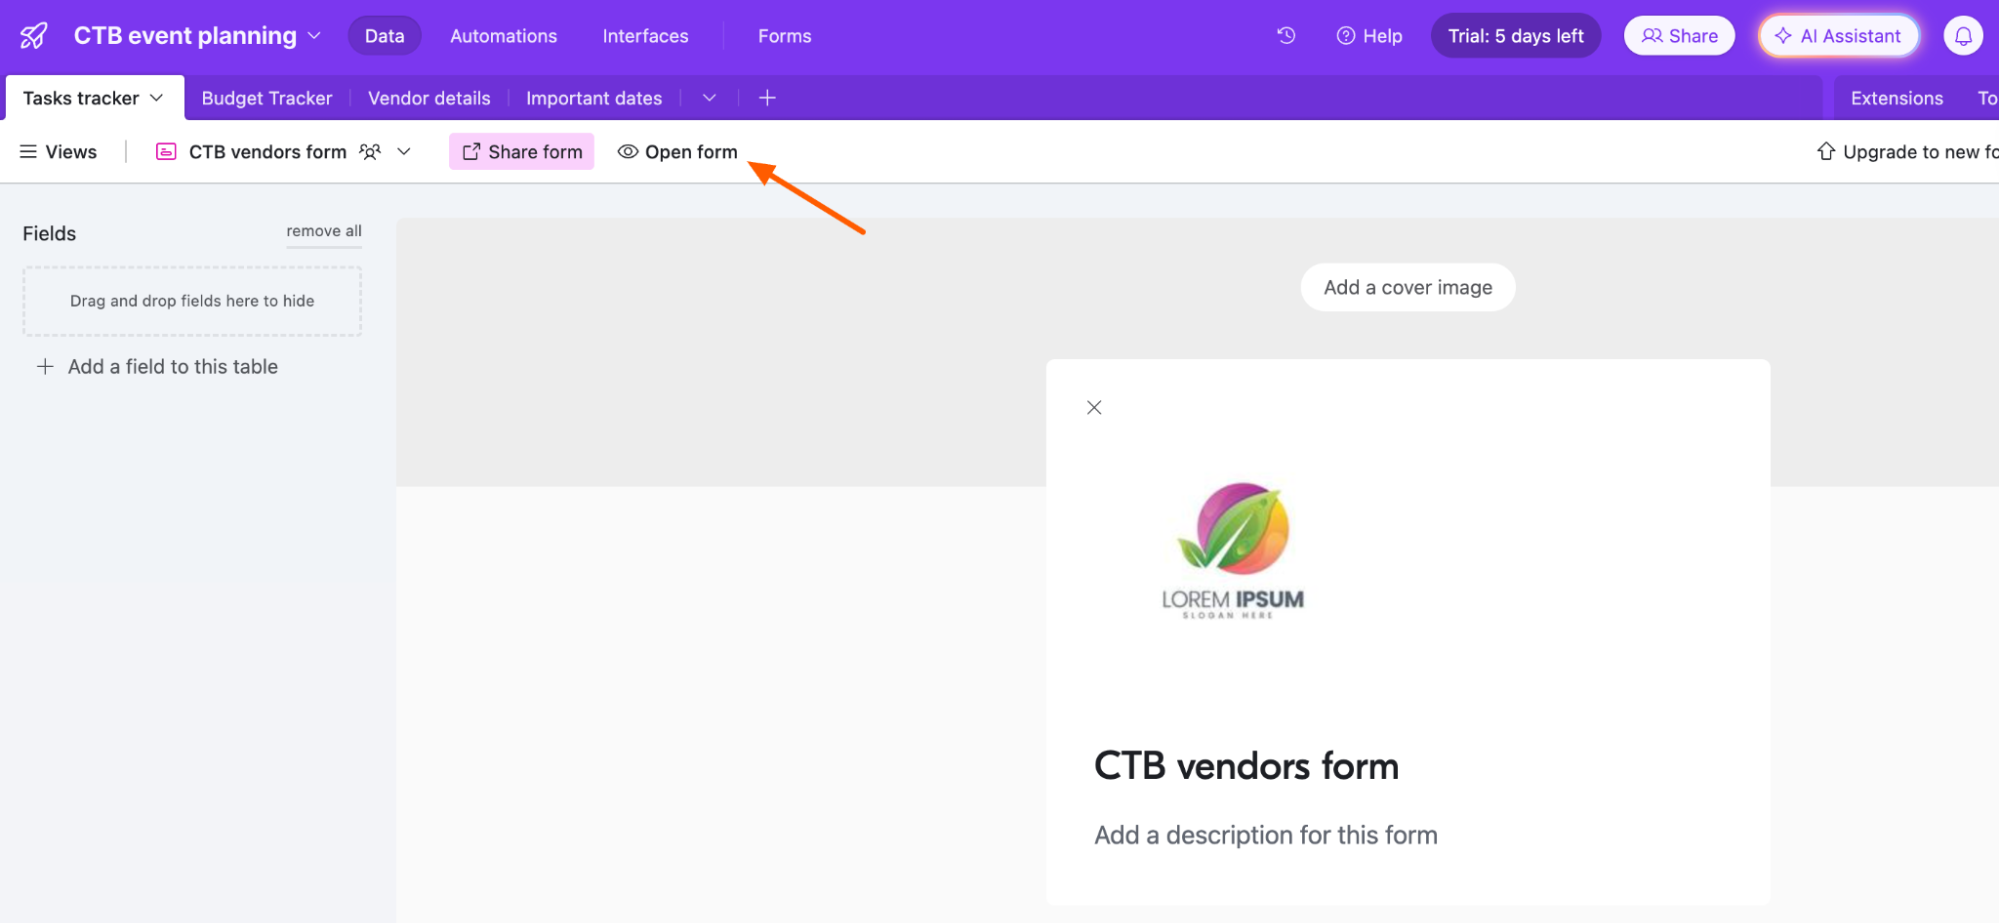
Click Open form (above the form editor) to preview your form.
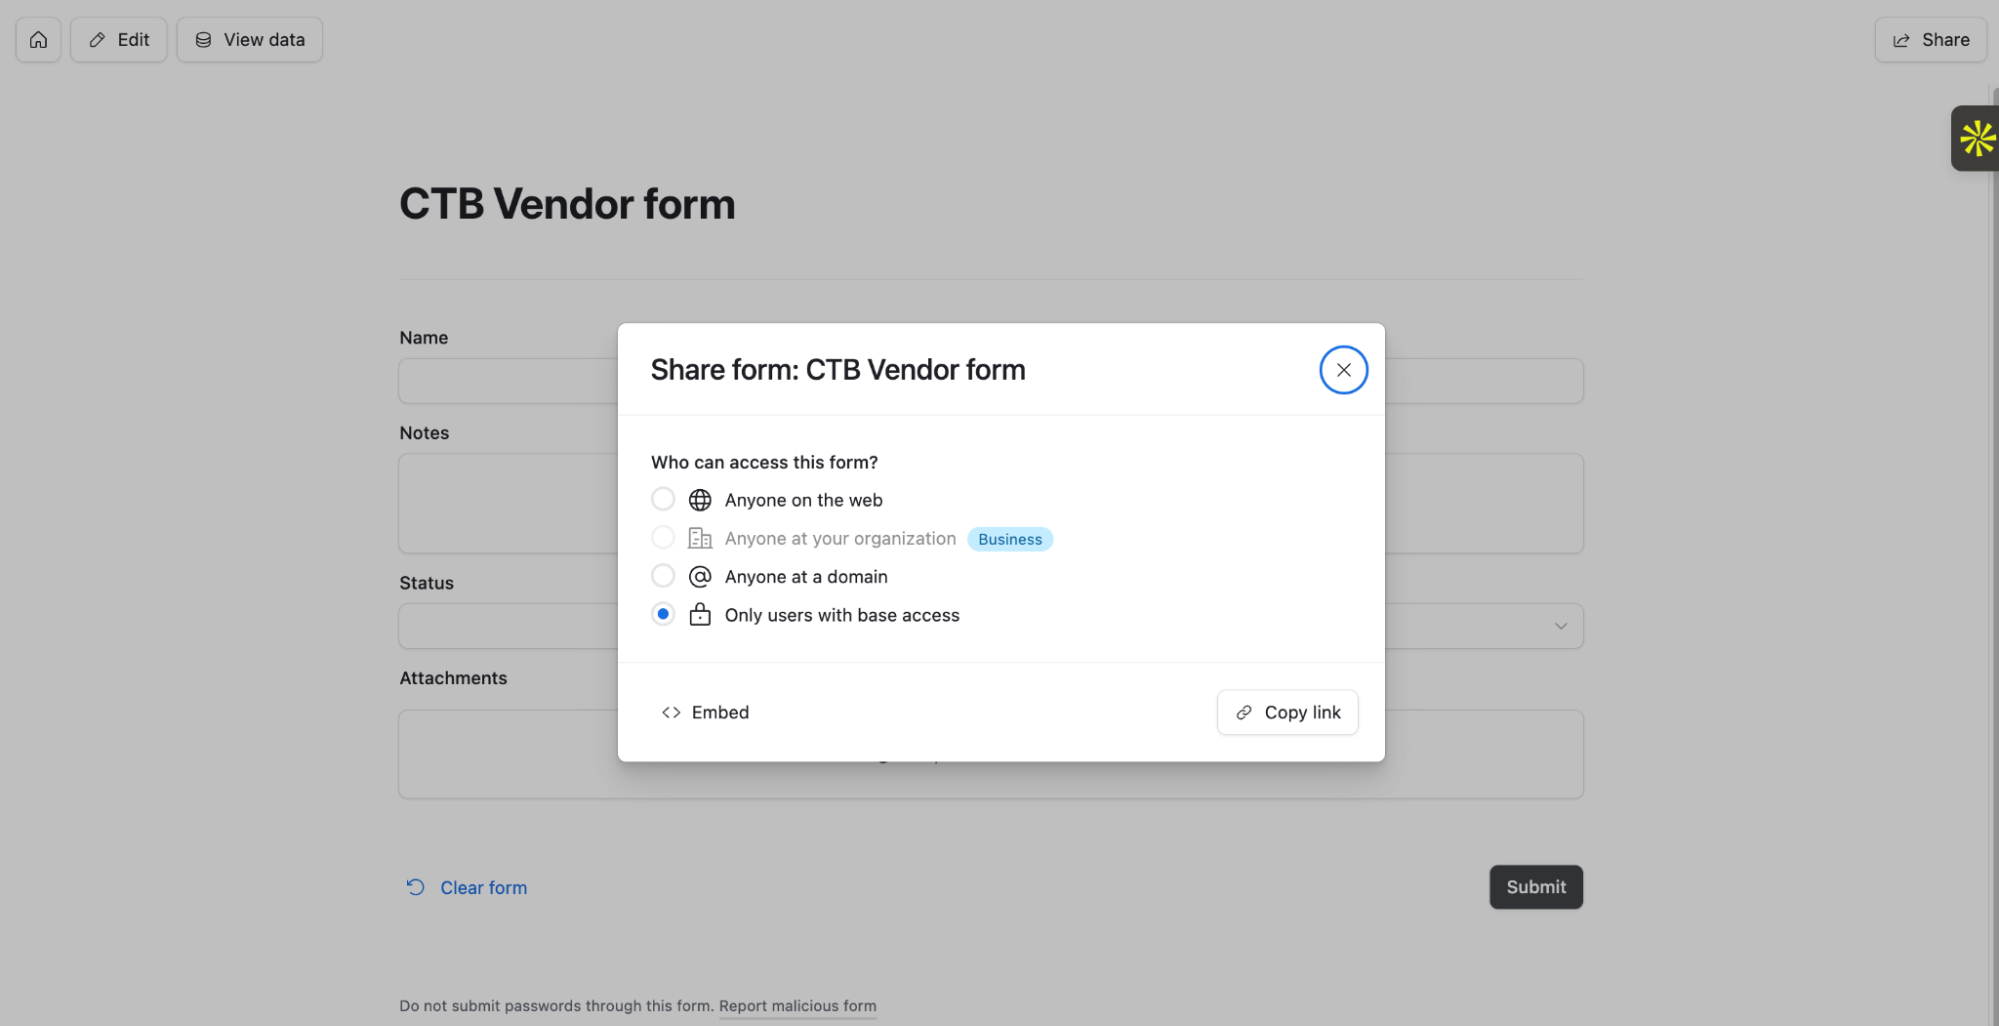
If everything looks good, click Share form, and select how you want to share it:
Copy link. Copy the link and share it as you normally would.
Embed this view. Get a code to embed the Airtable form on your website.
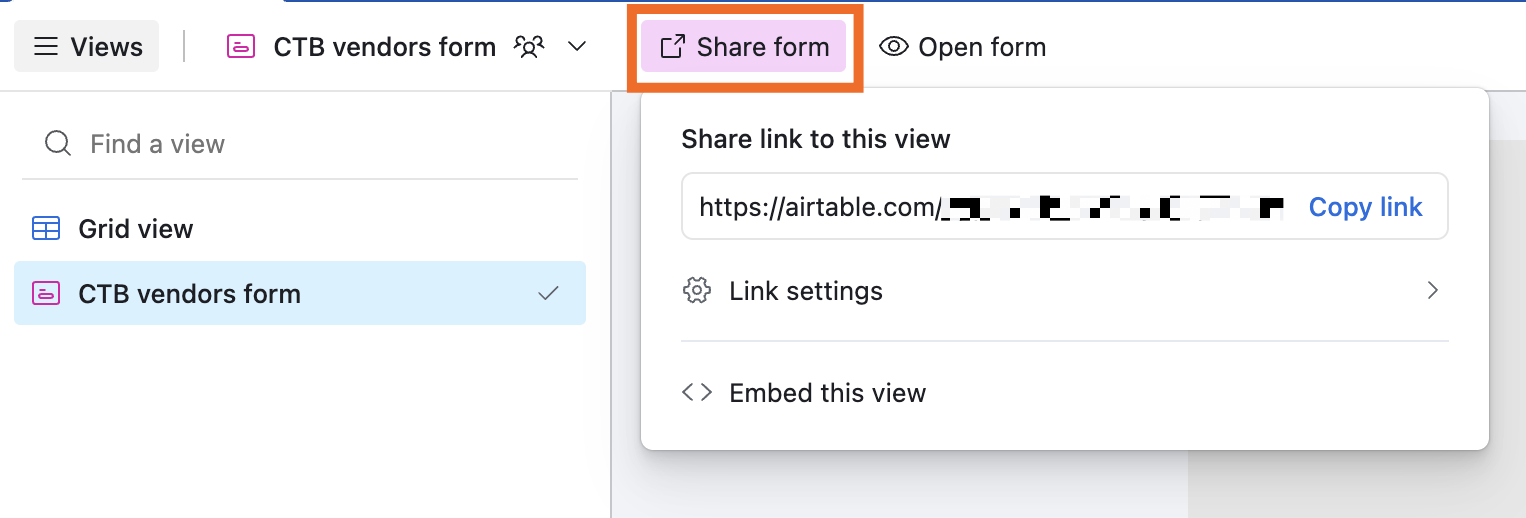
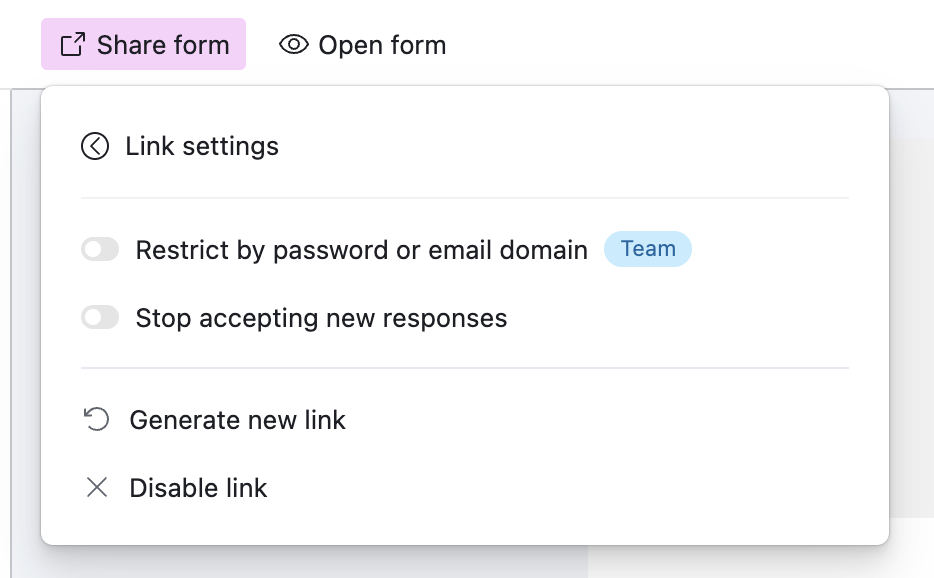
You can also click Link settings to manage things like adding a password, preventing new responses, and disabling the form link.


You're all set!

How to create a form in Airtable using interfaces
If you want slightly more flexibility over how your form looks and behaves, you can also create a form using Airtable's Interface Designer. The final product isn't all that different from what you'd get with the form view, but there are a few features that give it a more polished look. Here's how to use it.
Open an existing Airtable base—it should contain all the fields you want to include in your Airtable form. (If it doesn't, you can add them as you build your interface.)
Click Interfaces (next to the base name).

Click Start building.

In the pop-up that appears, click Build a form.

In the next pop-up, choose the table where you want to store your form responses, and give your form a name.
Click Create form.

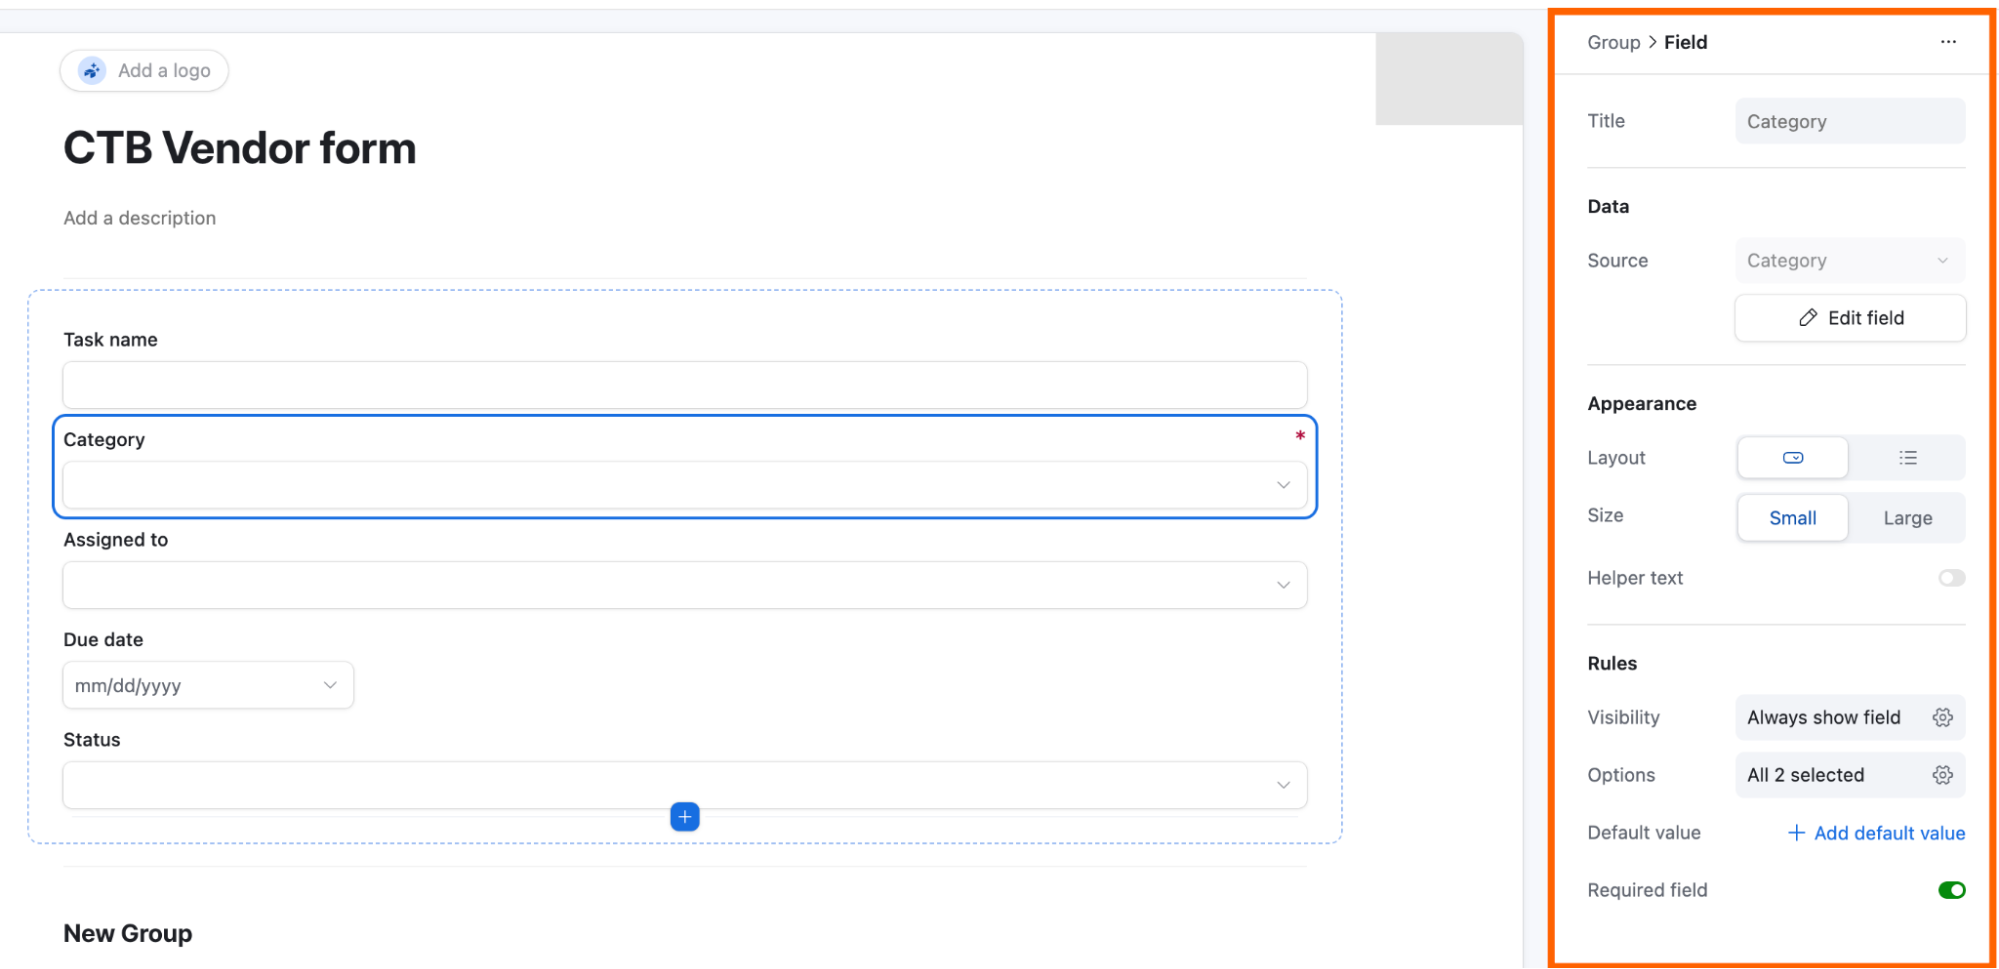
From here, you can apply the same customizations as you would with the form view—and then some. But how you edit your form varies slightly.
Branding: Click Add a cover image or Add a logo to keep your form's appearance on-brand.
Edit form fields: Airtable automatically adds every independent field from your table to the form. To modify a field, click it, and edit it in the side panel. You can do things like mark a field as required or set character limits on responses.
Add form fields: Click the plus icon (
+) at the bottom of your form or hover between two fields and click the+that appears. Then select the type of field you want to add.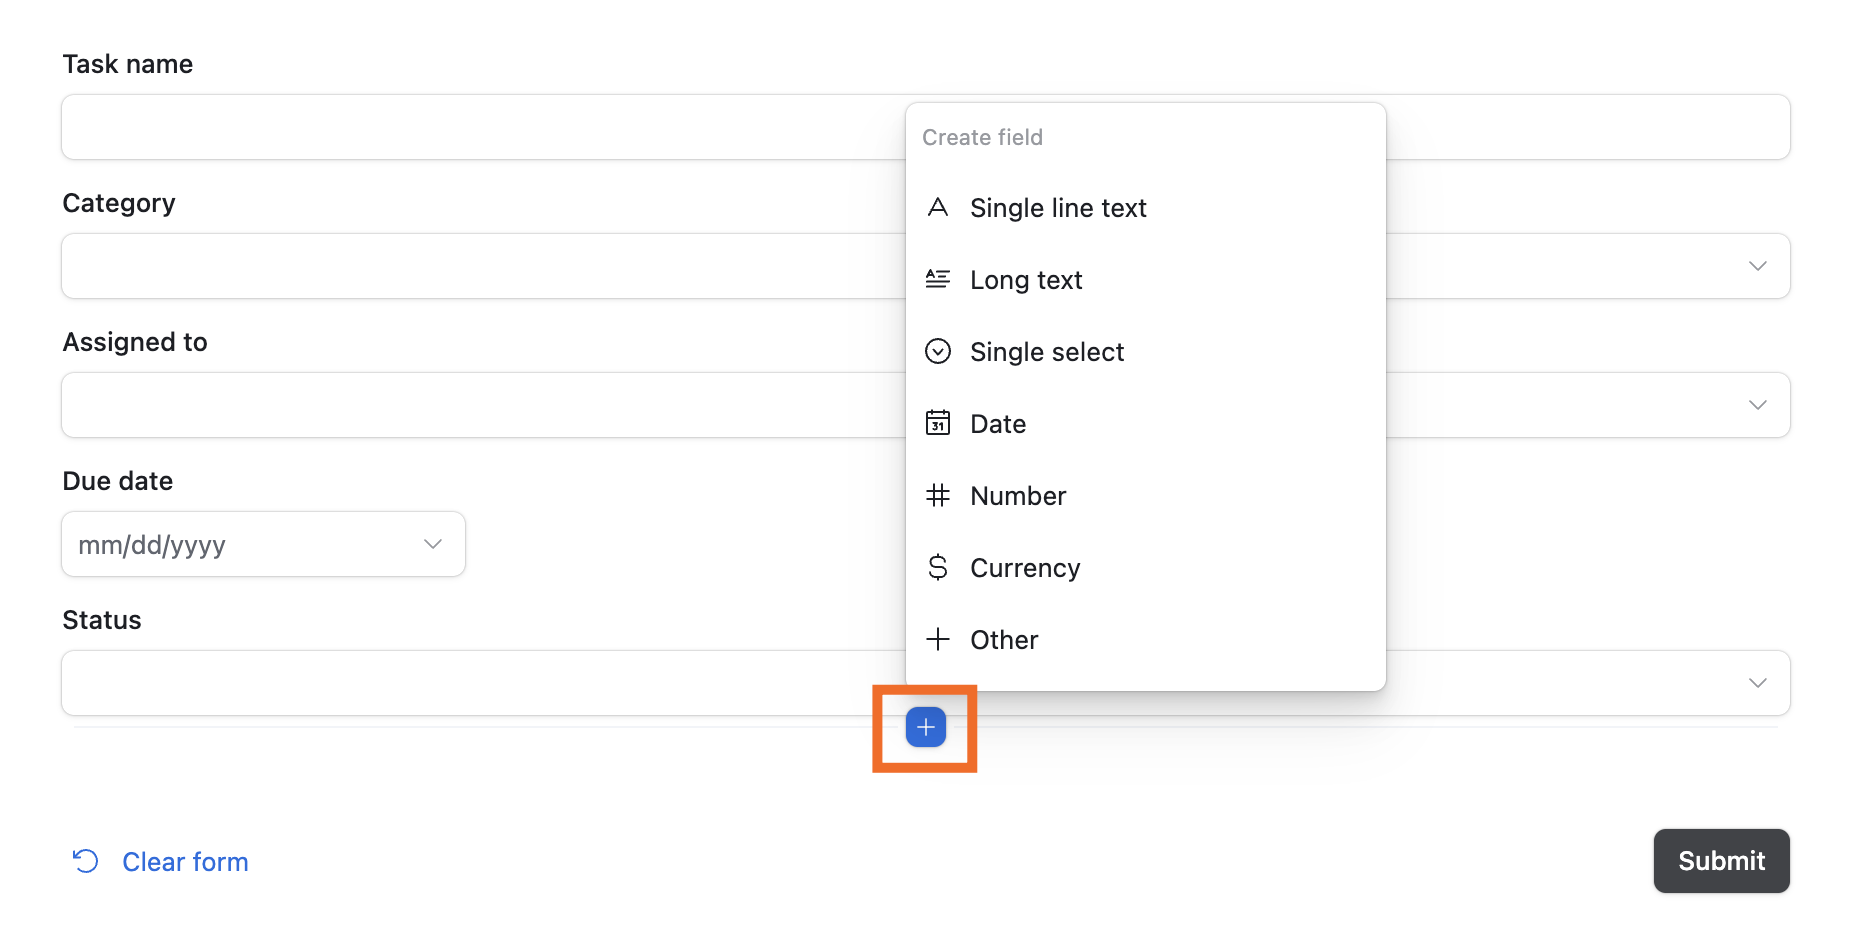
Rearrange form fields: The easiest way to rearrange fields is by dragging and dropping them to different positions within your form. Unlike the form view, you can also rearrange fields to sit next to one another instead of stacking them.
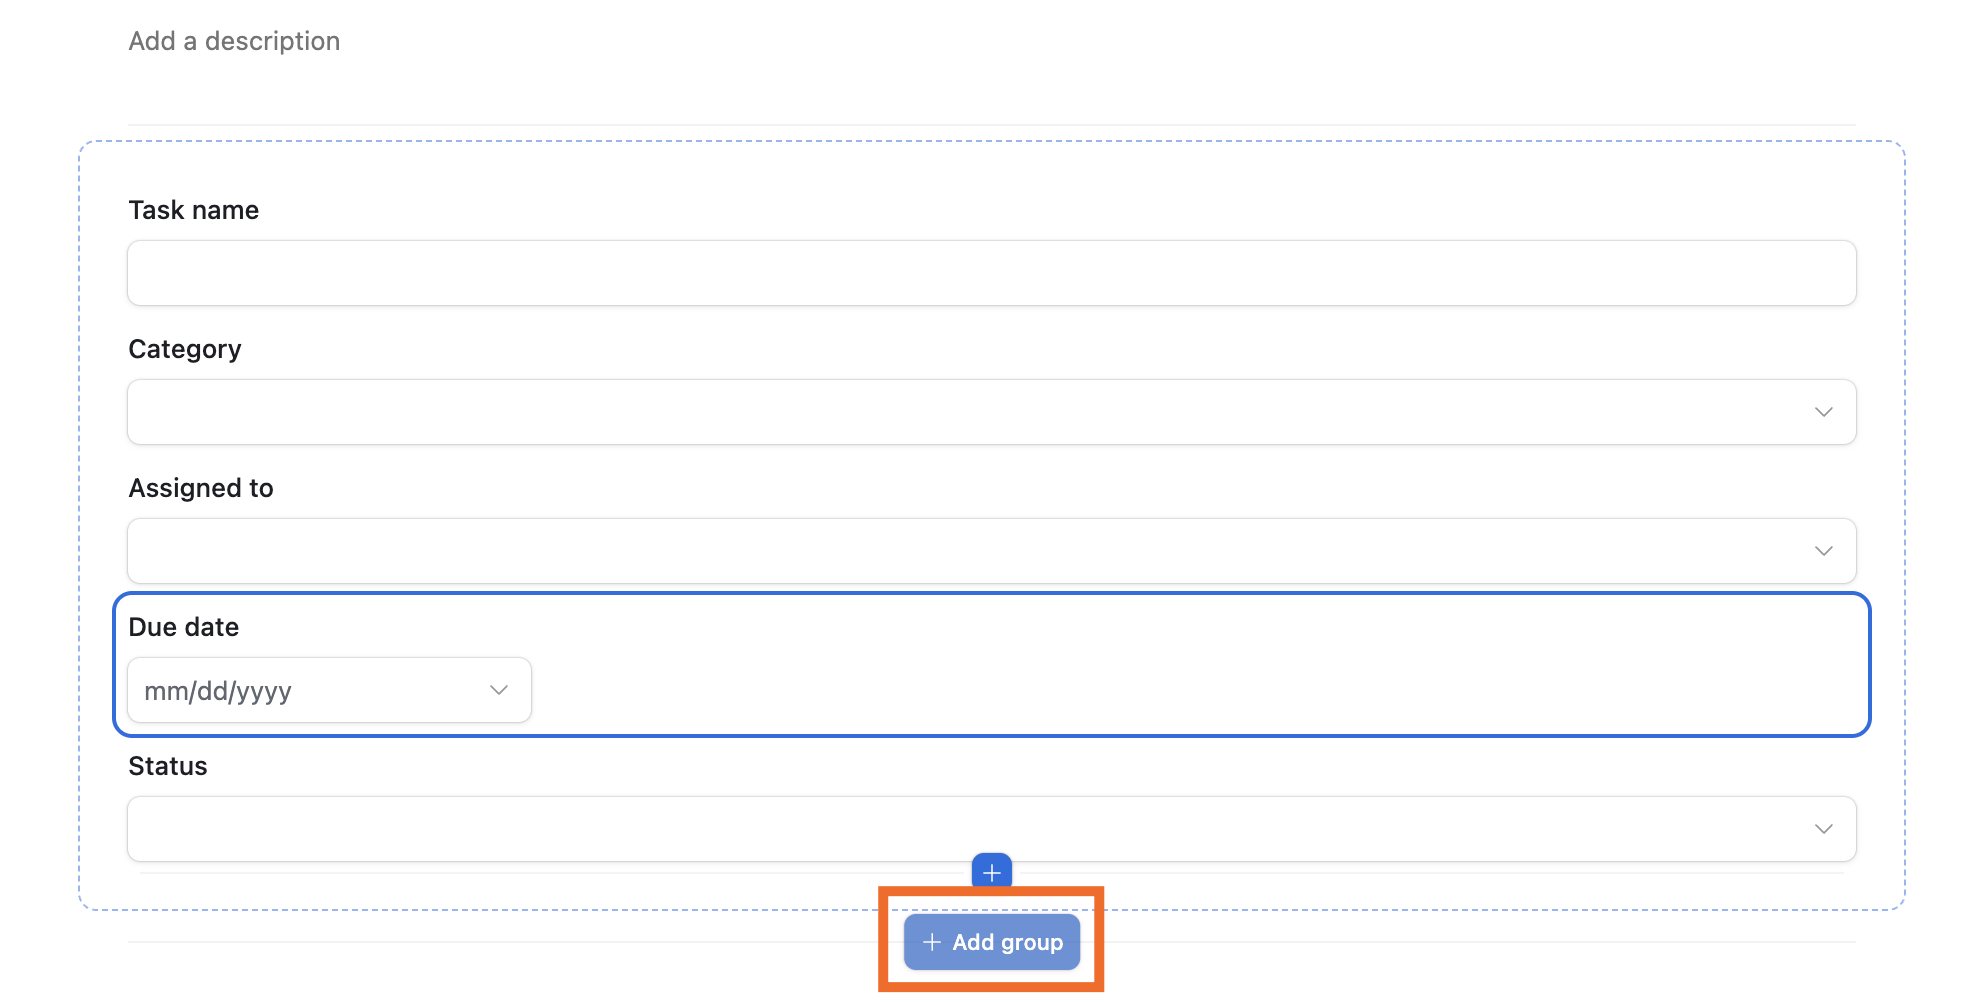
Group form fields: By default, Airtable groups pre-existing form fields together. But you can split these up. Hover over the line break at the bottom of a group, and click Add group. Then drag and drop fields to rearrange them between groups.
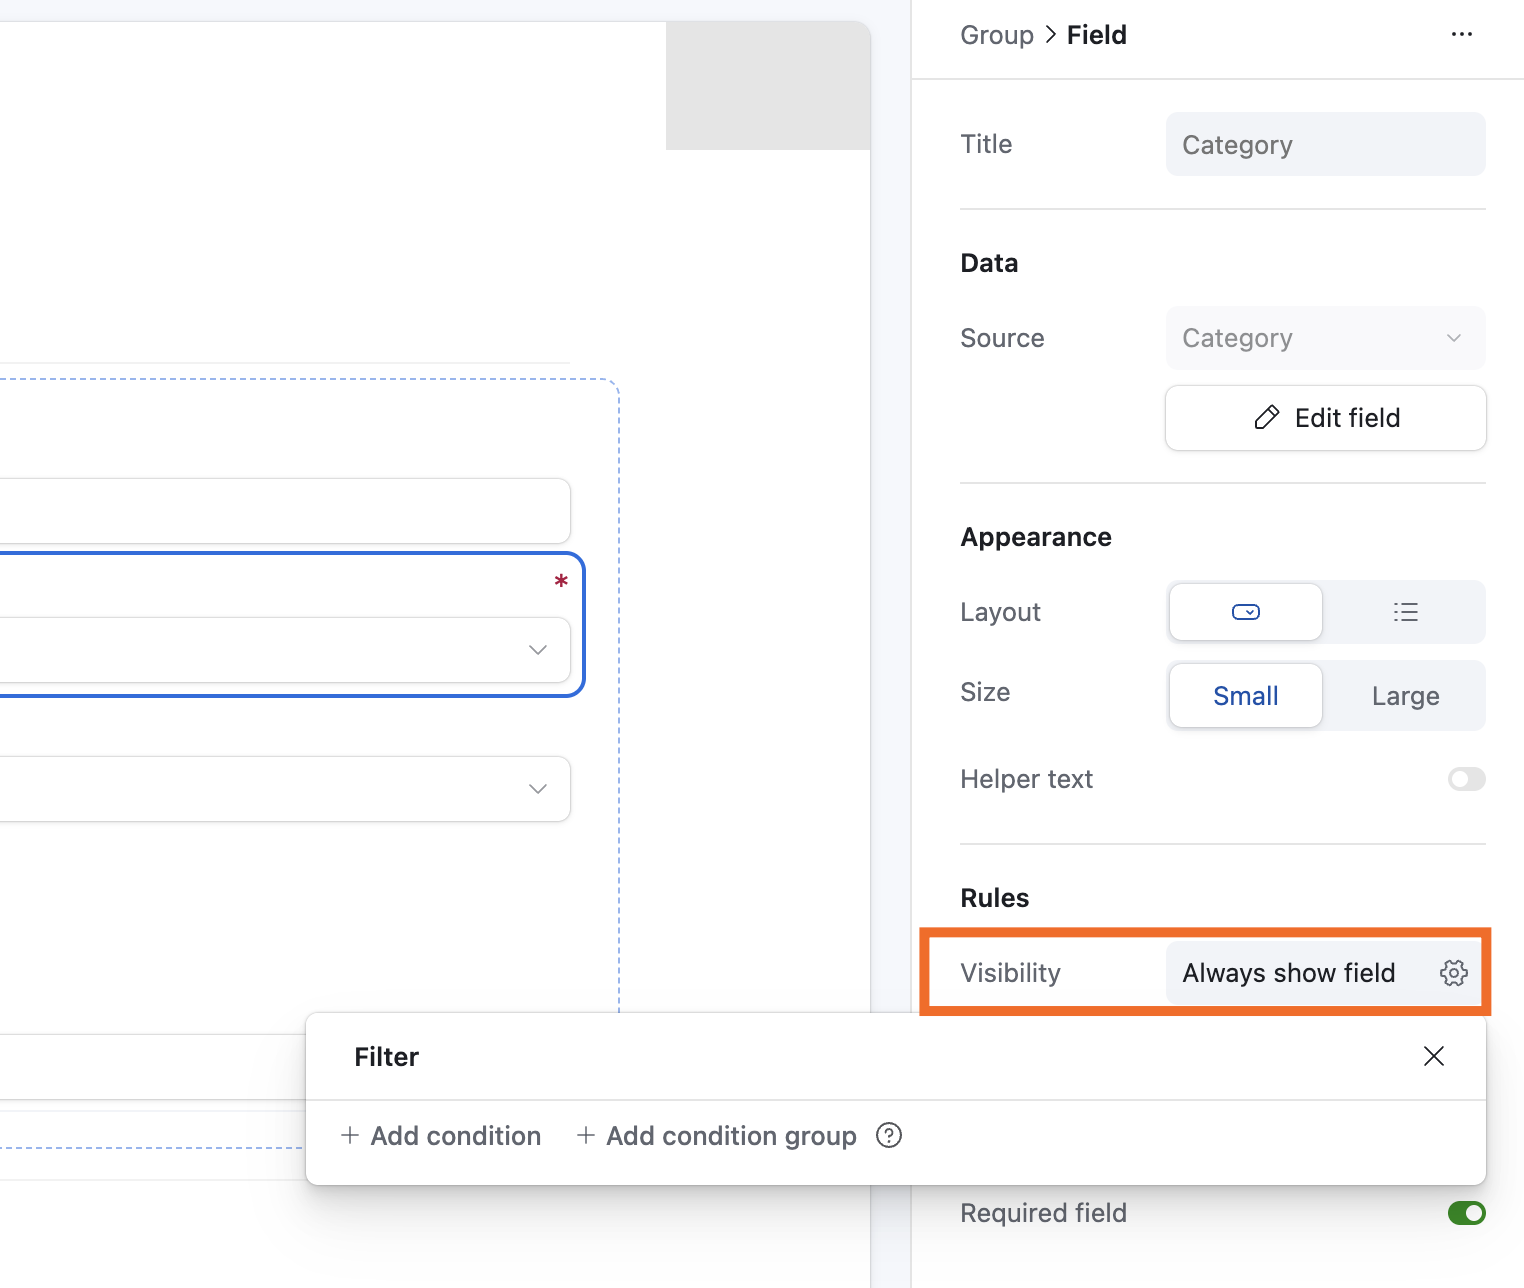
Set conditional form field visibility: Click the field you want to add conditional logic to. Under Rules, click the Visibility settings, and then set up your conditions.
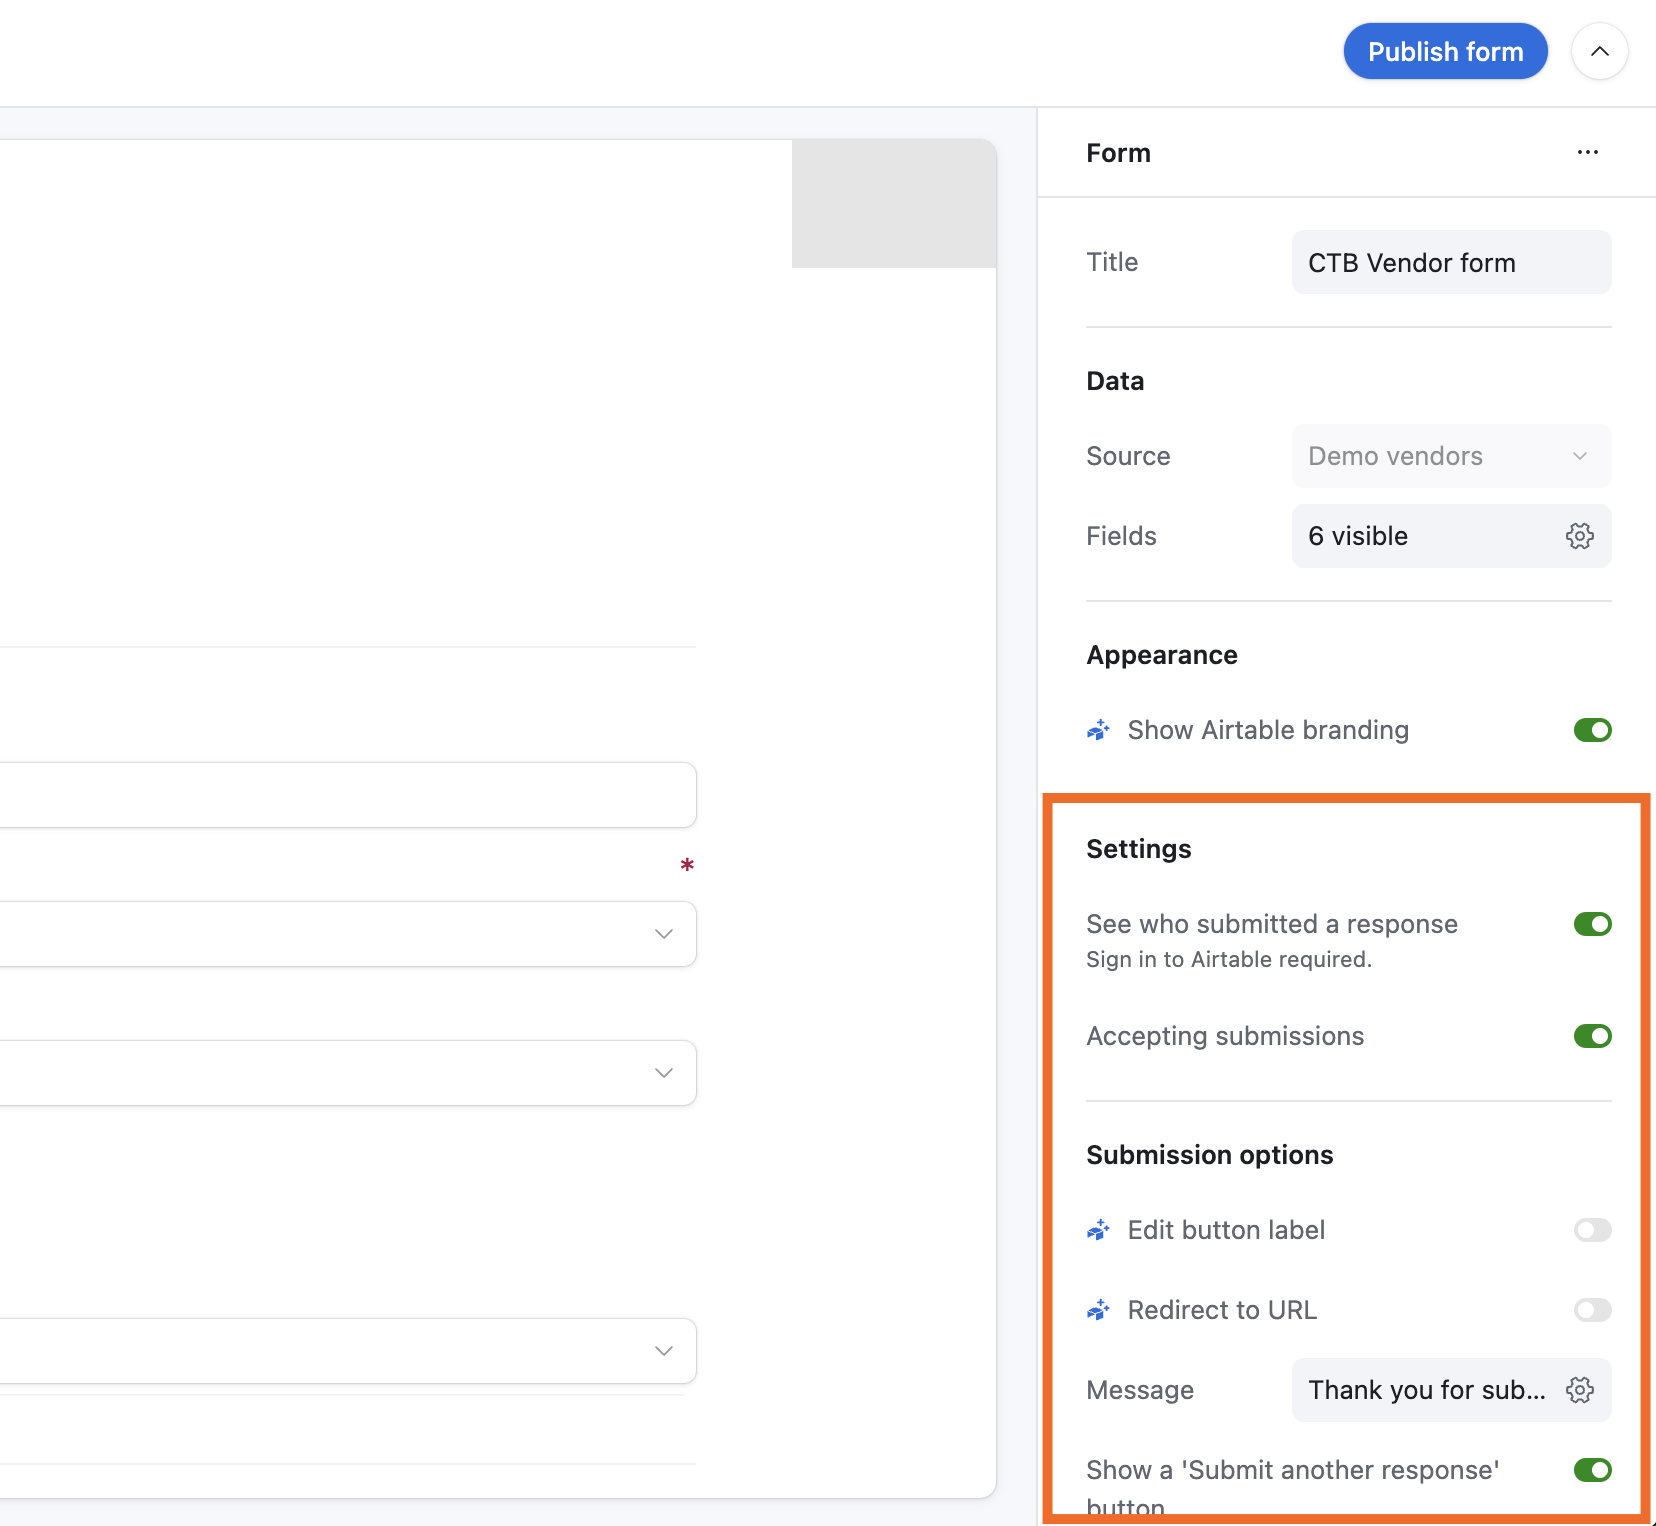
You can customize what happens after users submit your form in the Form side panel (if this isn't visible, click any blank area on your interface). You can do things like collect respondent information (under Settings) and set a post-form submission message (under Submission options).
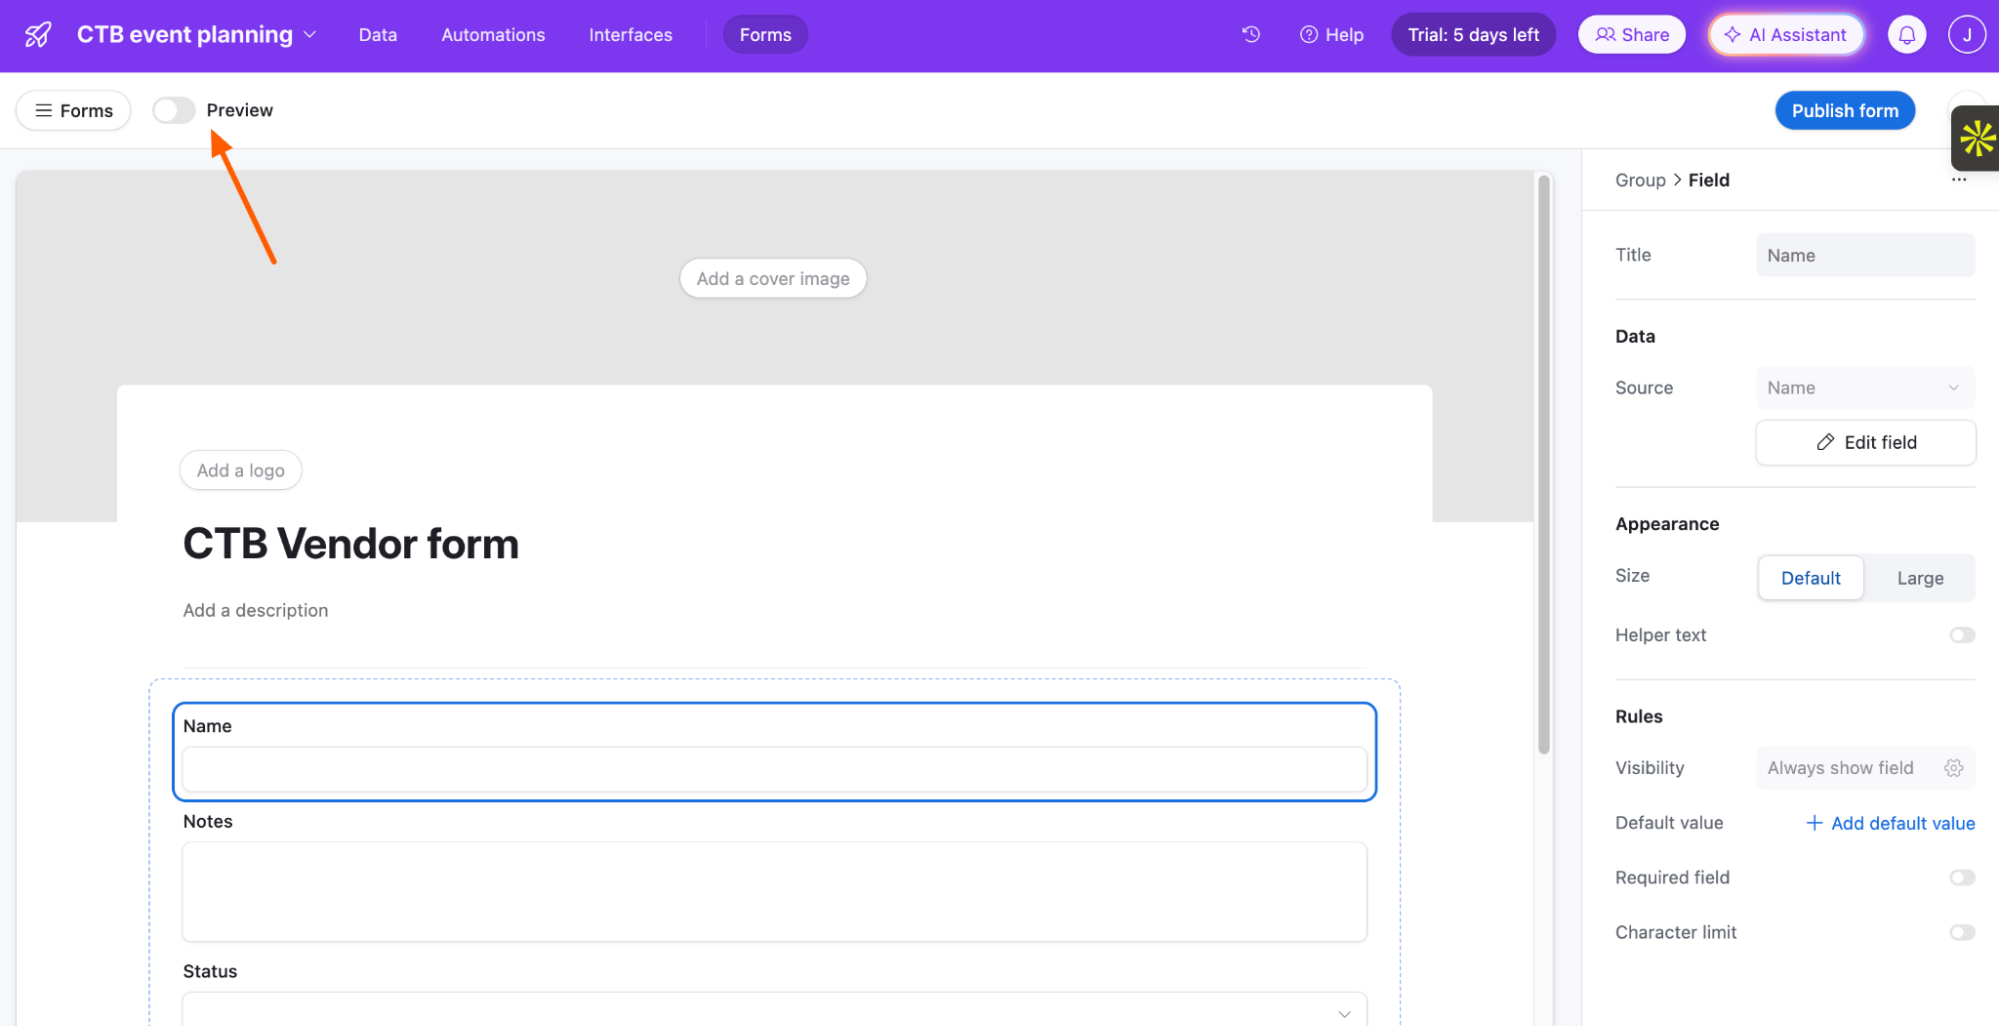
Click Preview (above the interface designer) to preview your form.
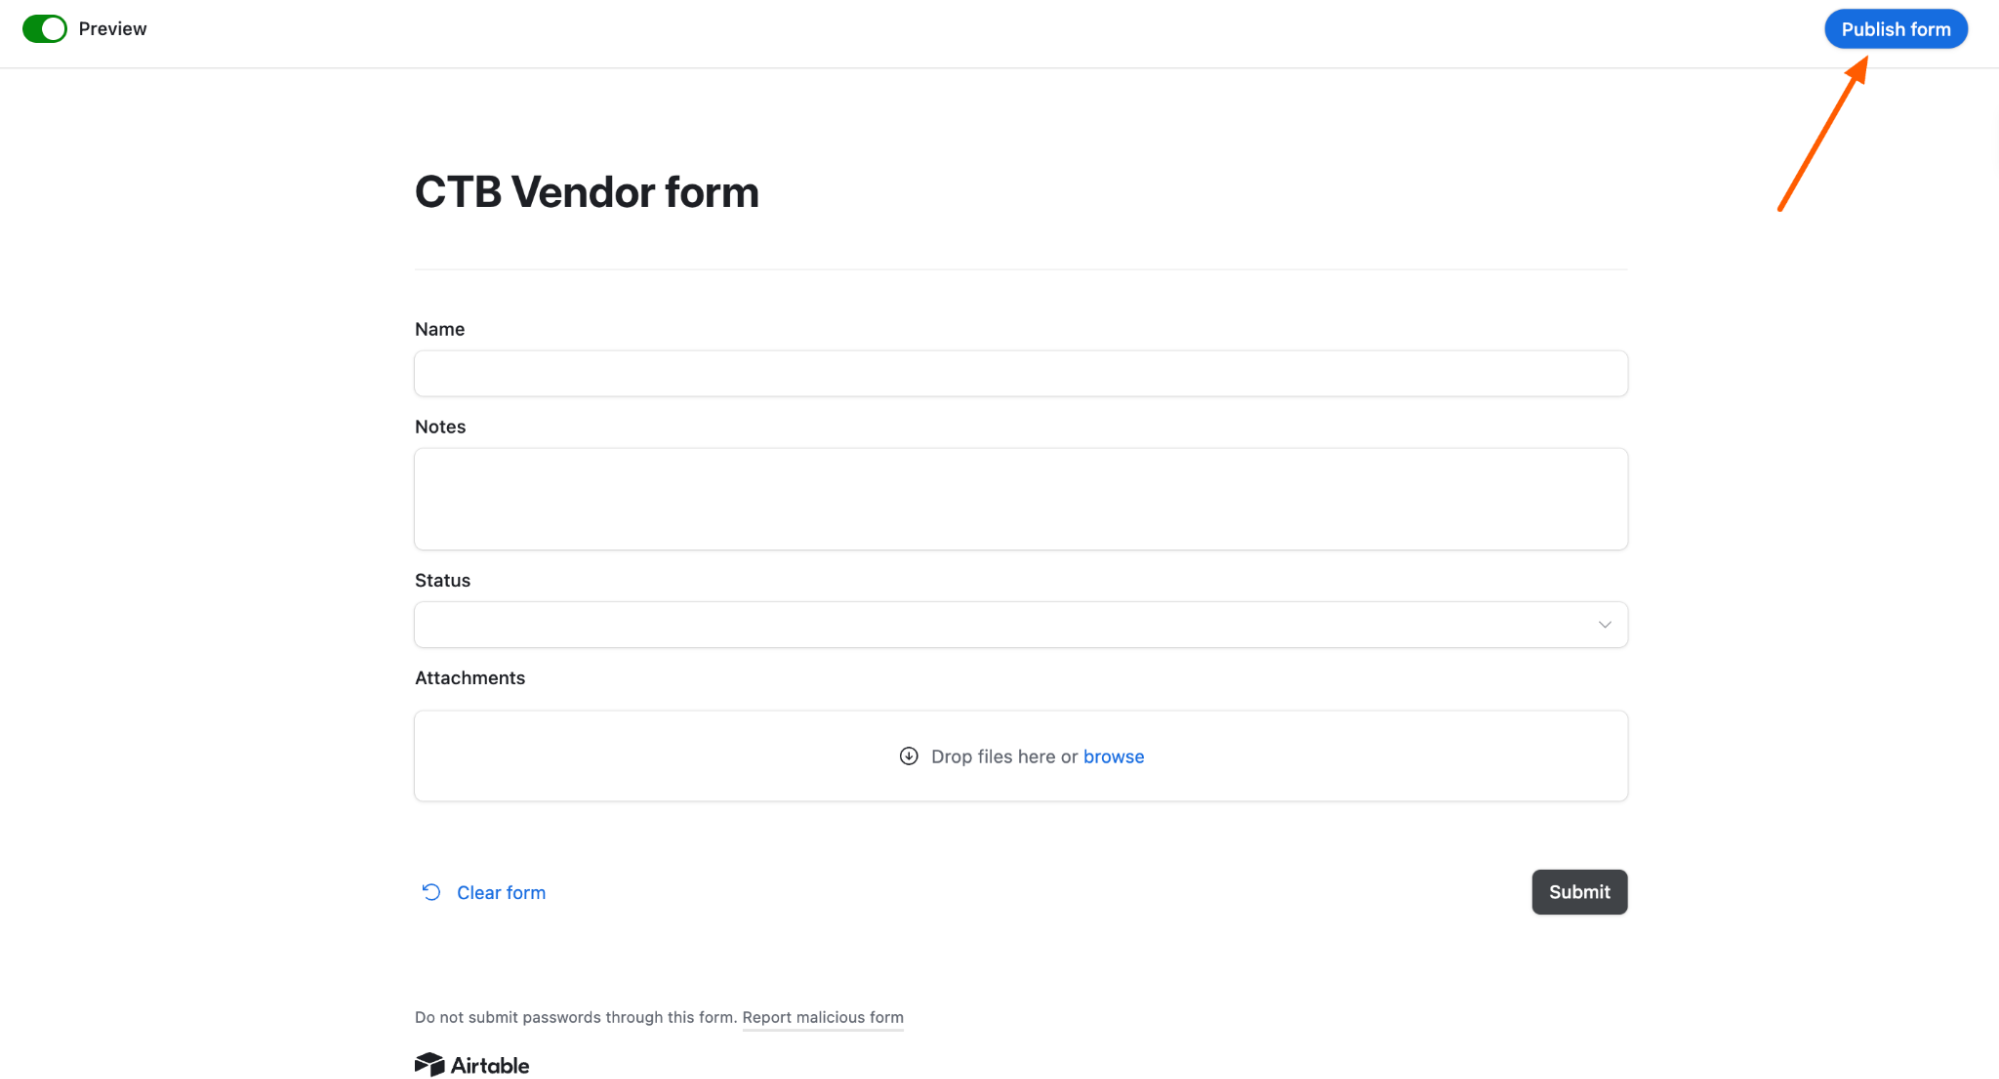
If everything looks good, click Publish form in the top-right corner.
Once the form is live, click Share (top-right corner), and choose how you want to share your form.


Automate Airtable forms
If you want to use your form data in other apps—like Salesforce, Zendesk, or Basecamp—Airtable offers 35+ native integrations that let you do just that. But to extend it further, use Zapier's Airtable integration. This way, you can connect it with thousands of other apps and automatically do things like get notified in Slack about new form submissions or send lead data from your Airtable form into your CRM.
Learn more about how to automate Airtable and create fully automated systems for your data, or get started with any of these templates.
Add subscribers to Mailchimp via new Airtable records
Import new contacts from Google Contacts into Airtable
Zapier is the most connected AI orchestration platform—integrating with thousands of apps from partners like Google, Salesforce, and Microsoft. Use interfaces, data tables, and logic to build secure, automated, AI-powered systems for your business-critical workflows across your organization's technology stack. Learn more.
Airtable forms: FAQs
If you're just getting started with Airtable forms, or you've clicked around and still aren't totally sure what the difference is between form view and Interfaces, here are answers to some of the most common questions.
What's the difference between the Airtable form view and Interfaces form?
Form view is the original method of building an Airtable form. It's quick to set up but offers limited customization. Interfaces, on the other hand, offers a more intuitive form-building experience with slightly more customization options.
Can you embed an Airtable form?
Yes—no matter which method you use to build your form, you'll be able to copy an HTML code to embed it on your site.
Who can create an Airtable form?
As long as you have editor, creator, or owner access to an Airtable base, you can turn it into a form. But if you're on a free plan, your customization and sharing options are more limited.
Related reading:


