
I'll be the first to admit that I get a kick out of manual data entry—it's when all my childhood years playing typing racer games really pays off. But when you need to copy heaps of data from one spreadsheet to another, the novelty of hitting keys fast and furious wears off pretty quickly.
That's where the IMPORTRANGE function comes in.
Here, I'll walk you through how to use IMPORTRANGE in Google Sheets, so you can automatically pull data from another spreadsheet and keep things consistent.
Here's the short version, but for a step-by-step guide with screenshots, keep scrolling.
Open the Google Sheet spreadsheet with the data you want to copy and the one you want to pull the data into.
Click the destination cell.
Enter
=IMPORTRANGEimmediately followed by("[the URL of your source sheet]","[sheet name]![data range]").Press Enter.
If this is your first time connecting the two spreadsheets, click Allow access.
The same data-linking method doesn't work in Excel, but there's another way. Learn how to pull data from another sheet in Excel.
Table of contents:
What is IMPORTRANGE in Google Sheets?
IMPORTRANGE is a function in Google Sheets that allows you to automatically copy data from one spreadsheet to another.
The syntax for IMPORTRANGE is =IMPORTRANGE(spreadsheet_url,range_string). Here's what each of those inputs mean:
IMPORTRANGE: This is the function.
spreadsheet_url: This is the URL of the source spreadsheet (the spreadsheet that you're pulling data from). When you enter the spreadsheet URL, it must be wrapped in quotation marks.
range_string: This is the cell range of the data you're importing. This must also be wrapped in quotation marks.
How to use IMPORTRANGE in Google Sheets
Here's the step-by-step version of how to use IMPORTRANGE in Google Sheets. To demonstrate, we're going to use the IMPORTRANGE function to transfer the data from cells A2 to C10 of the All students spreadsheet to the corresponding cells of the ABC101: Student roster spreadsheet.
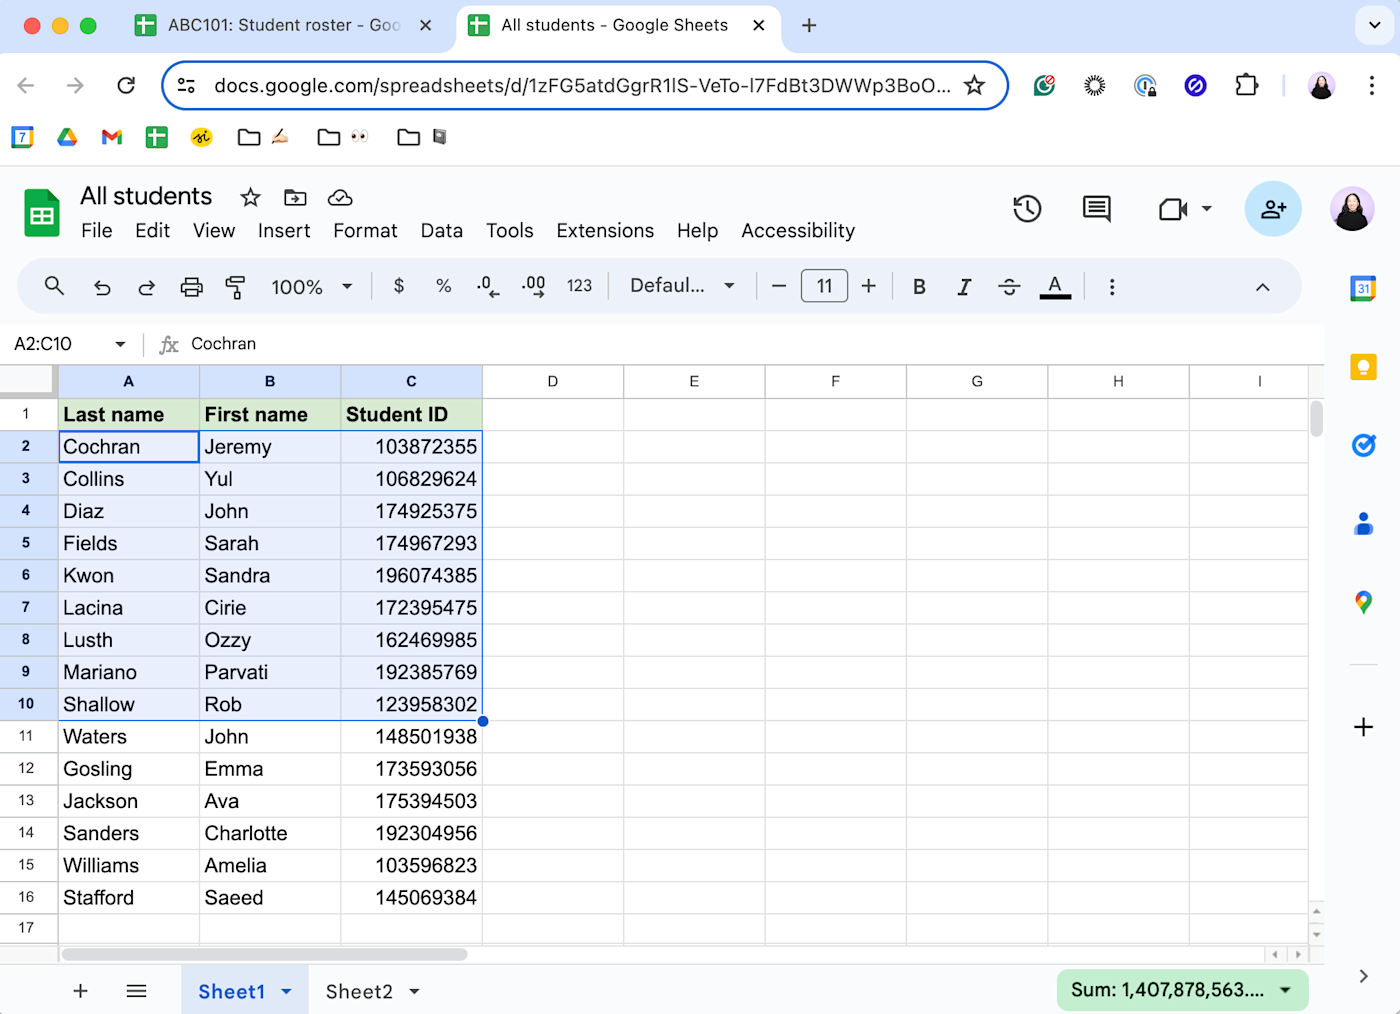
Open the Google Sheet spreadsheet with the data you want to copy. In this example, the source spreadsheet is All students.
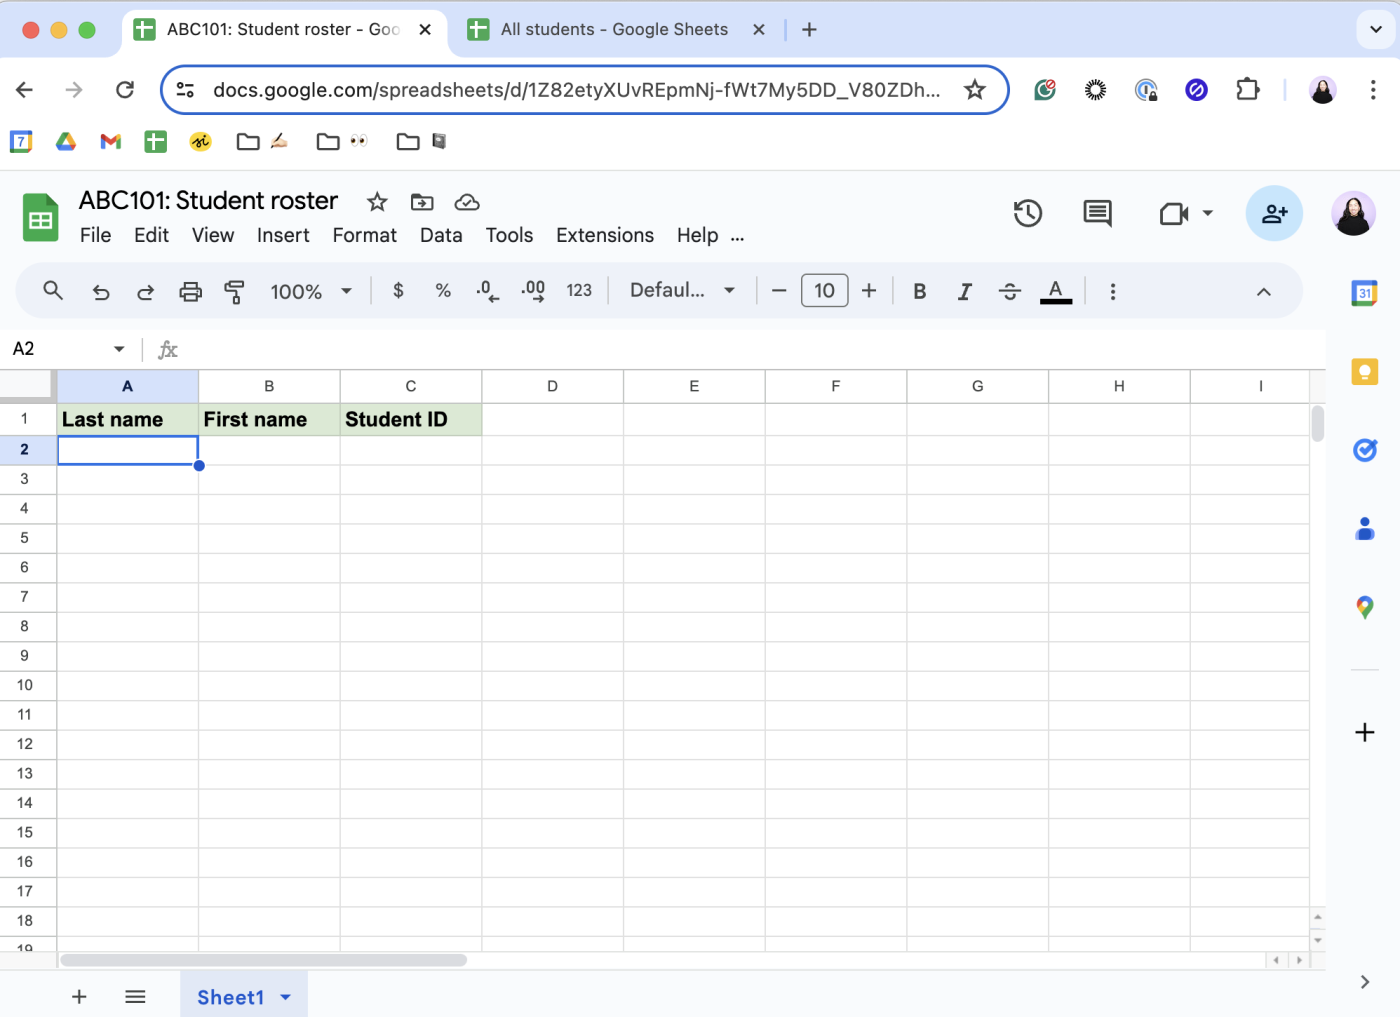
Open the spreadsheet that you want to pull the data into. In this example, the destination spreadsheet is ABC101: Student roster.
Copy the URL of your source spreadsheet—everything except for
edit#gid=0which automatically appears at the end of your URL.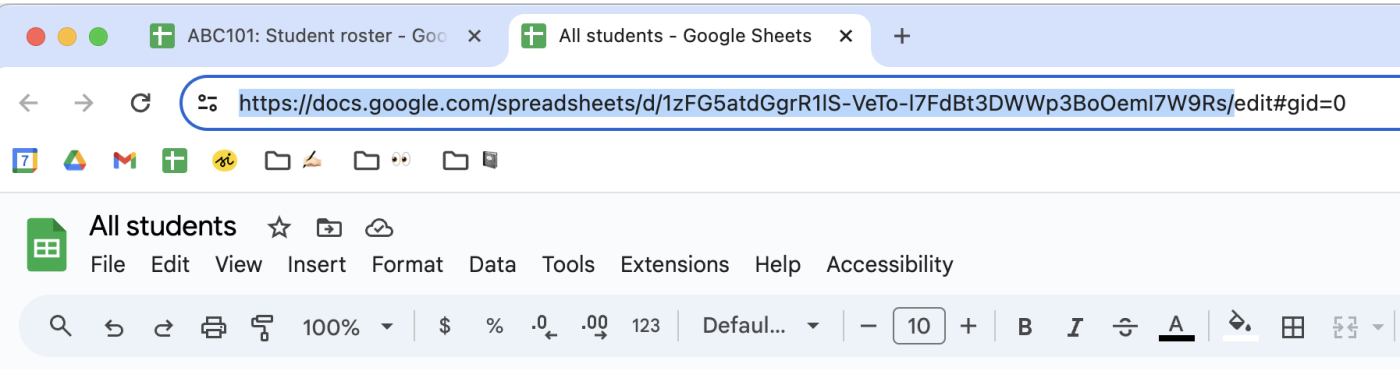
Click the destination cell (the cell where you want the imported range to start from). In this case, that's cell A2 of the ABC101: Student roster spreadsheet.
Enter
=IMPORTRANGEimmediately followed by("[the URL of your source sheet]","[sheet name]![data range]"). Here's what this would look like in our example:=IMPORTRANGE("https://docs.google.com/spreadsheets/d/1zFG5atdGgrR1lS-VeTo-l7FdBt3DWWp3BoOemI7W9Rs/","Sheet1!A2:C10")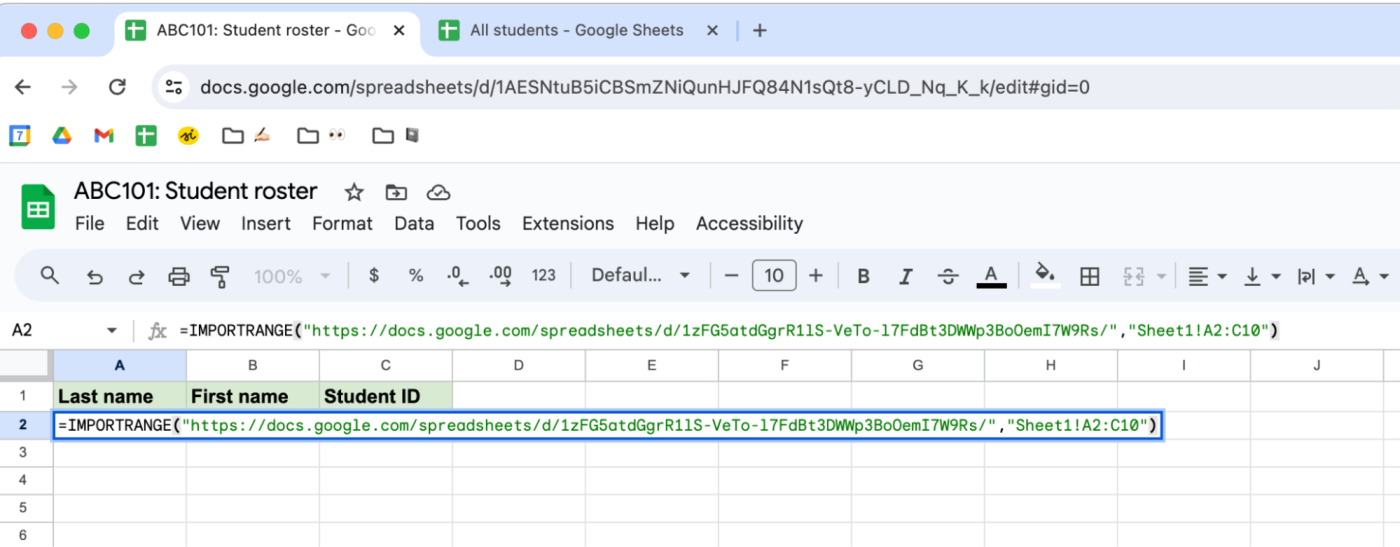
If your spreadsheet contains multiple sheets, it's crucial to specify which source sheet you want to pull data from. Otherwise, Google Sheets will automatically import data from the first sheet.
Press Enter.
The first time you try connecting data across spreadsheets, you'll get an error message:
#REF!. This is normal. Click Allow access to give your destination spreadsheet permission to access your source spreadsheet.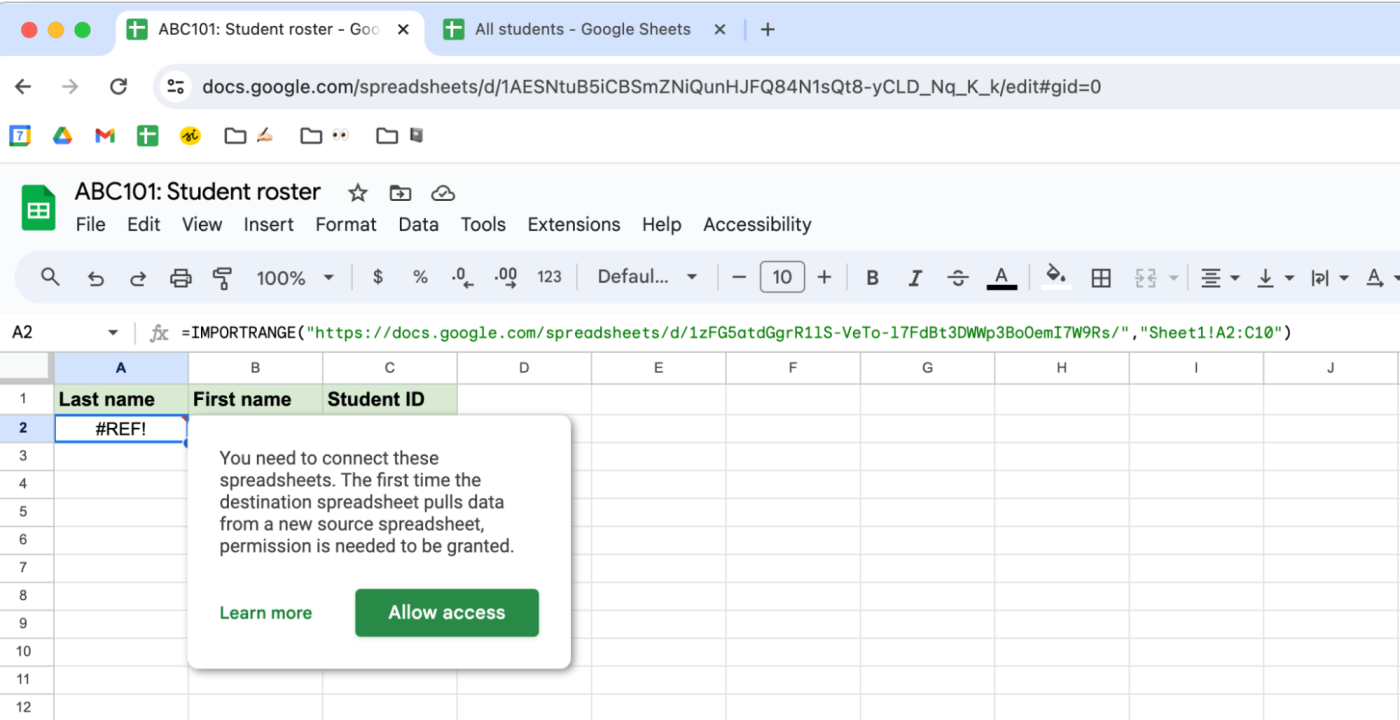
That's it. Google Sheets will import the specified data range into your destination spreadsheet. Any updates made to the source cell range will also automatically appear in the destination spreadsheet.
Automate Google Sheets
Need to import data from somewhere other than another Google Sheet? Use Zapier's Google Sheets integration to automatically add data from (or to) other apps, like Gmail, Typeform, or Shopify—no manual data entry or formulas required. Learn more about how to automate Google Sheets, or get started with one of these pre-built templates.
More details
To get started with a Zap template—what we call our pre-made workflows—just click on the button. It only takes a few minutes to set up. You can read more about setting up Zaps here.
Related reading