Great news! You've kicked off a Google Ads campaign and the leads are rolling into your lead gen form. But all that data is worthless unless you do something with it.
Tracking your Google Ads data in a spreadsheet provides a structured, organized, and easily accessible snapshot of your campaign's performance. It lets you quickly identify trends, measure efficiency, and make data-driven decisions that can greatly improve your campaign's effectiveness. But manually copying and pasting lead data just doesn't scale as your campaigns grow.
Here's how you can use Zapier's automated workflows—we call them Zaps—to automatically track your Google Ads leads in Google Sheets.
New to Zapier? It's workflow automation software that lets you focus on what matters. Combine user interfaces, data tables, and logic with thousands of apps to build and automate anything you can imagine. Sign up for free.
Before you begin
First, make sure your Google Ads campaign is set up and that you've selected Lead Gen as a campaign goal. Next, create a lead form that includes fields for collecting lead names, emails, and any other details you need, like the campaign name and ID.
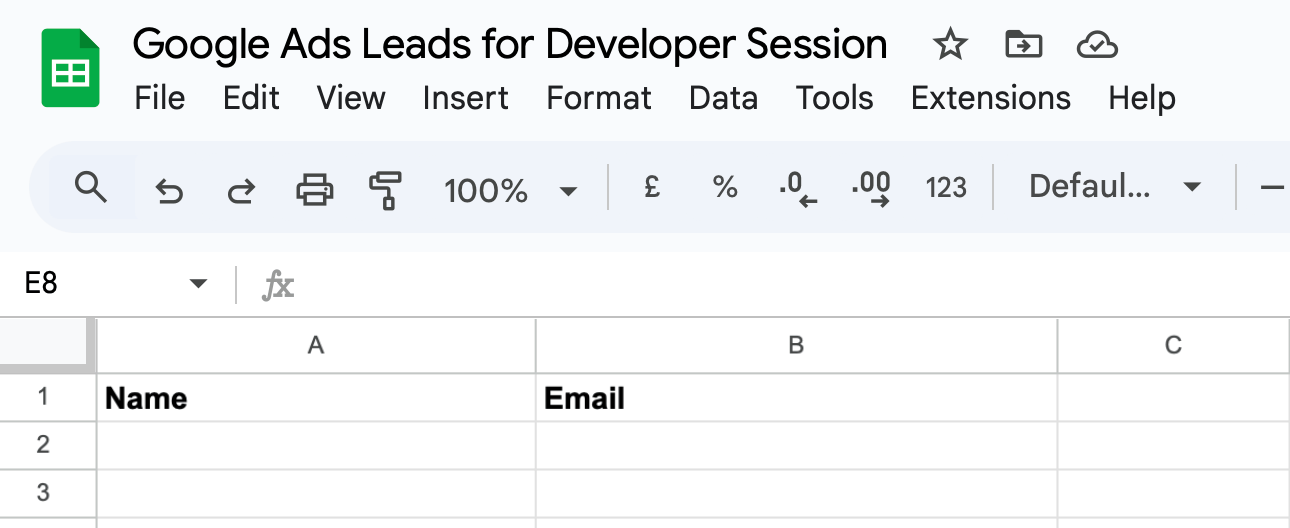
In Google Sheets, create a new spreadsheet with a heading row that includes columns for each of your lead form fields. We kept things simple with just Name and Email.
How to create Google Sheets rows for new Google Ads leads
Zapier lets you create automated workflows called Zaps, which send your information from one app to another. You can create your own Zap from scratch without any coding knowledge, but we also offer quick templates to get you started.
If you'd like to start with a template, click on the Zap template to go to the Zap editor. You'll need to create a Zapier account if you don't already have one. Then, follow the directions below to set up your Zap.
Set up your Google Ads trigger
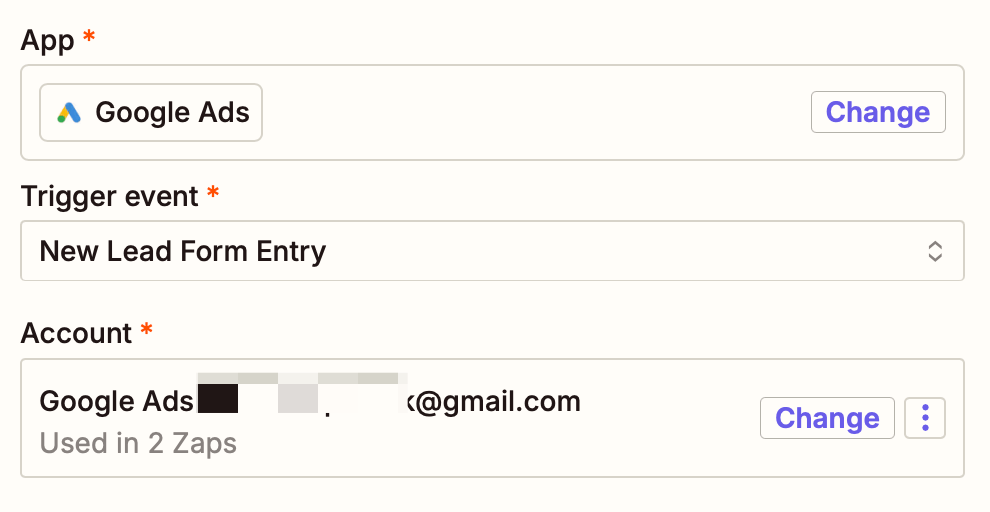
First, set up your trigger step—the event that starts your Zap. Search for and select Google Ads for your trigger app and New Lead Form Entry for your trigger event. If you're using the Zap template, these will be selected for you. Next, sign in with your Google Ads account, if you haven't already, then click Continue.
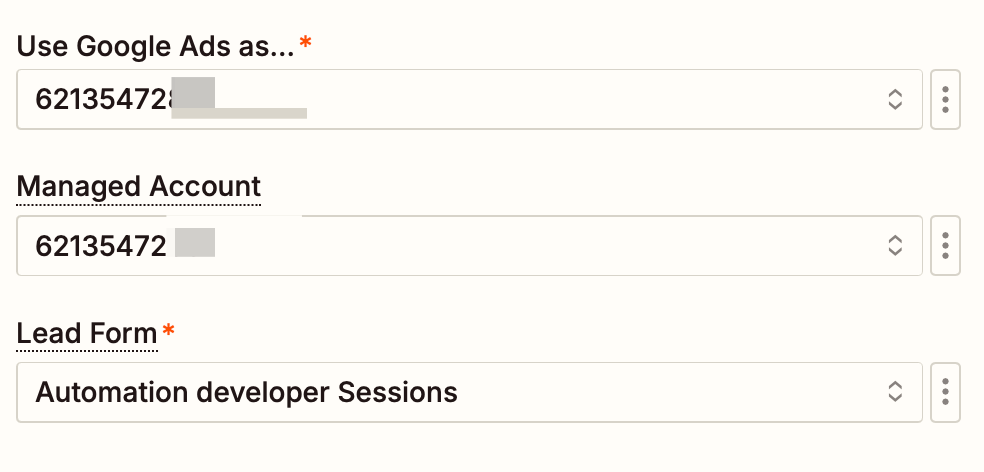
Now, it's time to customize your trigger step. First, choose your Google Ads ID from the Use Google Ads as dropdown, and do the same for your Managed Account. It will be the same ID if you're working with your own account, but it might differ if you're organizing a campaign for a client account.
Next, choose the Lead Form where you'll be collecting the data from the Google Ads campaign. Then, click Continue.
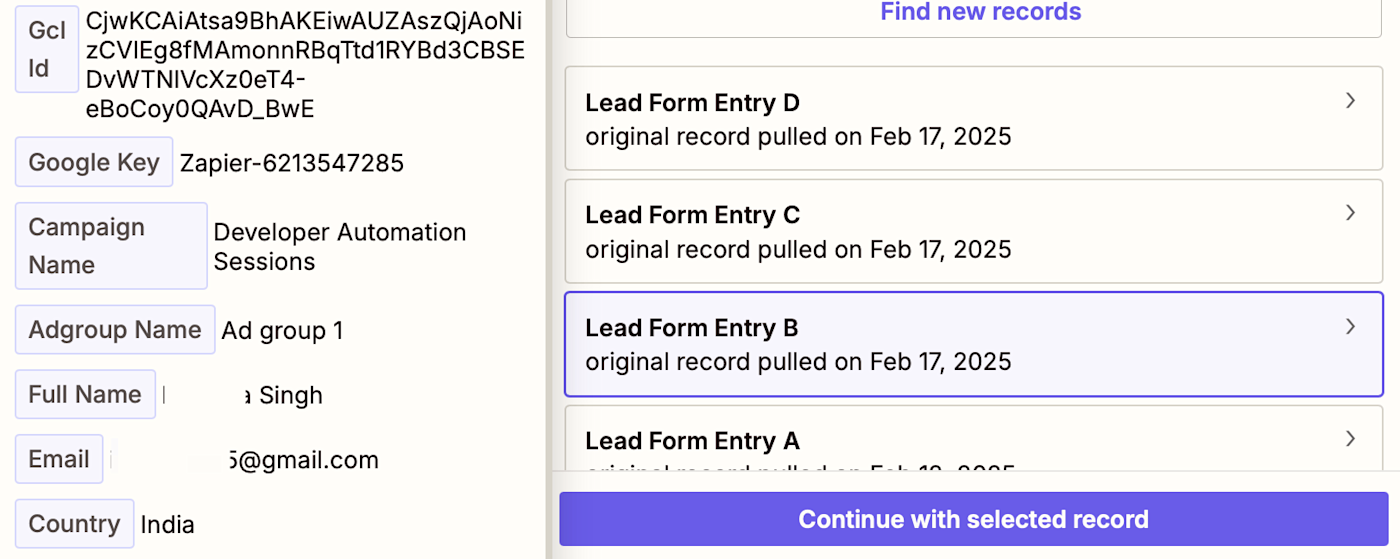
Next, click Test Trigger to test your trigger step. If you already have results from your Google Ads lead form, Zapier will pull in sample data from your campaign to use when setting up your action step. If you don't have your own results, Zapier will generate sample test data for you.
Select the sample data you'd like to use, then click Continue with selected record.
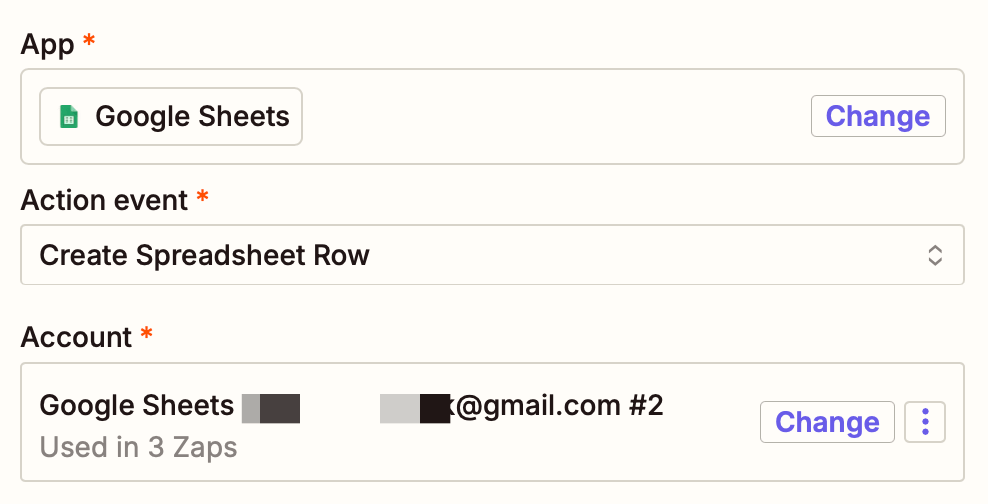
Set up your Google Sheets action
Next, we'll customize the action, the event your Zap performs after it's triggered.
Select Google Sheets for the action app and Create Spreadsheet Row for the action event—these will be selected for you if you're using the Zap template. Then, connect your Google Sheets account, if you haven't already, and click Continue.
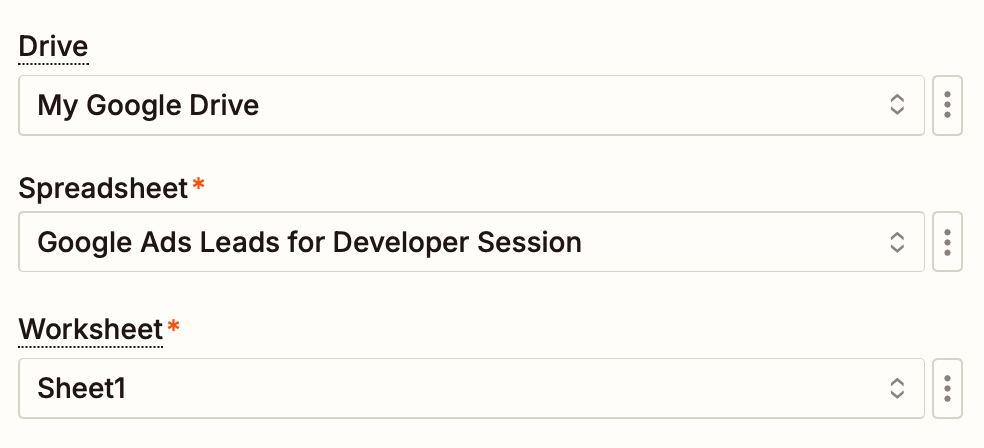
Now, the fun part—customizing your Google Sheets action. Select the drive where your spreadsheet lives in the Drive field, the spreadsheet where you want to track your leads data in the Spreadsheet field, and the right worksheet in the Worksheet field.
Once you've selected your worksheet, Zapier will add fields that correspond to the header columns you created in your spreadsheet so you can map data from your Google Ads trigger to the right fields.
In our example, we've only added columns for Name and Email, so we'll only see those fields. Your fields will differ based on the data you're trying to collect.
Now, let's map our data coming in from Google Ads to the right Google Sheets fields. Click the + button in any field to see the available data from your trigger step. Here we're going to select the Full Name data from Google Ads in the Name field of our Google Sheet.
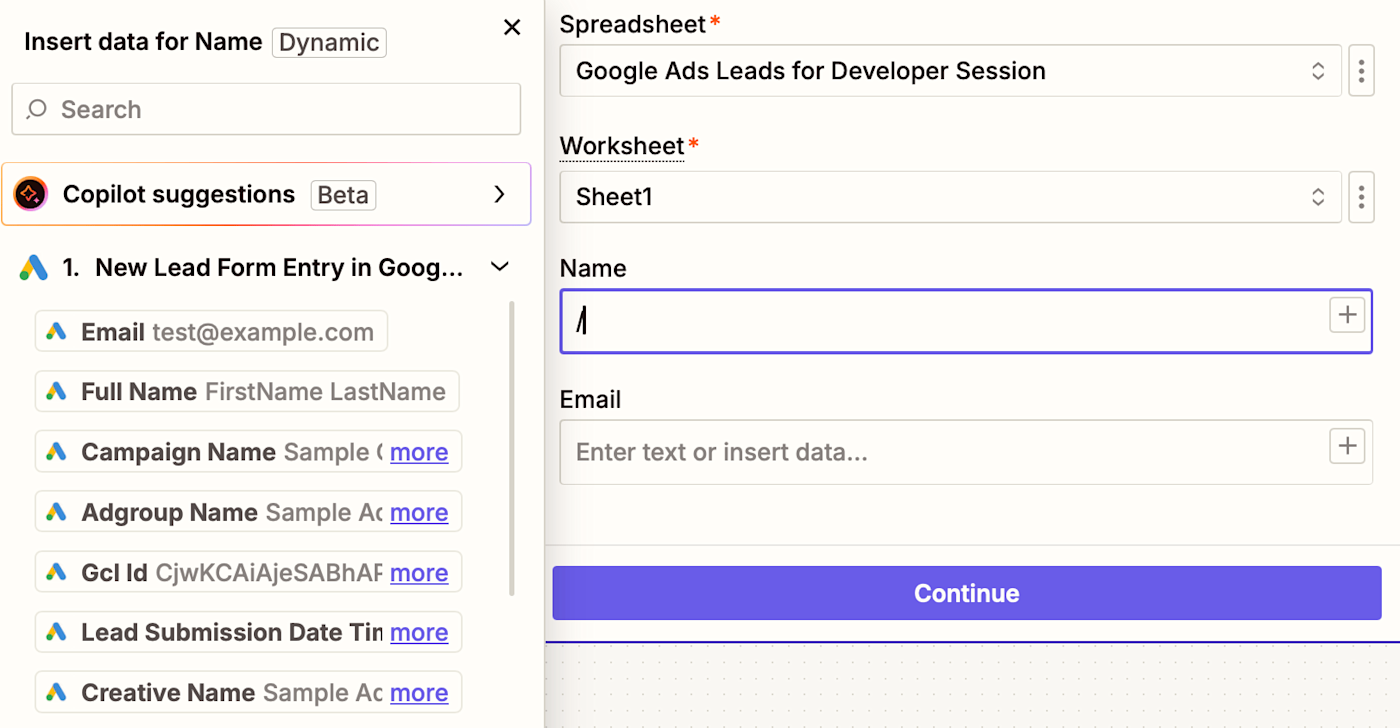
Map the rest of your fields, then click Continue.
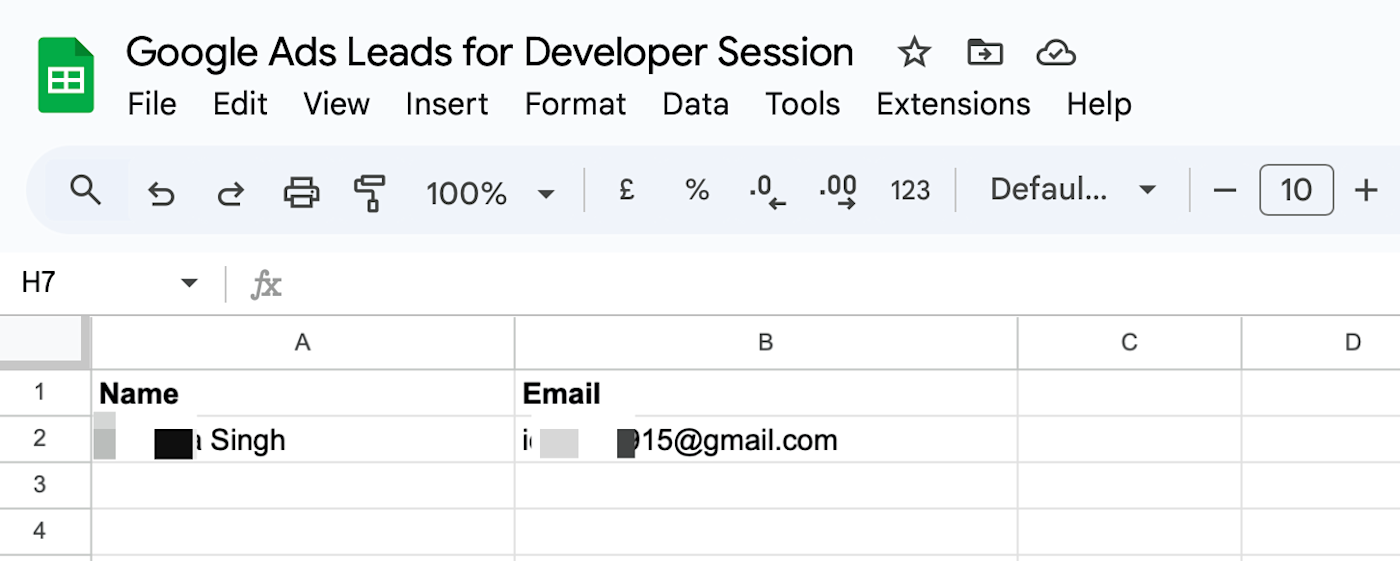
Now, click Test step to run your Zap. To make sure everything worked just right, open your Google Sheets spreadsheet to see if your Google Ads info is in the right spot. Here's what it looked like for our test data:
If everything looks right, you're ready to use your Zap. Now every time a prospect fills out your lead generation form, that data will show up in your Google Sheet automatically.