Your business platforms receive countless visitors over time. Prospects might visit your website, click through a social media ad, or reach out to you with a pricing-related question via email. But handling those queries (including passing those contact details to your sales team) can drain your team's resources.
Instead, you should think about building your own AI-powered chatbot with Zapier Chatbots. With your own data sources as a reference, it can answer questions on your behalf, collect contact details, and even qualify prospects before they reach your sales team.
Jump ahead
Set up your chatbot to greet leads
To start building your lead-generation chatbot, follow these steps:
Go the the chatbot template.
Click Use template.
This will open up your chatbot in the backend, where you can finish setting it up.
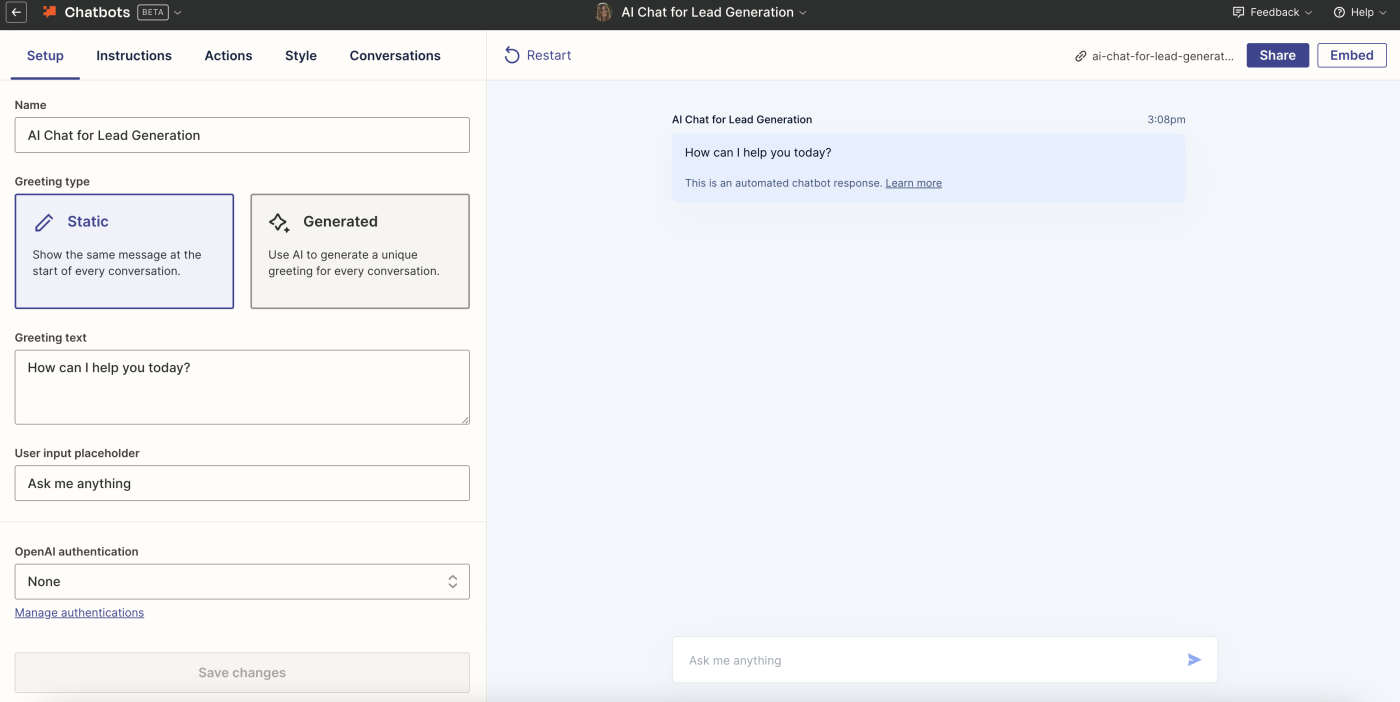
You'll see that the panel on the left is where you can set up your chatbot with the basics. The panel on the right is what your bot will look like once it's ready.
Under Name, edit or change your bot's name to something specific to your company.
Under Greeting type, click Static (for the chatbot's greeting to stay the same) or Generated (AI will create a new message every time it's opened).
Under User input placeholder, add any text that will show in the message box for leads to ask questions.
Next, set up your OpenAI authentication and follow the instructions for connecting your account. You can select GPT-3.5, or GPT-4 or GPT-4o if you have access.
Click Save changes once you're done.
Watch the video below to get more details on authenticating your OpenAI account:
Give your chatbot role-specific instructions
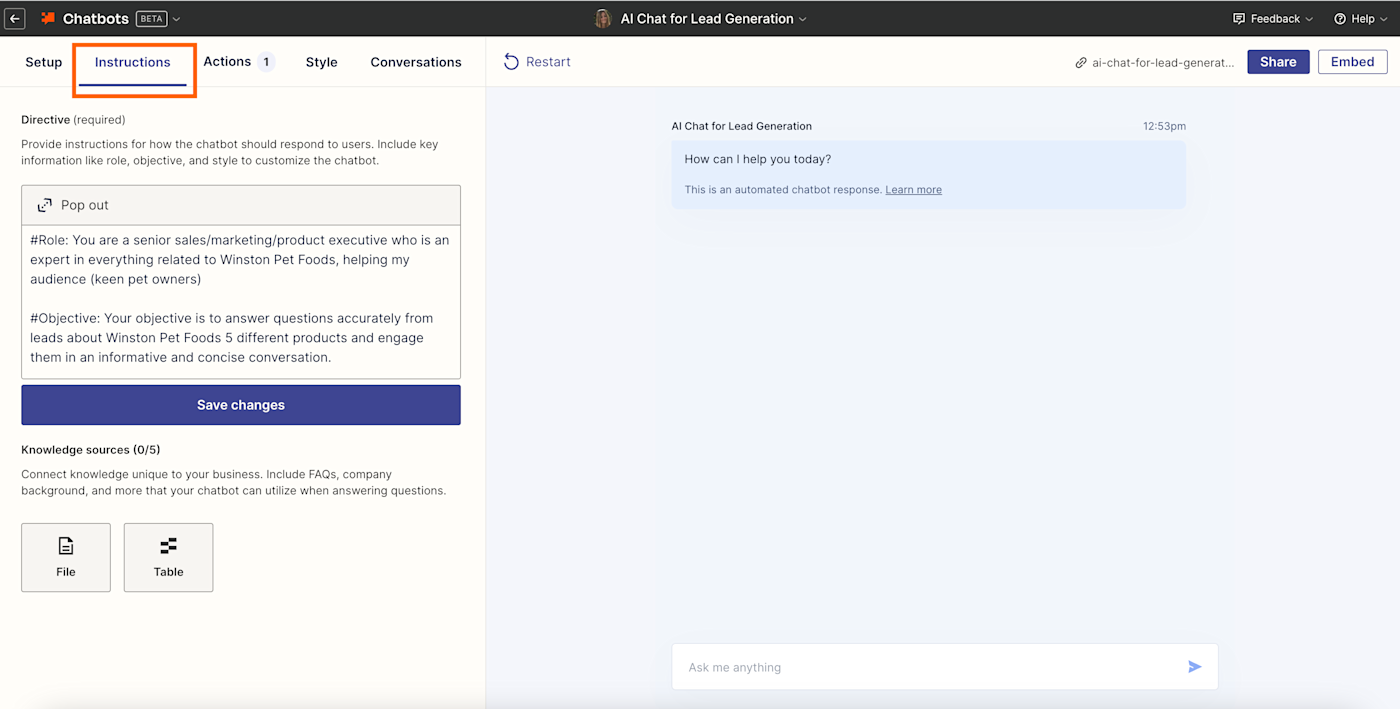
Next up, you'll want to give your chatbot instructions. Also known as a "directive," it's the prompt you give ChatGPT so it knows exactly how to respond to any leads that interact with it. It's important to remember that the more detailed and clear your instructions are, the better the chatbot will respond.
Because you're using our chatbot template, you'll see that Zapier has included placeholder instructions. Some of these are already filled in for you, but others need to be filled in and personalized by you. These include things like the chatbot's objective (you can add information about your own product), context (include your product's history or background), and audience (add your ideal customer profile).
To set up your own instructions, follow these steps:
Click the Instructions tab in the top-left corner of your screen.
Click the pop-out icon in the top-left corner to expand the box and tweak your instructions.
Once you've finished customizing your directive, click Done to exit the pop-out window, and remember to click Save changes.
Add product knowledge to your chatbot
To talk about your company's products with any degree of knowledge, your chatbot needs to draw that information from somewhere. (And the instructions alone won't cut it.)
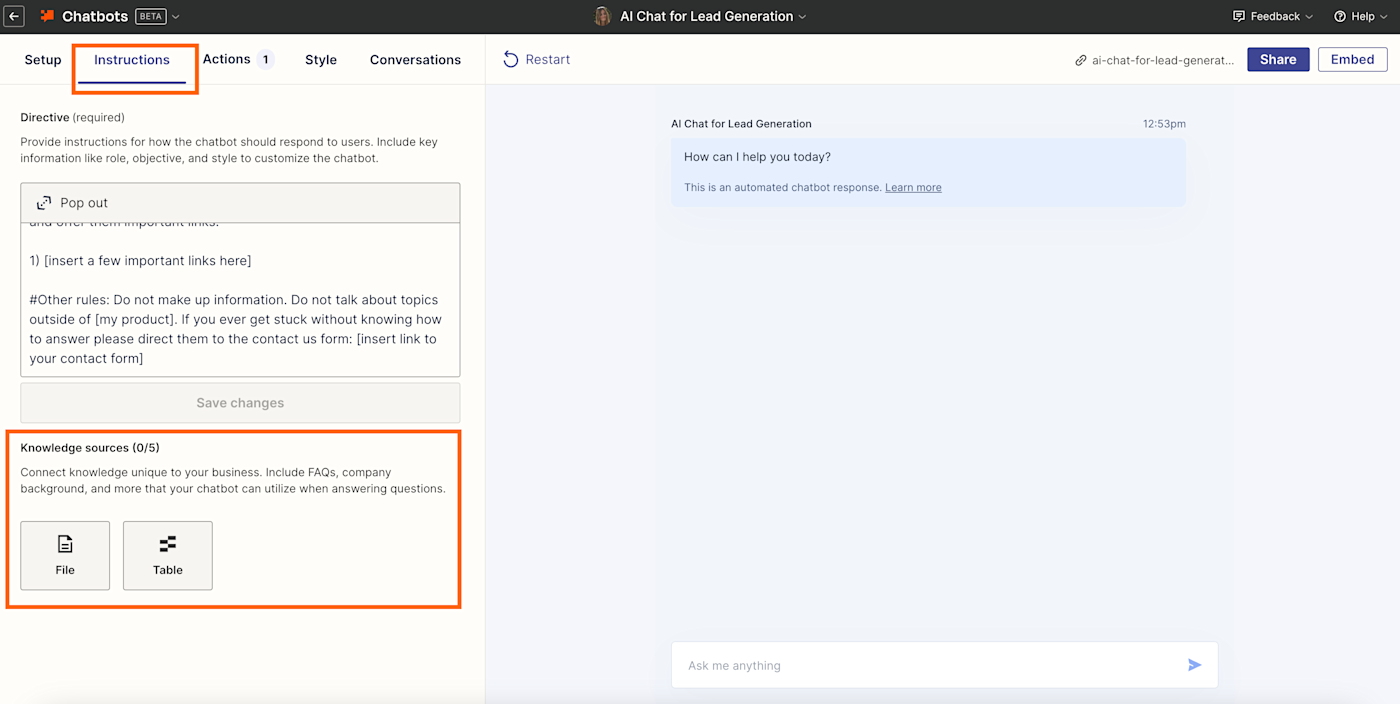
This is where the knowledge source comes in. You can upload up to five personal or internal company files (or Zapier tables) to your chatbot so it only generates answers from those specific sources or databases. That means you can upload files like product specifications, user manuals, marketing materials, sales data, and customer feedback surveys to ensure your chatbot has a comprehensive understanding of your products and services.
To add your knowledge sources, follow these steps:
Click the Instructions tab in the top-left corner of your screen.
Select File or Table.
Click Browse files for files or Select Table for a table.
Give your file a description, then click Add source.
Collect contact details through chat
It's one thing to have a chatbot that can assist your leads at scale—that's already a win for your team. But capturing their contact information at the same time is even more valuable.
Not only does it give your chatbot a personalized touch (as it will address each lead by their name), but it's an easy way to collect that info and share with your sales team. That includes the prospect's name, email address, phone number, and company name.
You can choose at what point in the conversation your chatbot requests that information, too. Options include at the beginning, after a few messages have been exchanged, or when certain keywords (like schedule appointment) are used.
Wondering where those contact details are saved? Zapier will automatically create a new table for you, including the info fields you choose to collect. (You can also create Zaps with your new table to automate lead nurture.)
To collect leads, follow these steps:
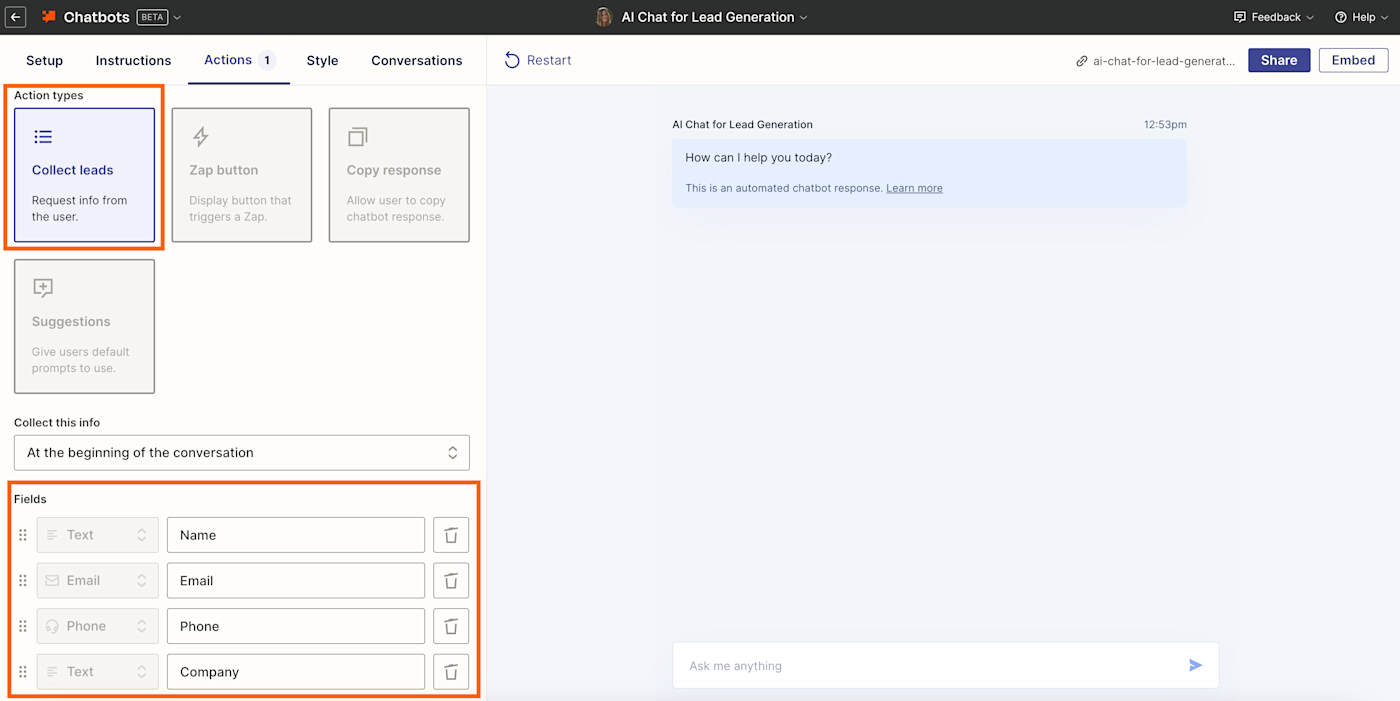
Click the Actions tab in the top-left corner of your screen.
Select Collect leads.
Choose when to collect your leads.
Select which fields you want to include in your chatbot (name, email, phone, or company).
Click Create action to save it.
Embed your chatbot on your site
Now that you've built your chatbot, you'll want to put it somewhere. The most logical place will be your website, as that's where your leads will land looking for more information.
You can either embed your chatbot directly into a web page or as a pop up, which lets you overlay the chatbot and fix it to the bottom-right of a webpage.
Once folks start using your chatbot, you can see their full conversation history in your Zapier account. That way, you can refer back to conversations to analyze data, spot trends, or qualify promising leads.
To embed your chatbot, follow these steps:
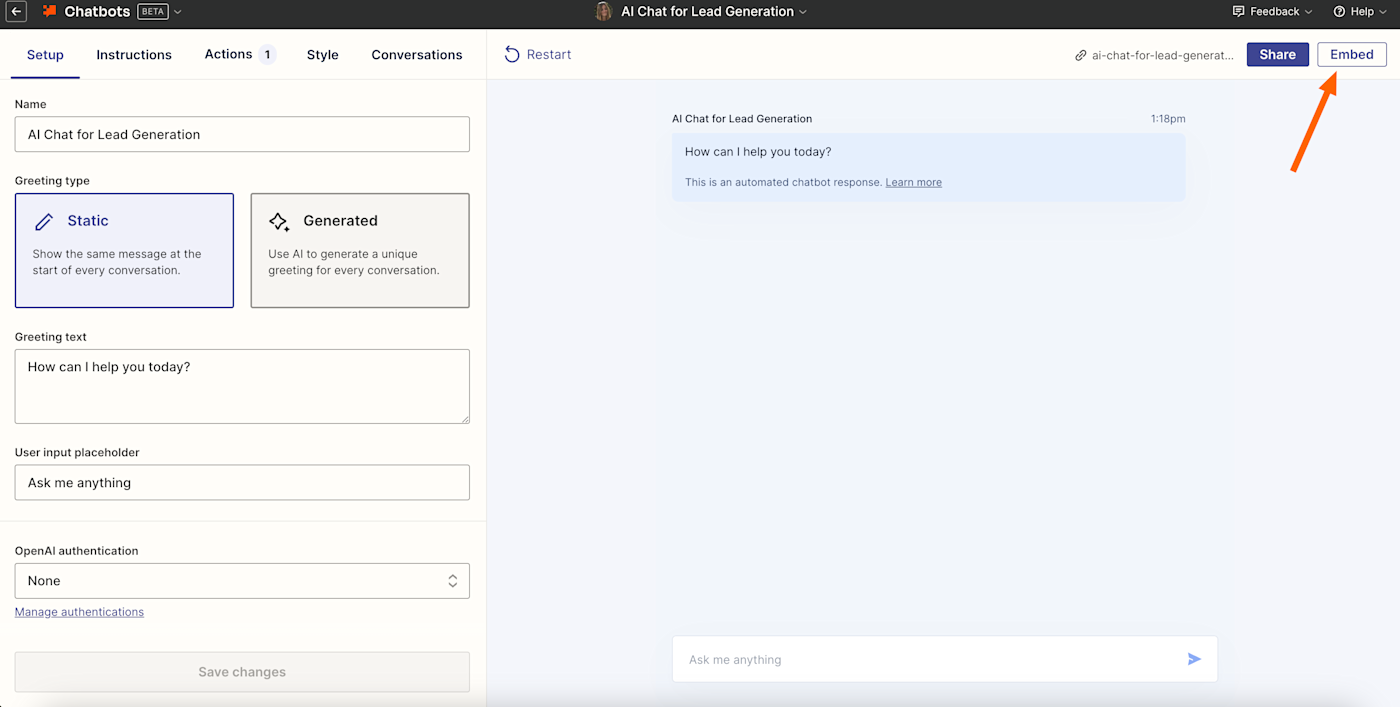
Click Embed in the top-right hand of your screen.
Select Standard to embed the chatbot as part of a page or Pop up to embed the chatbot as a widget.
If you select Standard, you can copy the code snippet type (Script or iframe). If you select Pop ups, they can only be used with Script.
Click </> Copy embed to copy the code to your clipboard, then follow your own site's instructions to embed the snippet.
Note: For more information on building an AI chatbot from scratch, check out this step-by-step guide we put together for you.
Start automating your lead collection with chatbots
With Zapier, you can create your own custom chatbot in a matter of minutes, helping you streamline the way you collect—and follow up with—leads.
Whether you need to support leads at scale with their questions or qualify leads faster, Zapier Chatbots can do the heavy lifting. Start experimenting today.
