QuickBooks Online has made it easy and accessible for businesses of any size to send and track professional invoices to clients.
Creating each invoice, though—even if it's from a template—isn't the best use of resources. You and your team likely have more important work. Plus, if it slips your mind, you run the risk of not getting paid on time. Streamline the process of creating and sending invoices by adding automation to the mix.
We'll walk through how to set up a Zap—what we call our automated workflows—that takes orders from apps like Shopify or Stripe and automatically turn them into invoices in QuickBooks Online.
Here are the steps involved:
Make sure QuickBooks Online is properly configured.
Connect the app that your sales come from and customize your trigger.
Connect your QuickBooks Online account and customize the "Find Customer" action.
Customize the "Create Invoice" action.
Optional: If you're creating an invoice with multiple items, add a "Find Product(s)" action to the Zap.
Test your Zap and turn it on.
You'll need to set up a Zapier account if you haven't already. Because QuickBooks Online is a Premium app, you'll also want to upgrade to a paid Zapier plan to use these Zaps long-term. Want to try it out before upgrading? New accounts get a free 14-day trial!
Before you start
Log in to QuickBooks Online and confirm there's at least one "Product" or "Service" in the Sales tab. To make things easier for you down the road, we recommend your products have the same names in all the apps you use, if possible.
We'll be using Shopify to get information about new orders, but the steps will work with most of the eCommerce or payment processing apps that integrate with Zapier.
Setting up the trigger
For this example, we've used the Shopify "New Order" trigger.
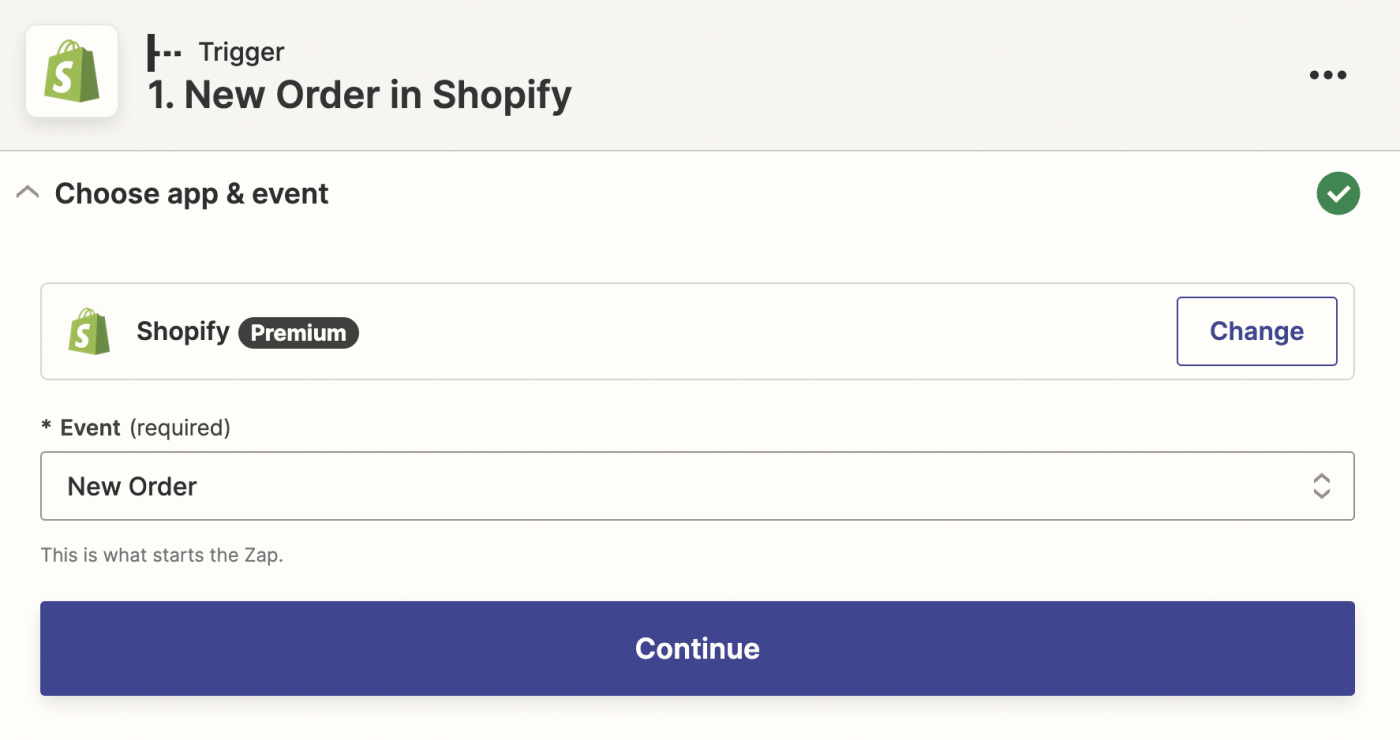
These steps will work for most of the apps that integrate with Zapier, so long as they provide information about your products. To make sure we're getting that information, remember to select Test trigger, and review the sample data it provides.
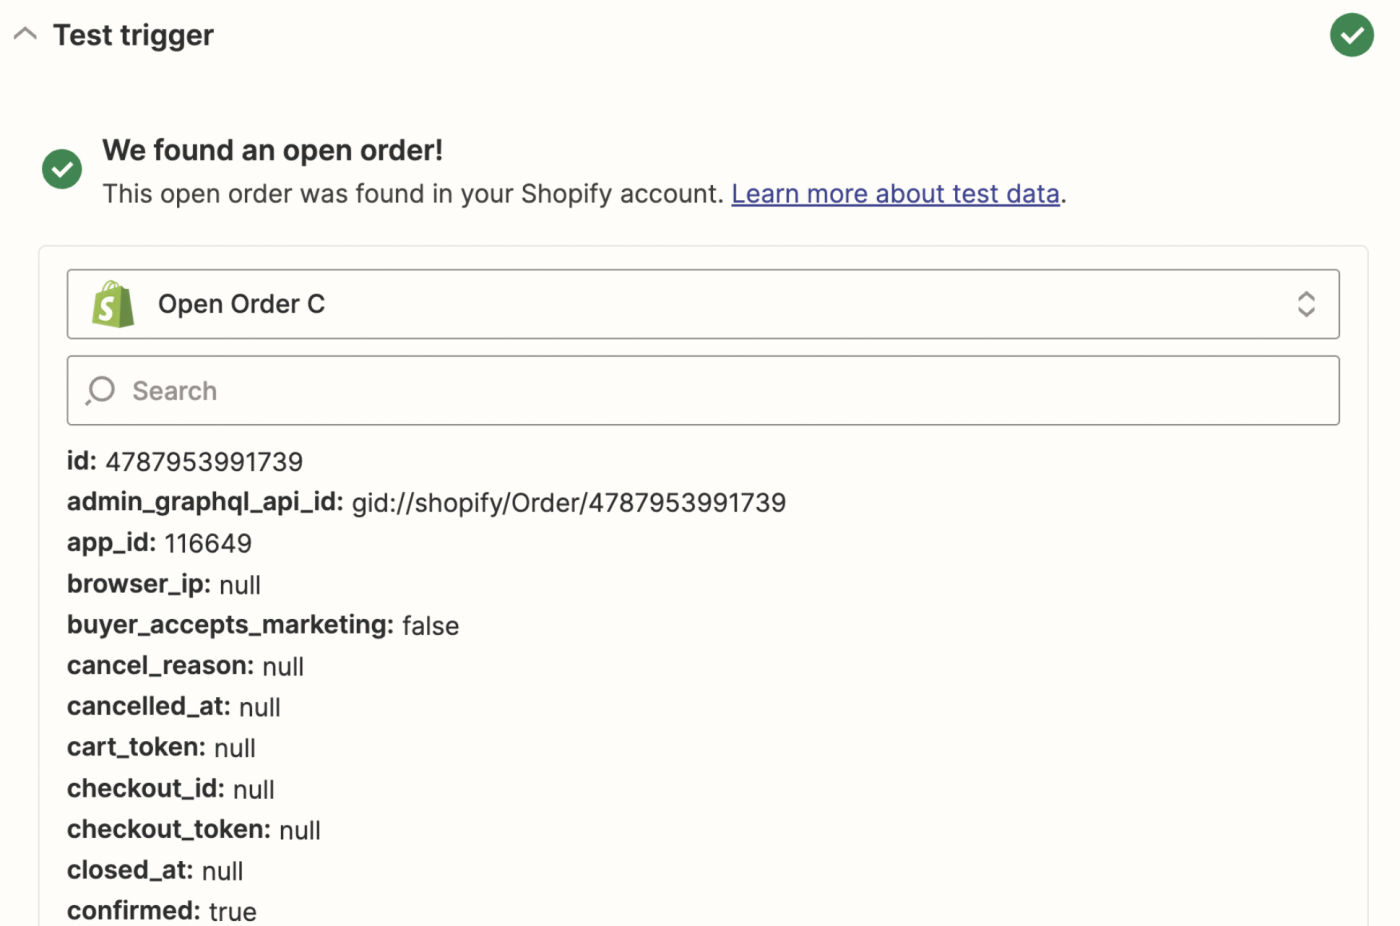
Before moving onto the next step, make sure that the sample data includes:
The name of the product that was sold
The customer's name
The customer's email address
Once you've got those, you're ready to move on.
Customize the "Find Customer" action
Using the + button in the Zap editor, add the QuickBooks Online action called "Find Customer".
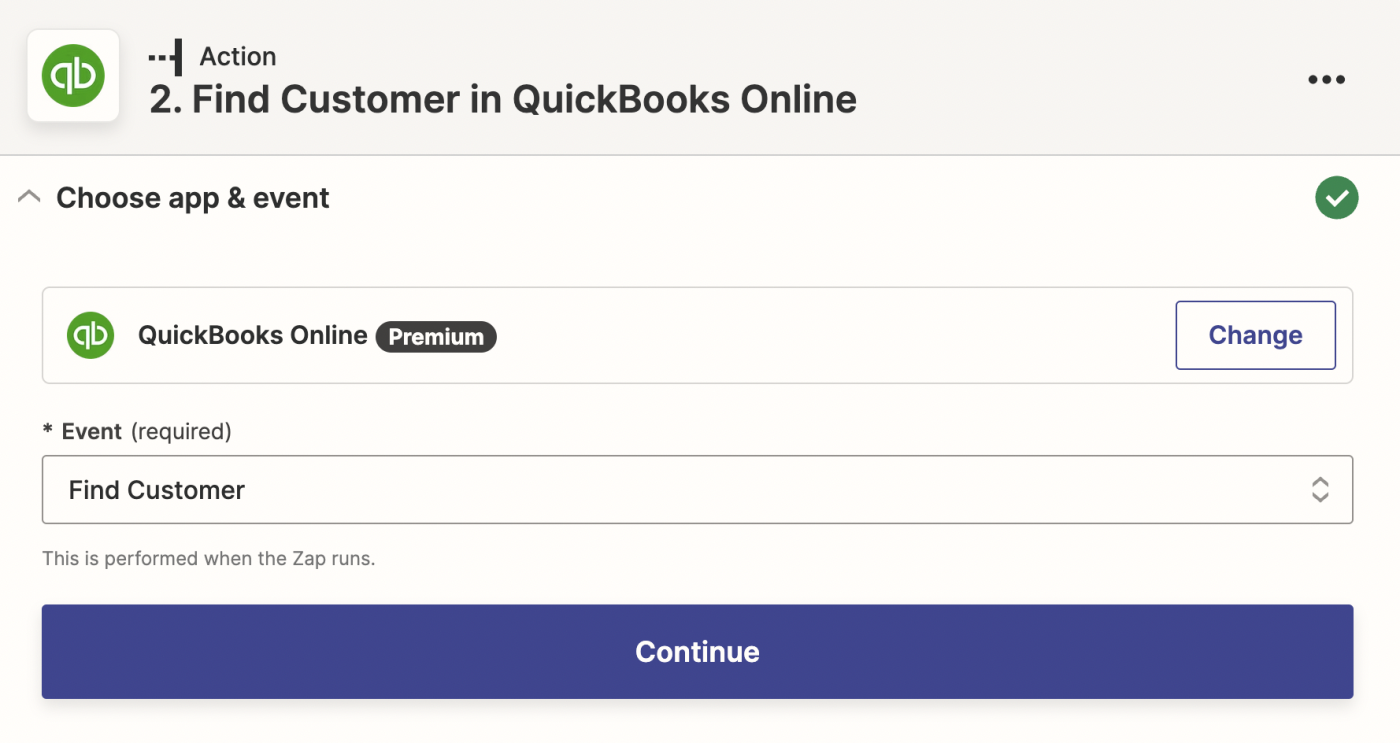
Select Continue, and you'll be prompted to connect your QuickBooks Online account. Following the prompts, log into QuickBooks Online, and select Continue again to move on to the customization step.
Because QuickBooks Online requires that all invoices are tied to a Customer, we're going to use this action to either find an existing Customer in QuickBooks Online, or create a new one.
First, select either Name or Email in the Search Field. This is the method we'll use to search for existing customers. You can pick either one, but I recommend using "Email" first, as it tends to be more unique.
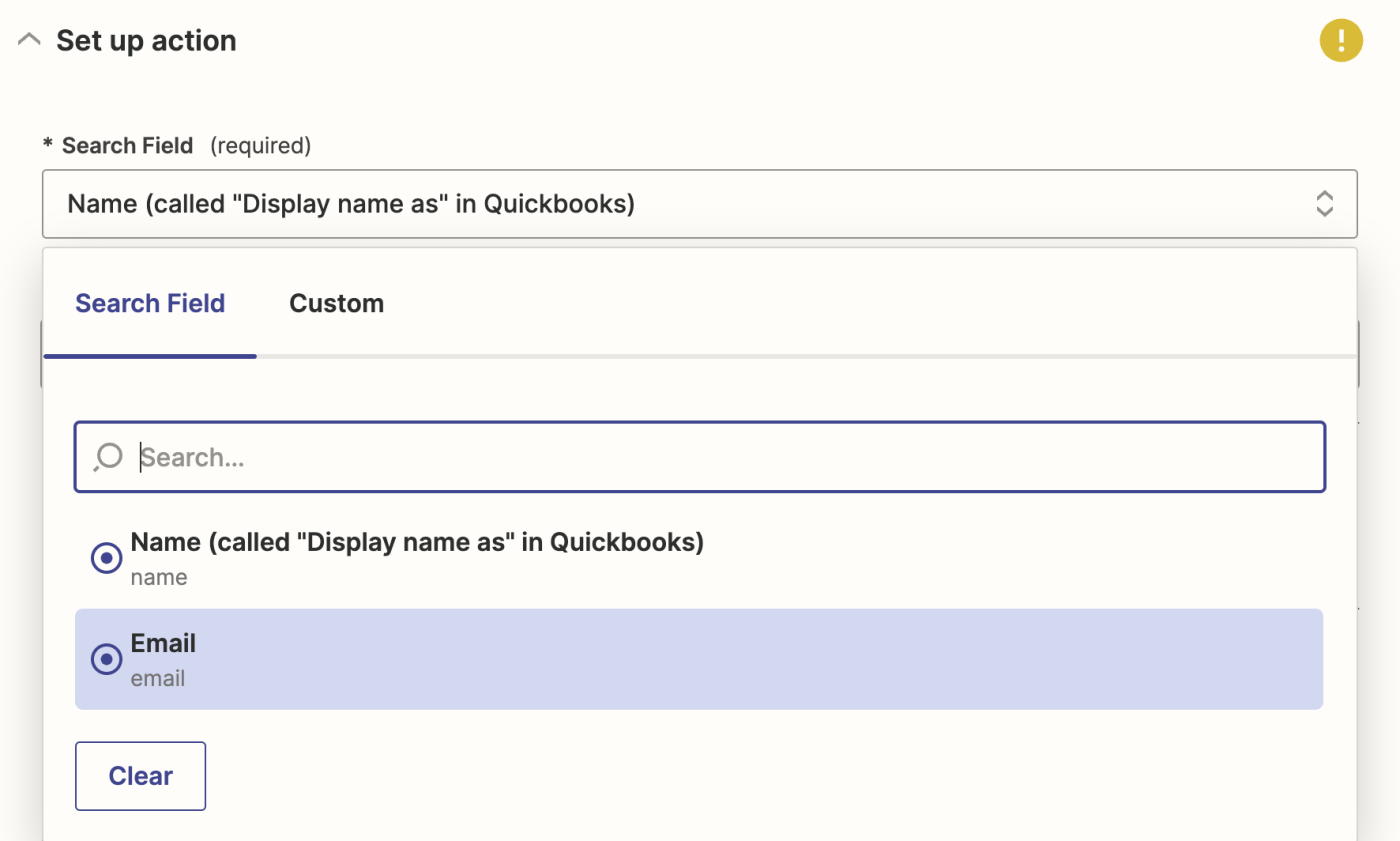
Then, map a corresponding value into the Search Value field. For this example I've picked "Email", so I'll use the customer's email address.

That way, it will search for a customer in QuickBooks that matches the email address we received from the trigger.
If it's possible that QuickBooks Online won't be able to find a match (for example, if you're selling to brand new customers), you can check the Create QuickBooks Online Customer if it doesn't exist yet option, and fill in the fields that appear. That will allow the action to create a brand new Customer record for your brand new customer.
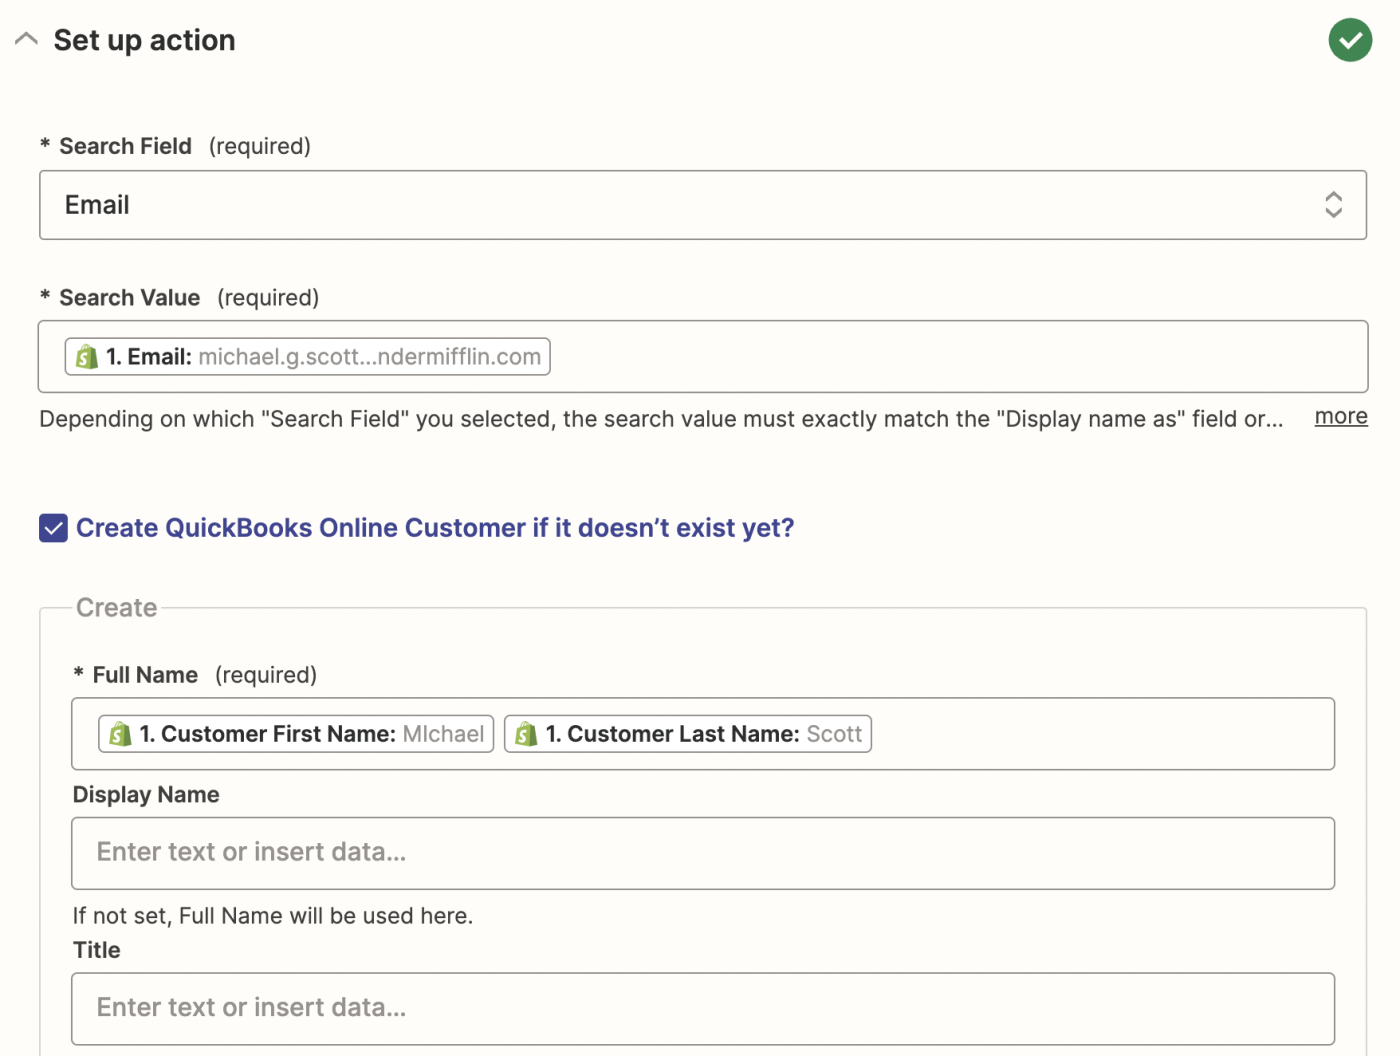
Once all of the required fields are filled in, select Continue and test the action. It should either find a customer in QuickBooks Online's records, or create a new one for you using the sample data.
Need help with more complex automation? Zapier Experts are certified consultants, freelancers, and agencies that can help you do more with automation. Visit our Experts directory to help you find the right Expert to work with.
Create an invoice with one item
It's finally time to create the invoice. Use the + button to add the QuickBooks Online "Create Invoice" action to the Zap, and select the QuickBooks account that you connected in the previous step. Select Continue and head to the Set Up Action step.
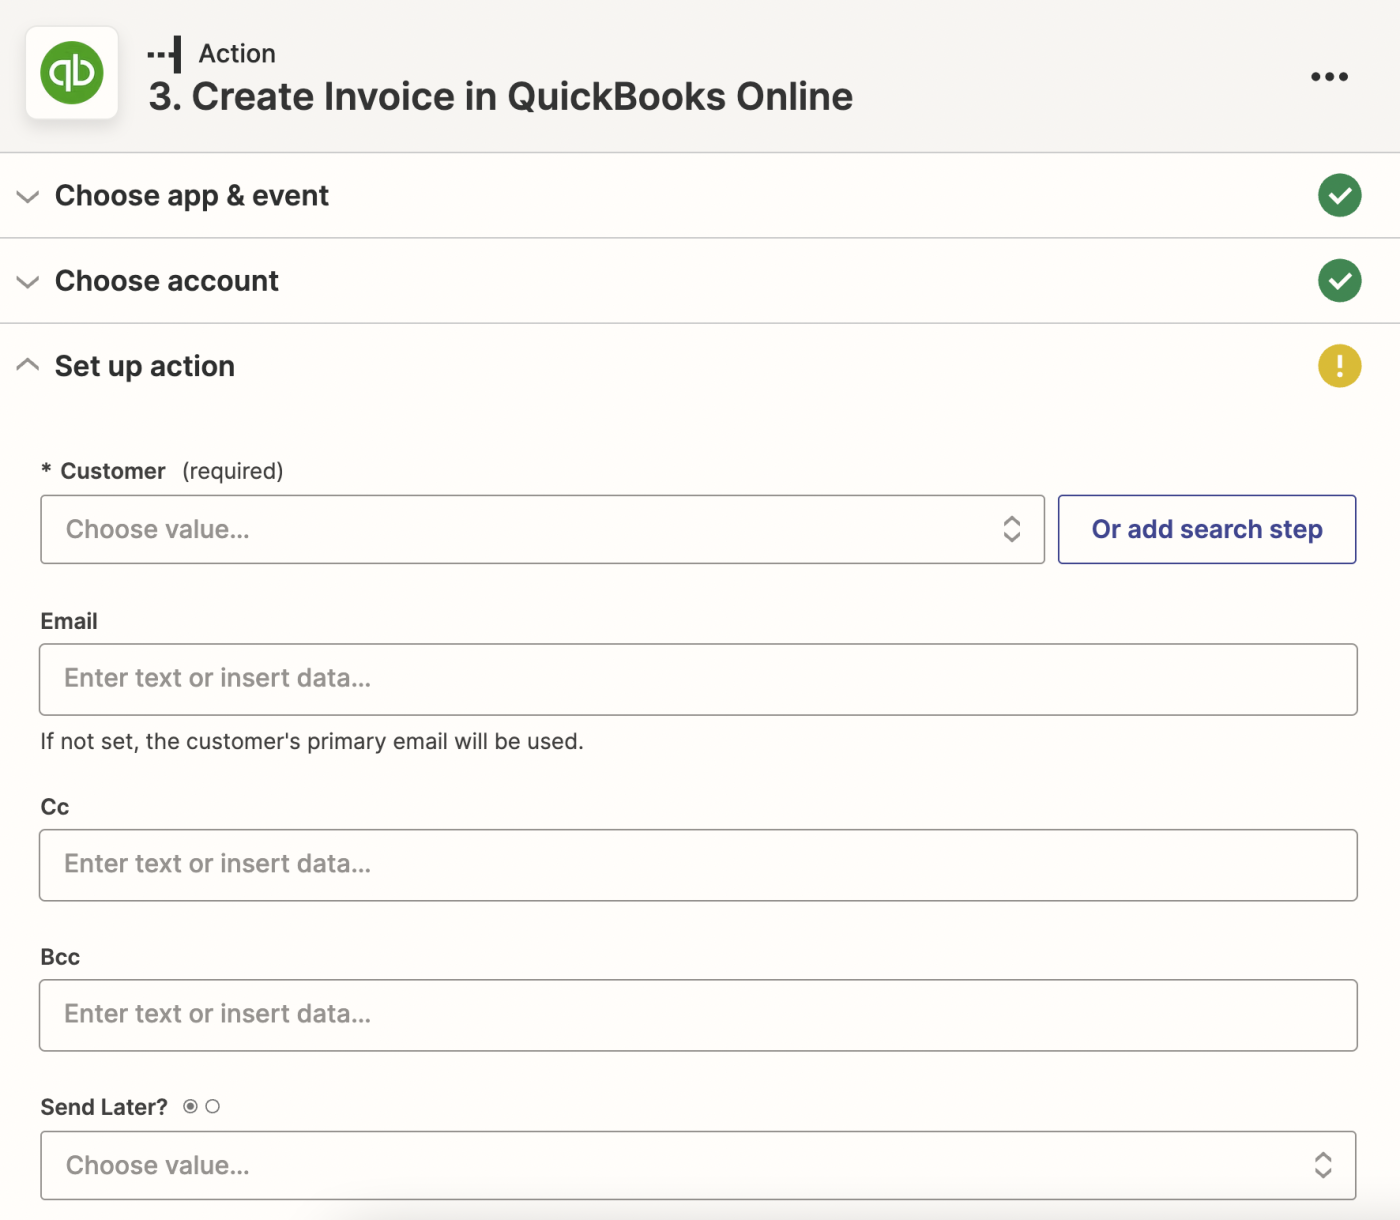
The first thing you might notice is that there are a lot of empty fields. Luckily, most of them are optional, and are used to make sure that the invoice has all of the information you want. For now, we're going to focus on the fields that are marked Required, and the fields in the section titled Line items.
The first required field is Customer, where we'll use the Custom option to select the ID of the customer we found or created in the last step:
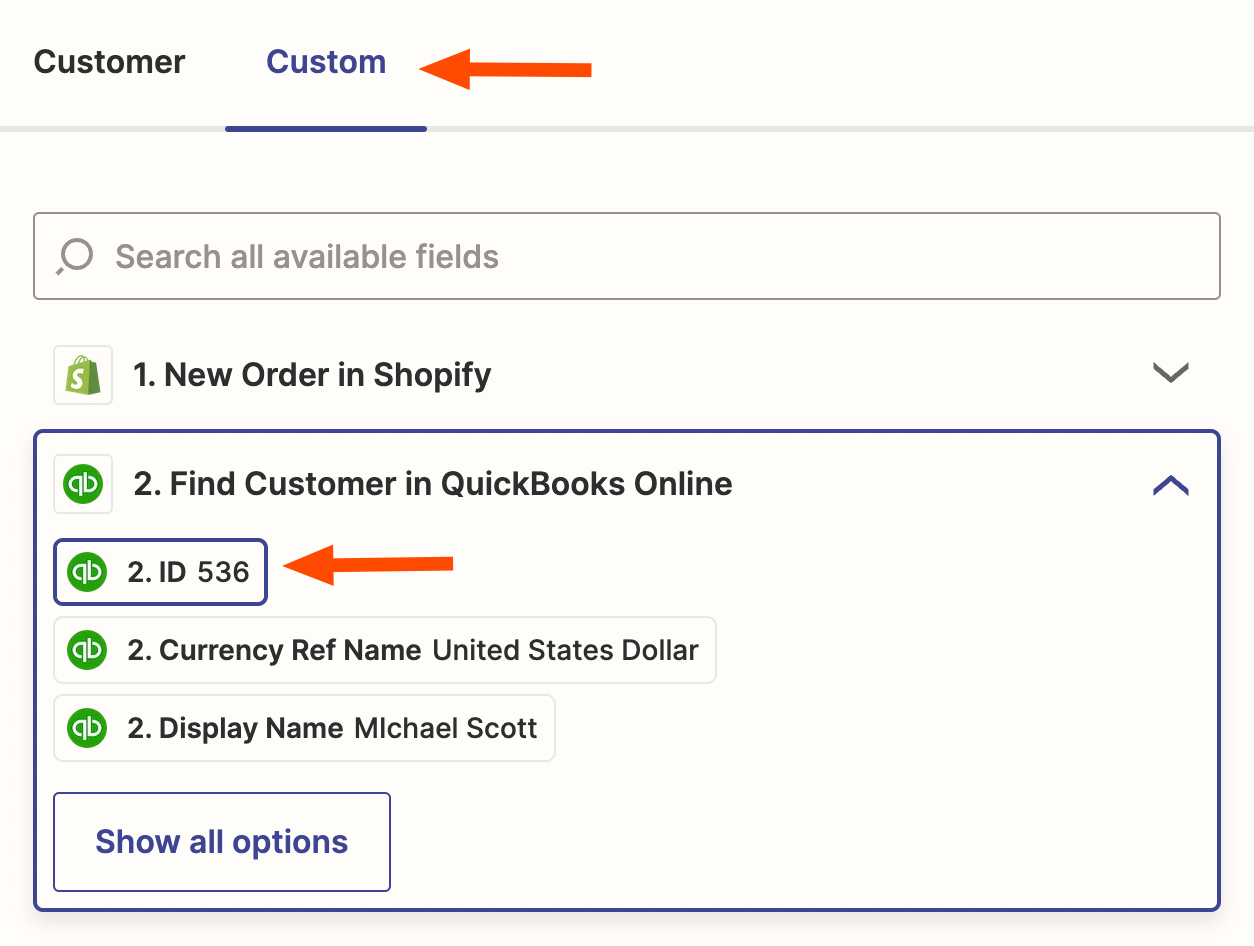
Using the Custom option lets that value update dynamically each time the Zap runs, so even though we're seeing just one customer's information right now, that will change each time the Zap is triggered.
Next, let's scroll down to the section labeled Line Items, which is where we'll define the lines that will be added to the final invoice.
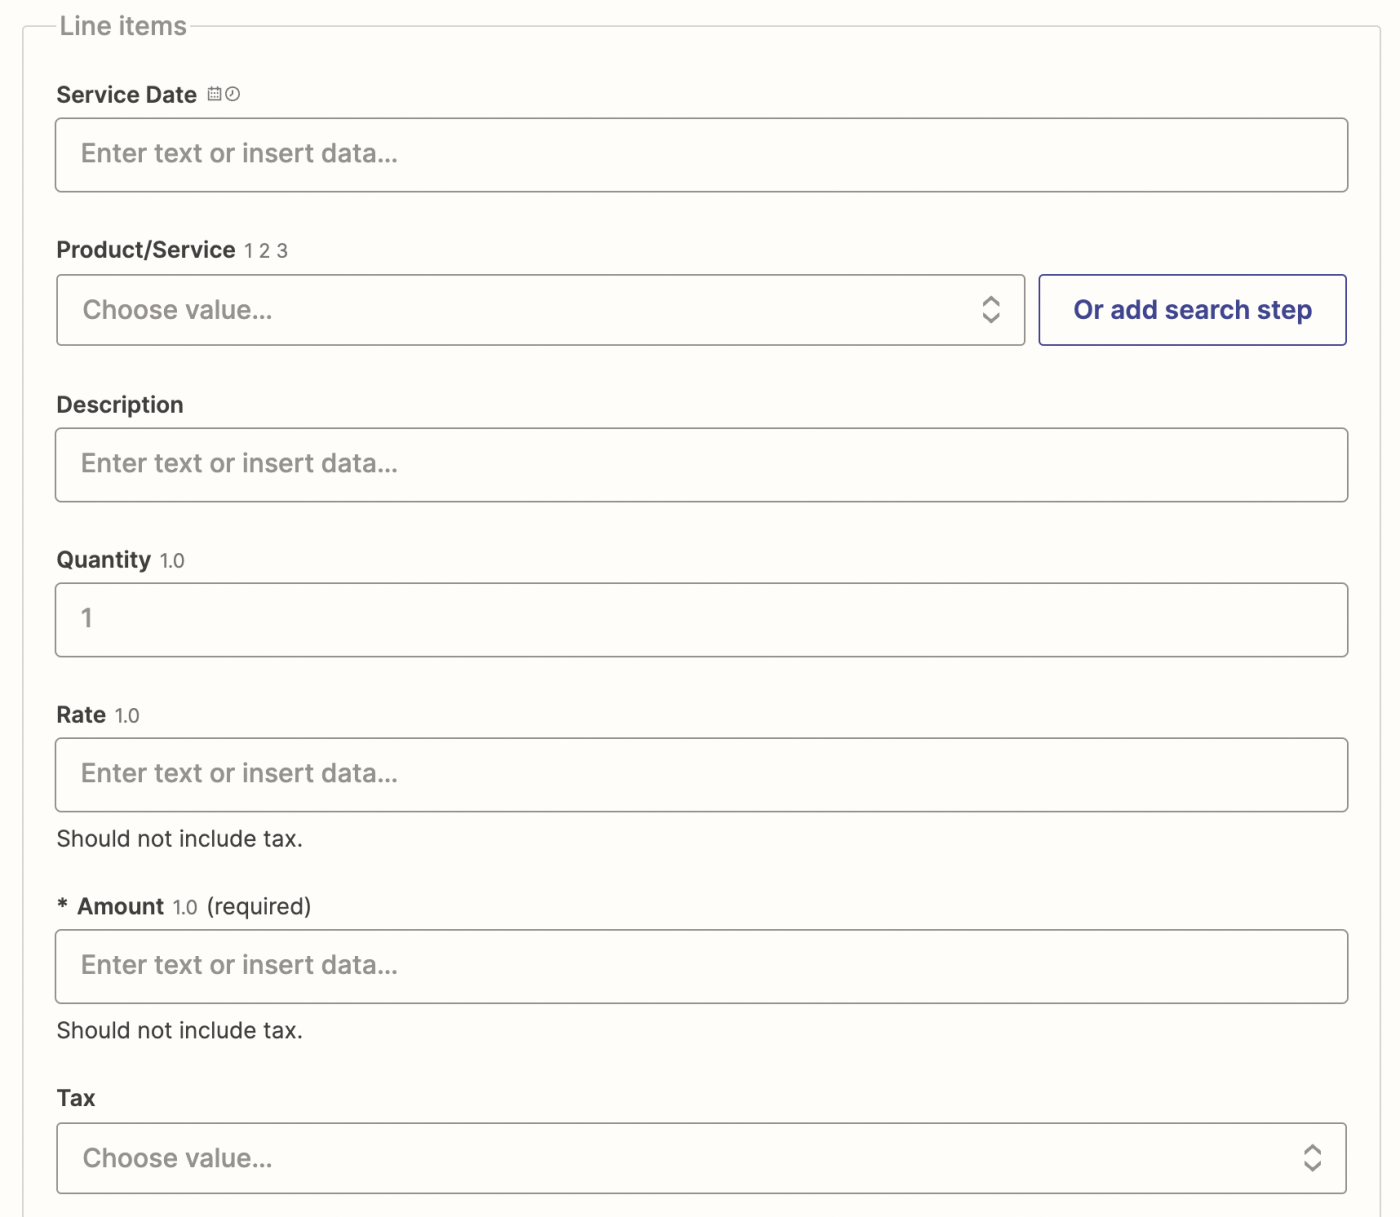
By default, this action is set up to add one line at a time, making it a great solution for single-item stores, online courses, or limited-time runs for specific products. If you're looking to create invoices that might have multiple lines, you'll need to add one more step (described later in this article).
To have the Zap add information about a single product, go to the Product/Service field, and select that product from the list that appears.
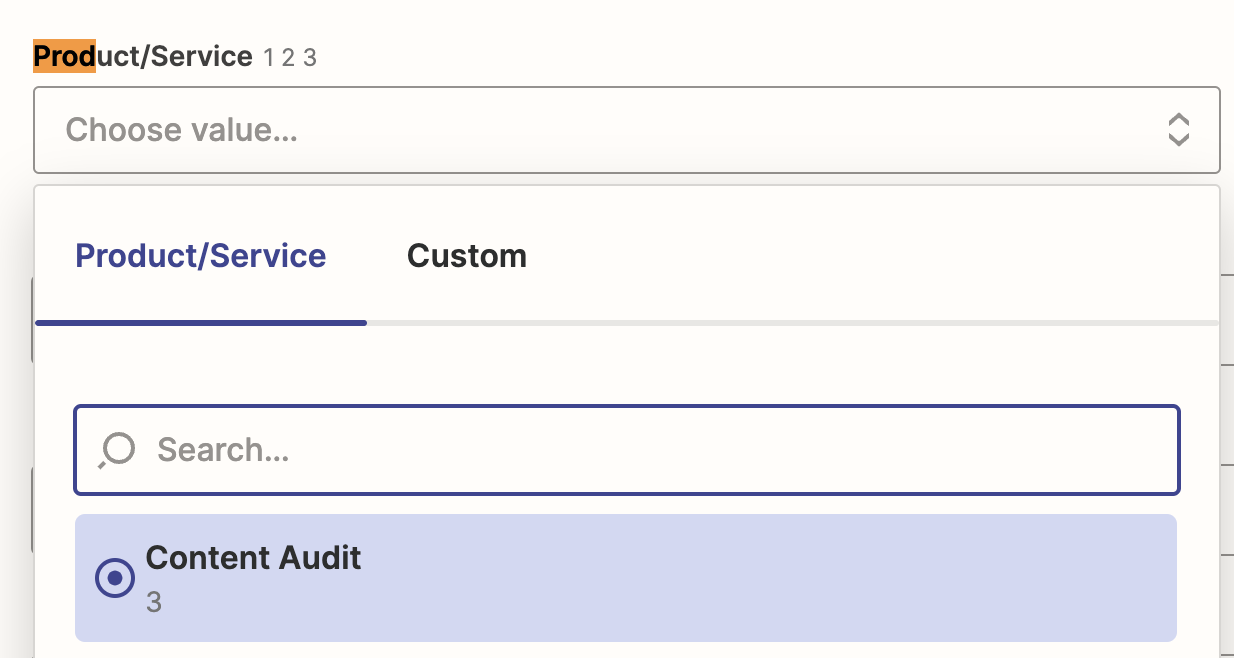
The other required field here is Amount, which we'll fill in with the price of the item. You can use a value provided by the trigger here or you can manually type that number in if you only have one option.

Note that QuickBooks Online also gives you a Tax field just below, so the Amount should not include taxes. If you charge taxes, you can select the tax type from that dropdown menu.
And that's it for required fields! We can select Continue now and test the action, and we'll get a pretty simple invoice as a result.
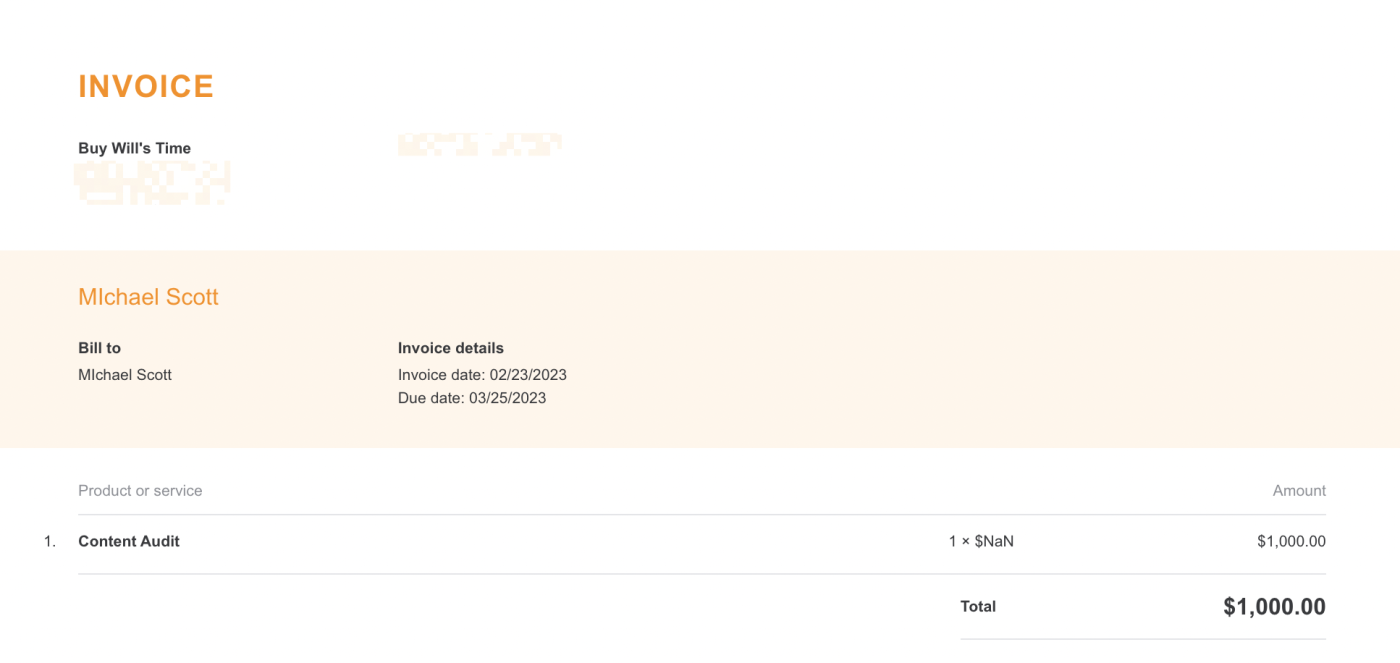
Once you've tested it once, I recommend going back through the optional fields, and filling in anything that sounds like it might be something you want. This is different for everybody, so you may want to test it a few times before finding the right mix.
Create an invoice with multiple items
If you're expecting orders with multiple items, or if your store has many different items to choose from, the above example falls a little short.
To start dynamically telling QuickBooks Online which products (plural) to use in the invoice, we'll want to add a new action for QuickBooks called "Find Product(s)". We can use the + button between the two existing actions to add it there.
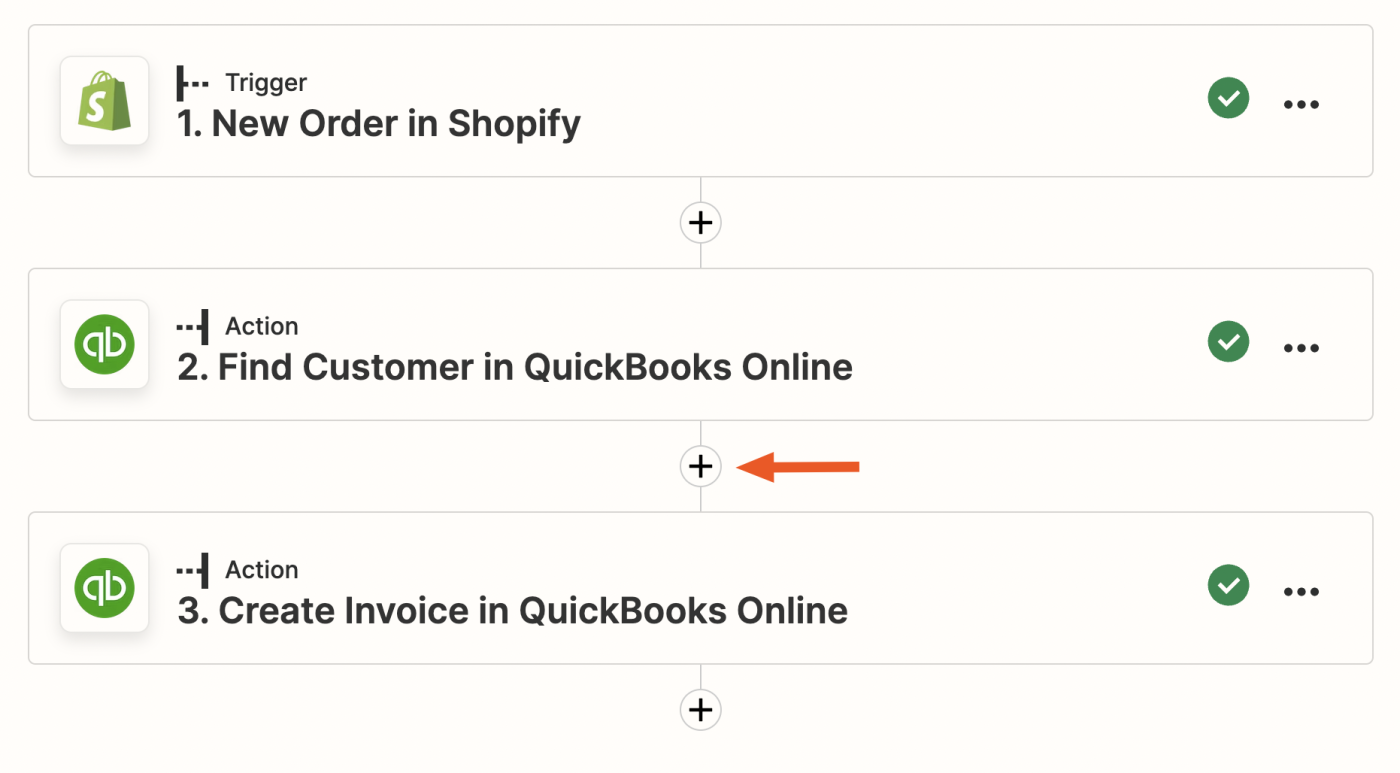
"Find Product(s)" lets us search for multiple products within QuickBooks Online's system. In return, it will tell us what information QuickBooks Online has on file for each of the products sold, including their unique ID numbers, which are the secret ingredient to creating invoices with multiple line-items.
When you add "Find Product(s)" to the Zap, you'll be prompted to select your QuickBooks Online account again, and then enter the Product Name that you want to search for. In that field, select the product names provided by your Zap's trigger.
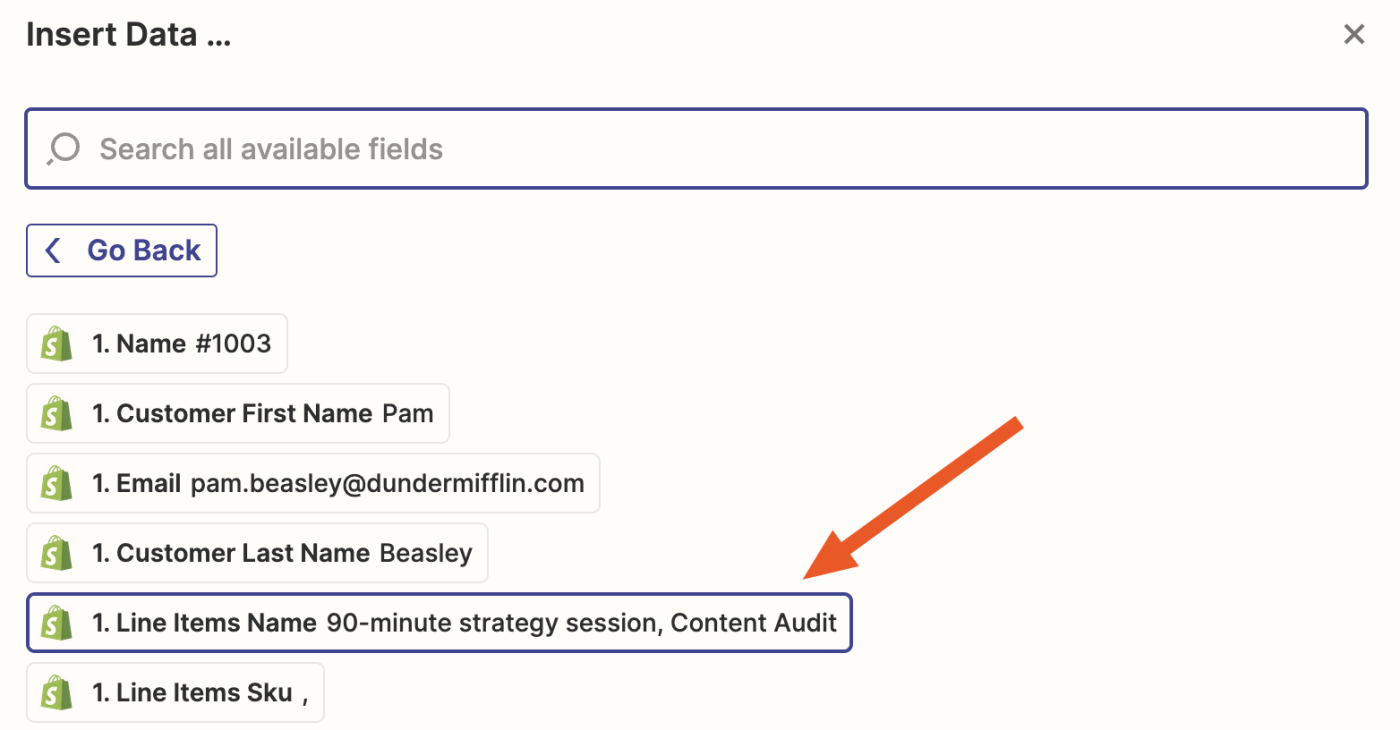
The search will then find the corresponding product in QuickBooks Online for each of the items provided by the trigger. Because the action is searching specifically for the product name, we highly recommend making sure that your products have the same names across all of your apps.
Once you have tested the "Find Product(s)" action, head back to "Create Invoice" and go to the "Product/Service" field. Instead of selecting just one item, now we're going to use the Custom option instead, and pick the Products ID provided by that new "Find Product(s)" action.
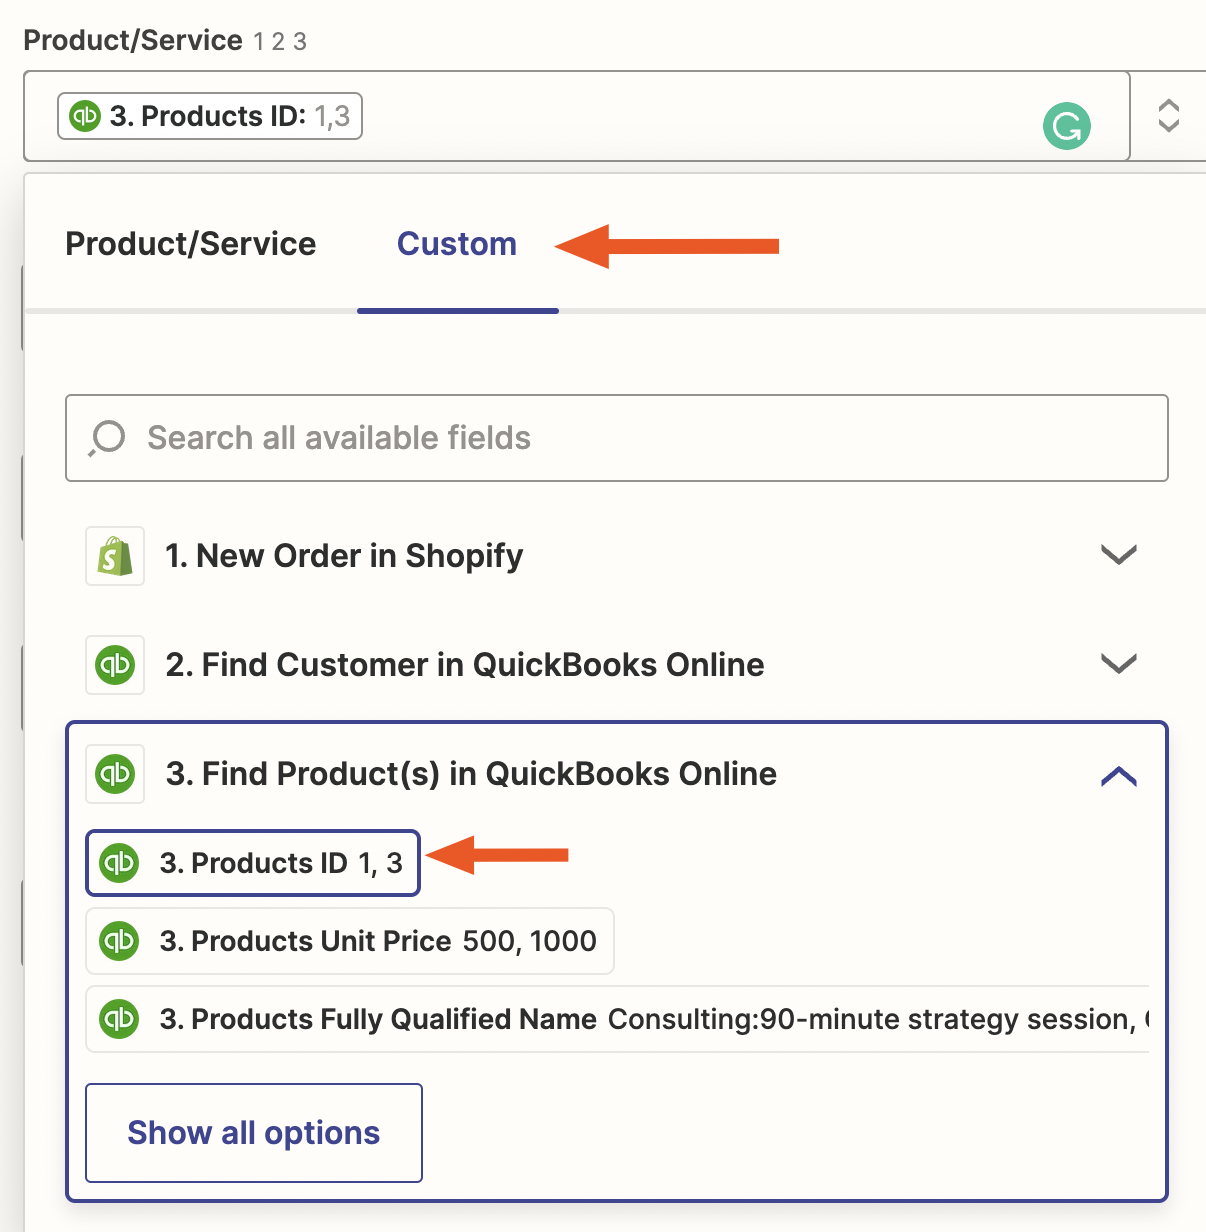
The "Custom" option lets you dynamically map values where you'd otherwise have to select just one. Learn more about how to use it effectively.
We use the ID number there, instead of the product's name, so that QuickBooks Online can accurately determine which product it needs to add to the invoice. Now that we have that set up, QuickBooks Online can add a new line for each of the products found by "Find Product(s)".
At this point, you can also fill in the rest of the Line Items section with other information you have about what was sold, such as quantities, discounts, or descriptions. Here's what that section might look like in the end:
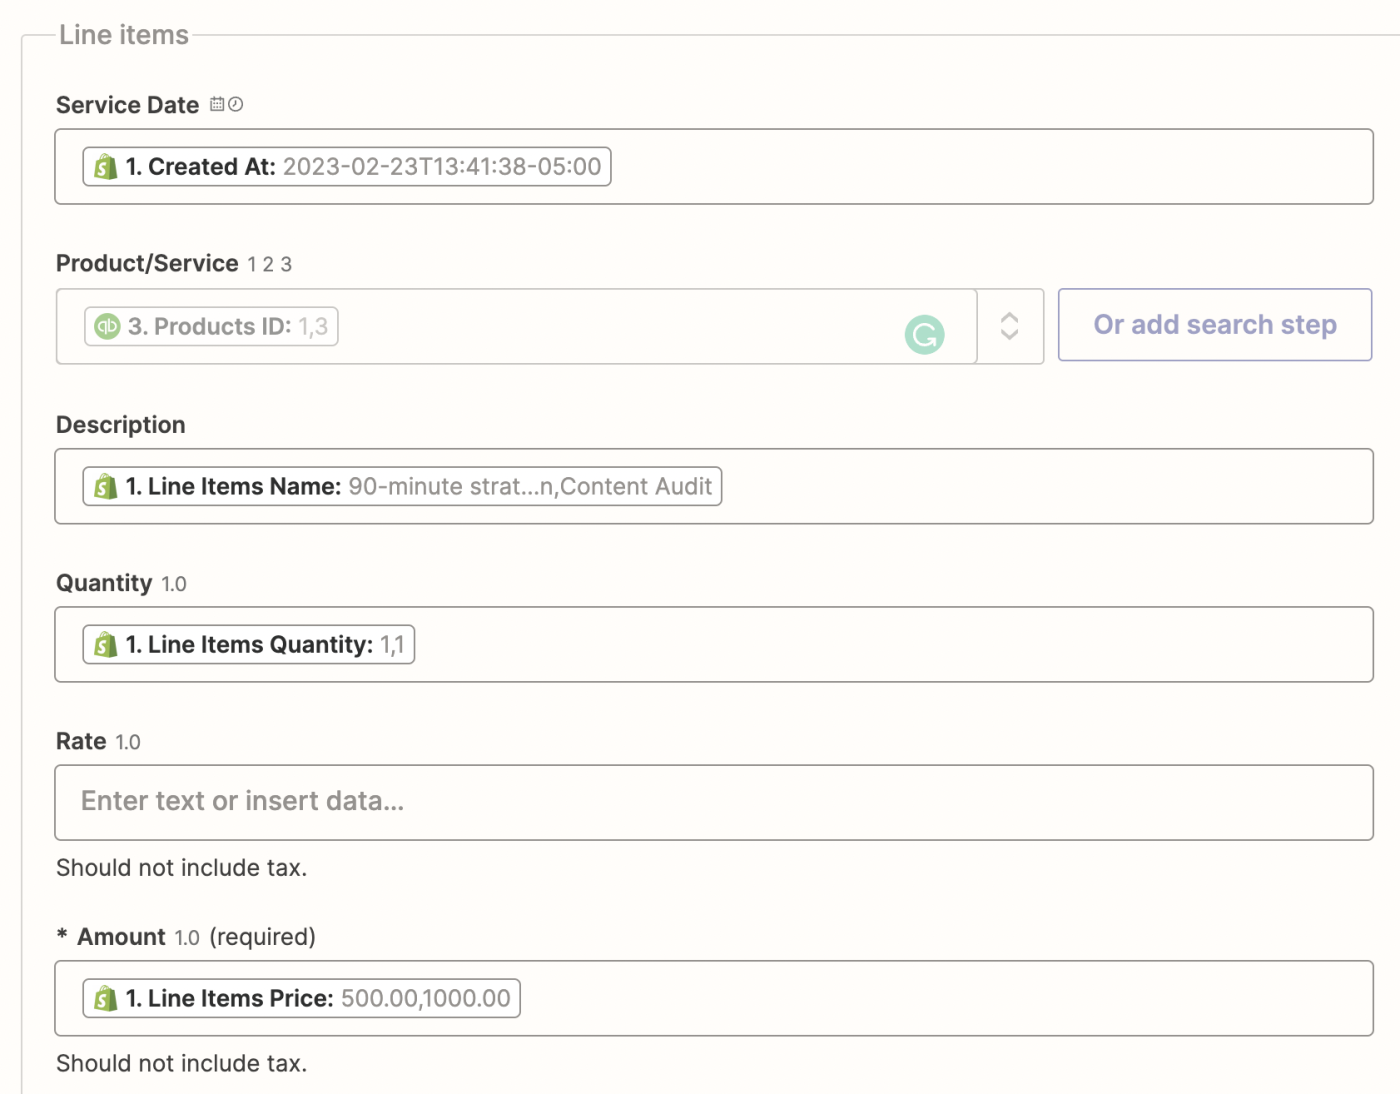
When we test the action again, the invoice will now have multiple lines, matching the details of the original order.
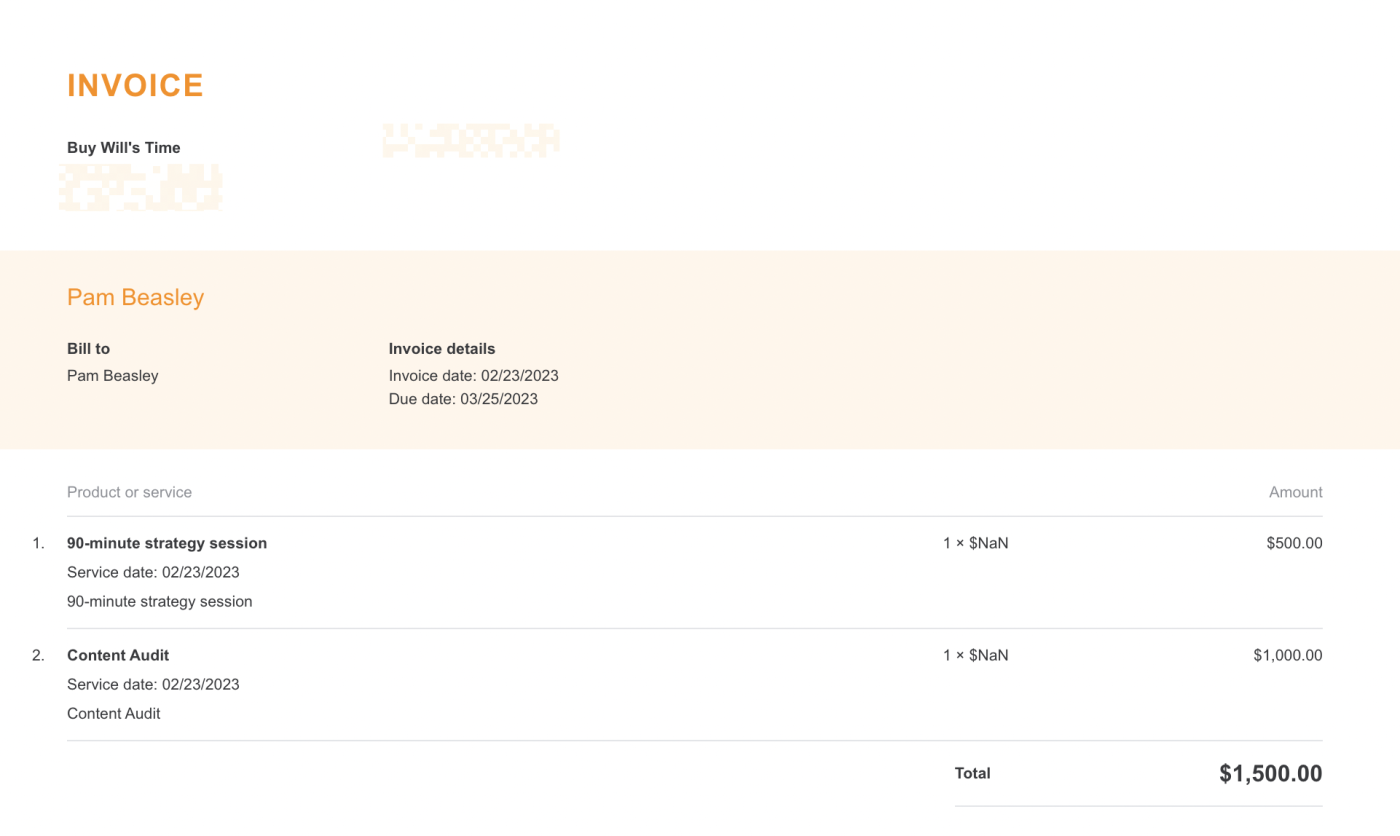
Now you have a Zap that automatically creates complex invoices, without you having to lift a finger!
Start automating your invoices
Ready to try it for yourself? Get a head start by using one of our Zap templates, which come with some fields pre-selected, then follow the steps above to customize it for your business.
Create invoices for QuickBooks Online customers from new Shopify orders
Create invoices in Quickbooks when deals enter a new stage in Zendesk Sell
Create QuickBooks Online invoices from new Stripe payments
This article was originally published in January 2021. It was most recently updated in February 2022 by Will Harris to add new screenshots.
